
|
I know those of you who is living in NZ must be thinking "Is she crazy? making sorbet in this freezing winter?" Well, have you noticed that its getting lighter in the morning and we also get more daylight when we get home after work, so we are just gearing up for warmer days to come :) The weather has not been too bad lately with the sun shining for the past couple of days, and sometimes the urge to have a refreshing dessert strike us no matter what season it is...am i right? :P But so that you know, there is only 5 more weeks until daylight savings starts, yay! And yes, we are counting down....bring on spring and then summer! So we can have more fresh fruit sorbet like this more often :) 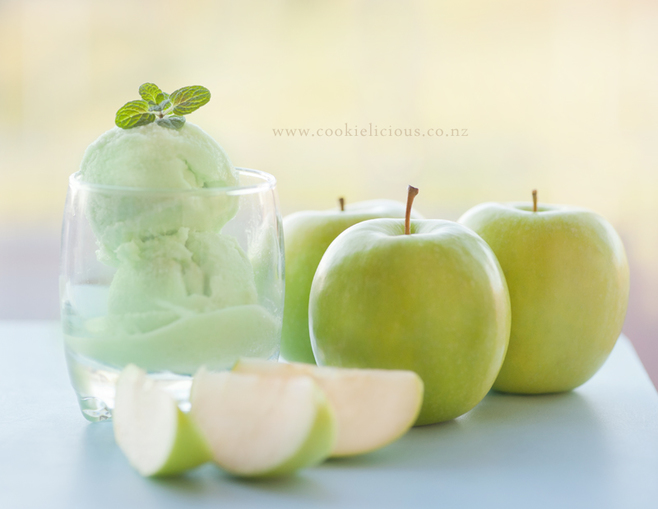 so anyway, this is really easy to make and doesn't take long at all to whip-up, as long as you have a few green apples in your pantry you'll be good to go... To make this yummy sorbet, all you need is a few very simple ingredients:
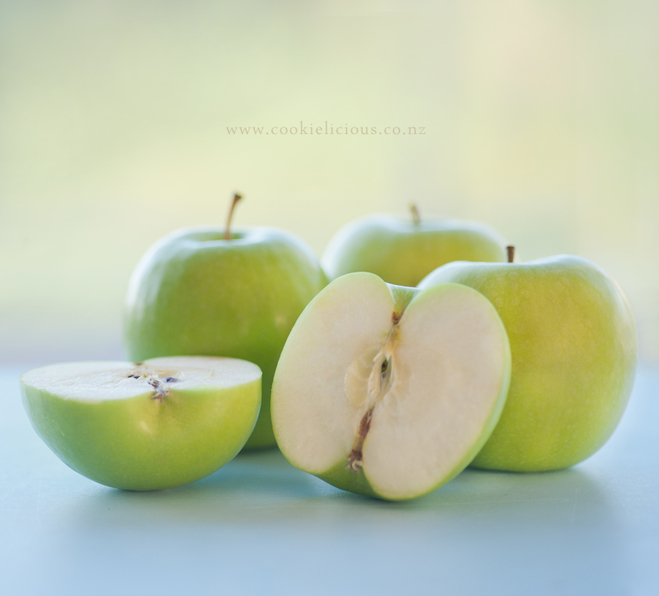 So we cut, core and coarsely slice the apples. We keep the skin on as we like the flavour of the skin but if you dont like it you can peel off the skin and just use the flesh of the apple. Then place them into a saucepan along with the lemon juice, sugar and apple juice. Boil them until they are soft. Then remove from heat and let it cool. Next step is to place the mixture into a blender or any food processor and puree the green apple mixture until its smooth. Strain the mixture (we just use our usual strainer that we use to sift flour) and then transfer to a small baking dish or any container that is freezer safe. 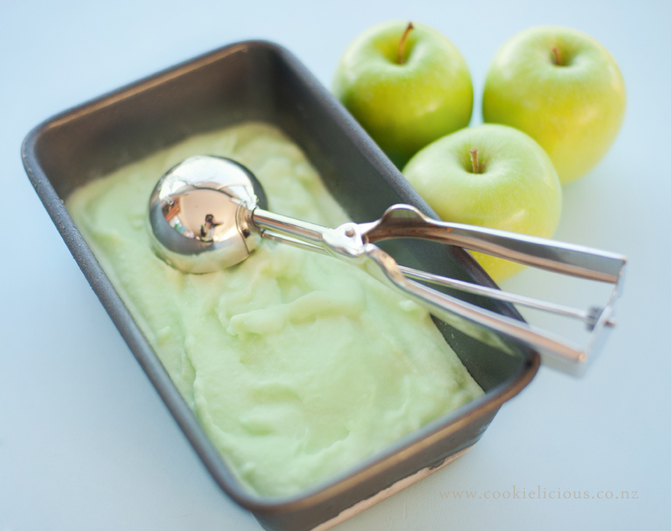 Oh yeah, we also mix in a teeny tiny drop of green food colouring and mix well. Place the sorbet mixture into the freezer. When the mixture is completely frozen take it out and remove from the container and place it into the blender and puree again. Return the sorbet back into the freezer until you are ready to serve it. That's it, all done without even using an ice cream maker :) 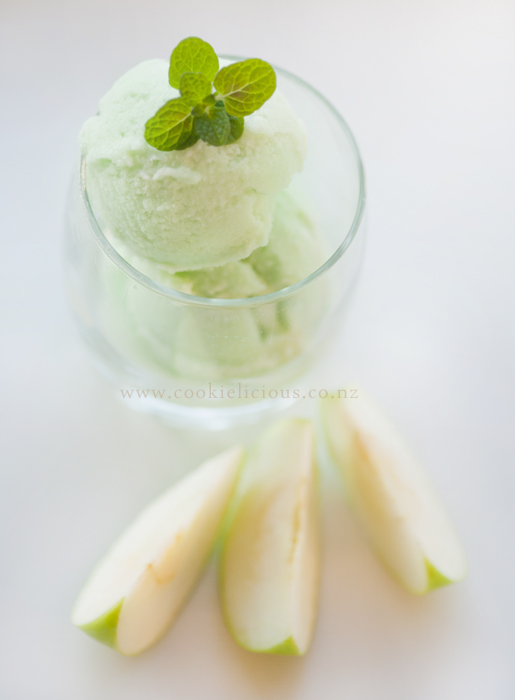 These are a sure favorite in our house, we will be making these again specially seeing that summer is coming, we will be trying out all sort of different fruit flavour combination :) This little guy has given me his seal of approval, he said "I really love it mummy!" 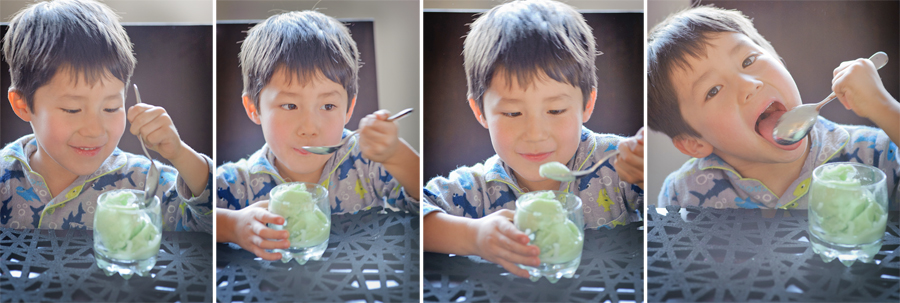  There you have it, a sure winner in our household! Rest assured that will be making more sorbet in all different kind of flavours in our house, so bring on summer! Hope you are having a great day :) 
0 Comments
One of my hubby's fave treat is a friand...its one of those fancy lil french cake that is really yummy, moist and scrumptious! The main ingredients are almond meal, egg whites, butter, and icing sugar. This weekend we decided to make them seeing that we have all the ingredient handy in the pantry. If you would like to try making them, we have put the recipe in our recipe sections HERE. Today I had the pleasure of having of our friand with a chrysanthemum tea, whereas hubby decided coffee is the best way to enjoy them :) 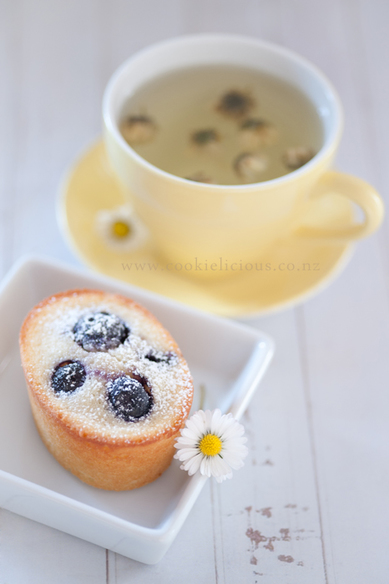 There is really not much to it, the key is to make sure you whisk the egg whites until they form a soft peak and then mix it with the dry ingredients. If you don't have any lemon then you can just leave that ingredient out and make just a blueberry friand, and if you don't have any blueberry and just want to make lemon friand you can do the same, they will still come our delicious either way :) Here they are fresh out of the oven. 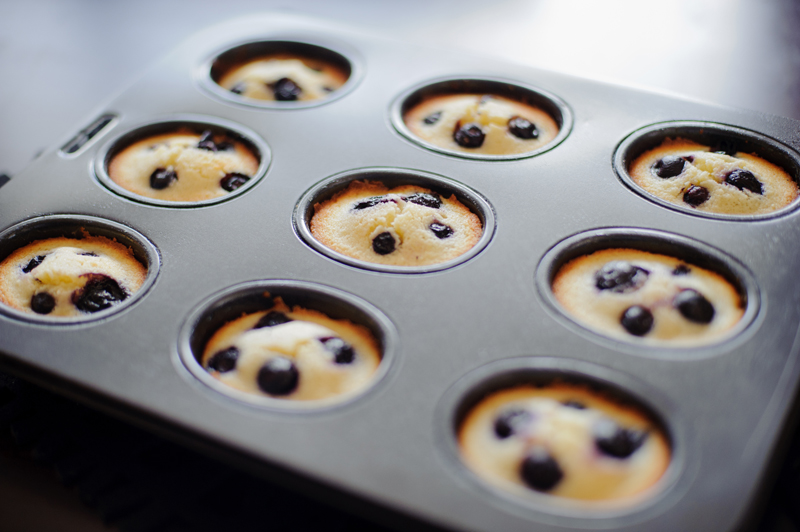 Make sure you apply a cake release batter generously around the pan, this will ensure they will come out easily after they have rested and cool. Ours came out perfectly without any effort at all :) 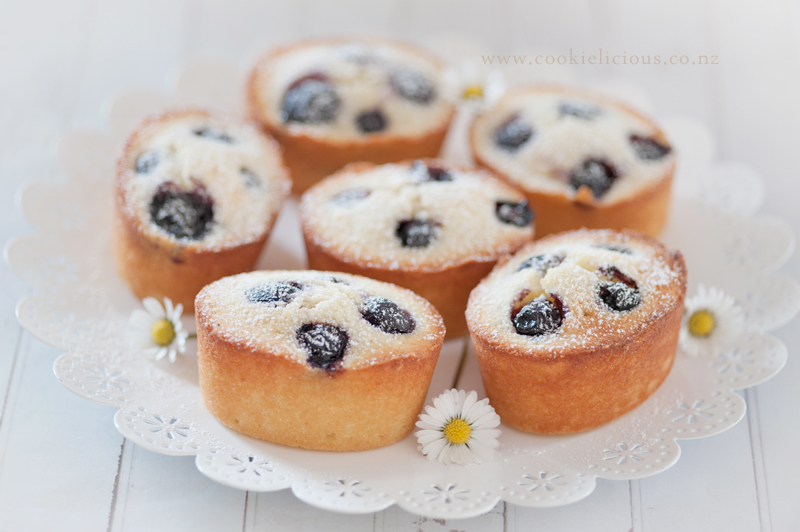 You can serve them on their own or they are a perfect compliment to your tea or coffee. 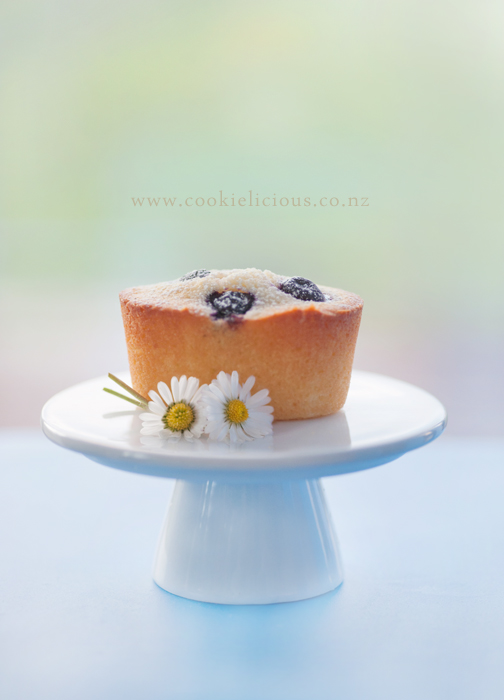 Here is my lovely assistant, showing off the finishing result :P 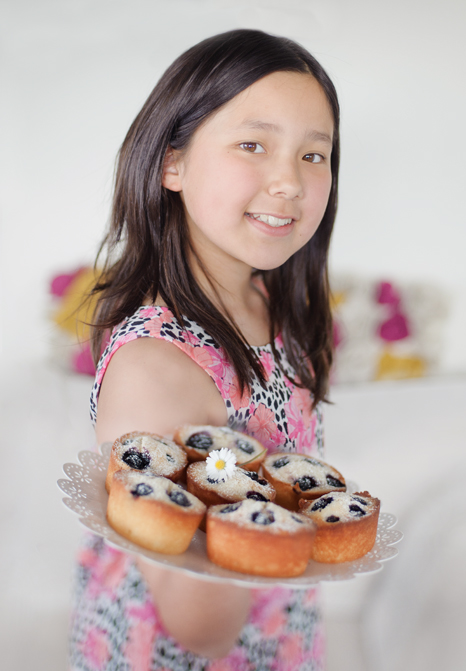 A close-up of the delicious french cake :)  Hope everyone is having a restful weekend!  For the past few weeks we have planned to make a special birthday cake to celebrate my mother in law and father in law's birthday, their birthday is only a couple of days apart from each other so we were planning to make a cake to celebrate it. But of course we didn't count on the fact that I got sick the week of their birthday and then my son got sick as well after me. So the celebration got a little bit delayed...but the most important thing is that we get to celebrate anyway :) We had planned to do an ombre rosette cake and here is our finished cake 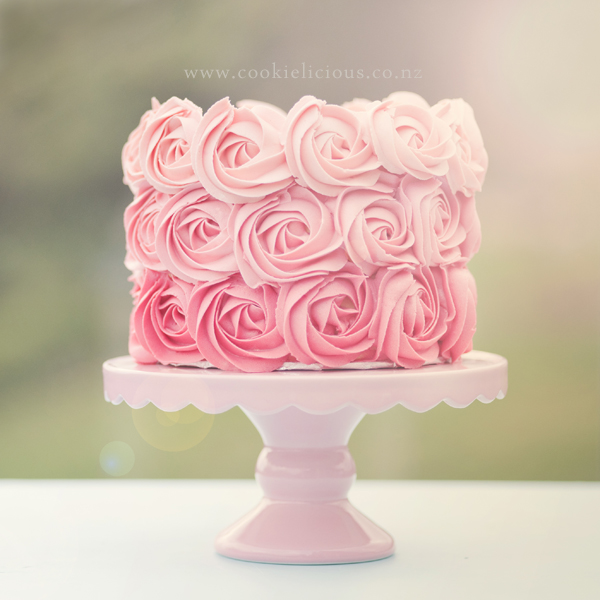 And we'll give you the step by step process just in case you want to try and make it too. Its not too hard to make, just slightly time consuming :) You can use any basic vanilla cake recipe, the first thing we do is divide the cake batter into four bowls and each dyed (coloured by using a gel food colouring) into a progressively darker colour. We wanted a pink rosette for the cake so we used Wilton Rose Pink gel colour. 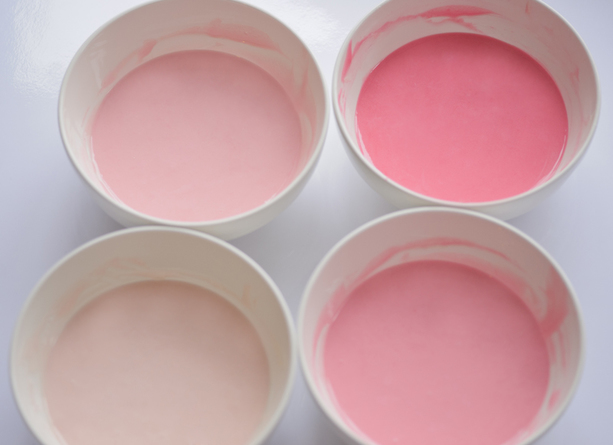 Put each batter into a 6" cake pan and bake according to the instruction from the recipe you use. We baked ours for approximately 35-40mins (until the toothpick inserted comes out clean when you check the cake). We also use the 'cake strip method' to make sure the finished cake is flat. This trick is used to prevent a 'dome' on top of the cake so that you don't have to level the cake after baking. I put the link there in case you want to check out the trick ;-) Here is the cakes in each colours, perfectly flat and ready to be layered up! 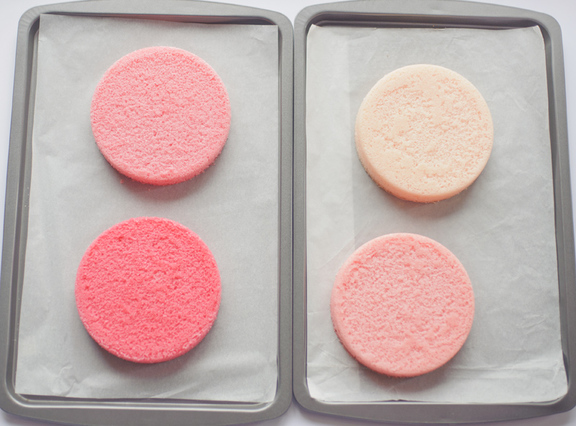 Okay so the next thing to do is to stack up each layer. We start with the darkest pink and we used a lemon curd filling to put in between each layer. We also put a bit of the buttercream icing on the edge of the cake to prevent the filling to bleed out into the buttercream frosting. 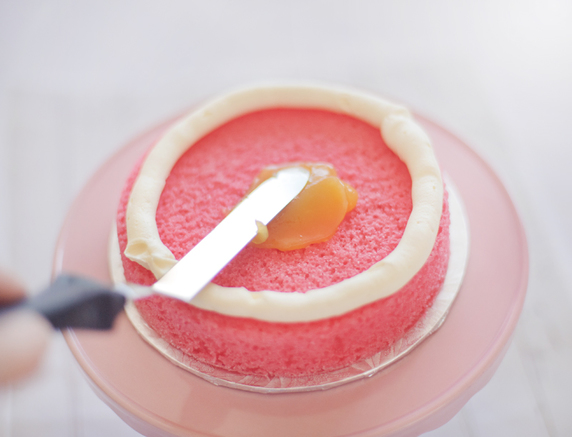 Then put the next layer on top and keep stacking each cake layer from the darkest to the lightest colour 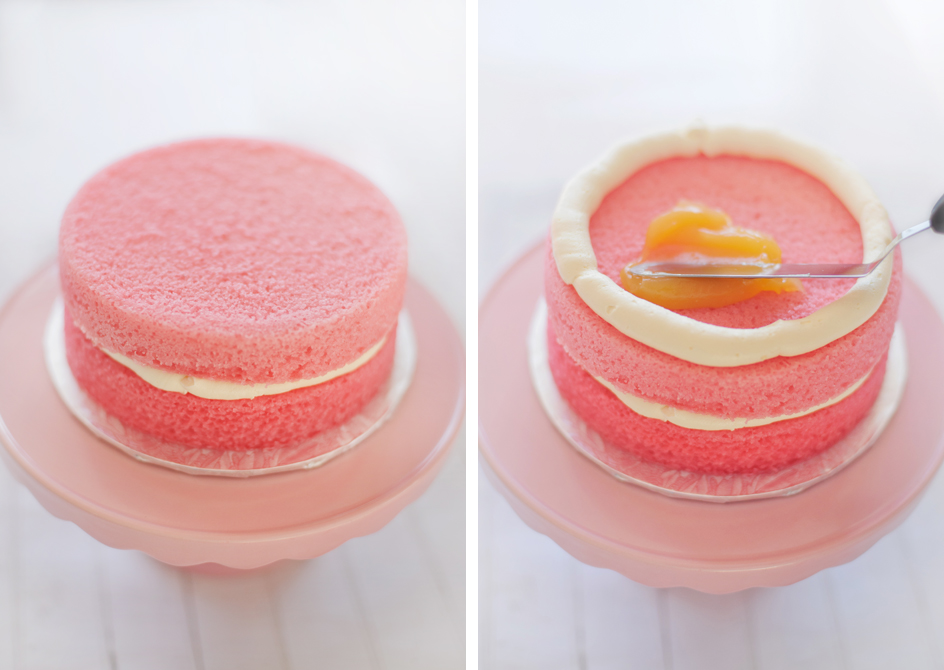 When you have finished stacking them up, it should look like this :) 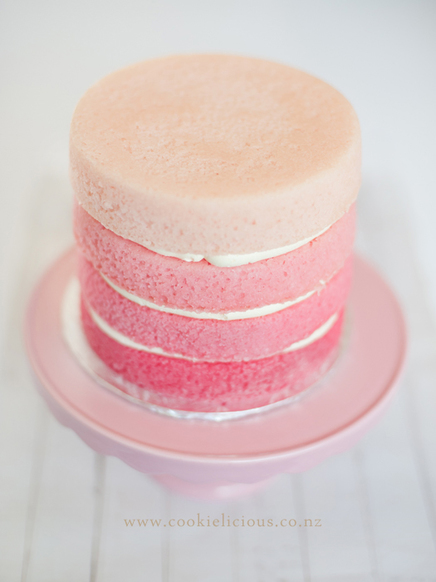 Then we cover the cake with buttercream icing, we just did a crumb coating because we will be putting a lot of rosette all around it so we don't want the coating to be too thick. 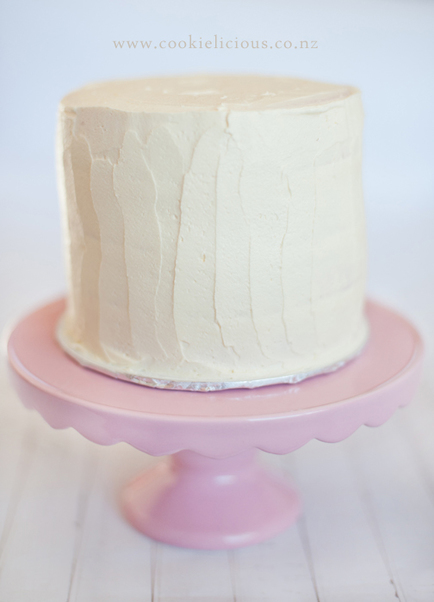 Then the fun part begins! It is now time to cover the cake with buttercream roses. We used the 1M piping tips to create the roses. 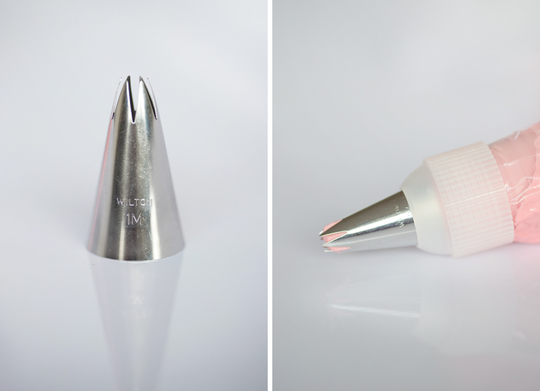 Start at the bottom of the cake with the darkest pink colour. The same process is used when preparing the icing, do the darkest colour first and progressively lighten it by adding more buttercream. Remember when decorating that the colours will intensify after a few hours. So if its not the perfect shade when you mix it - walk away and leave it alone for a few hours and let it meld :) Oh and just to be on a safe side i woulds recommend practicing the rose swirl on baking paper before doing the roses on the cake itself. 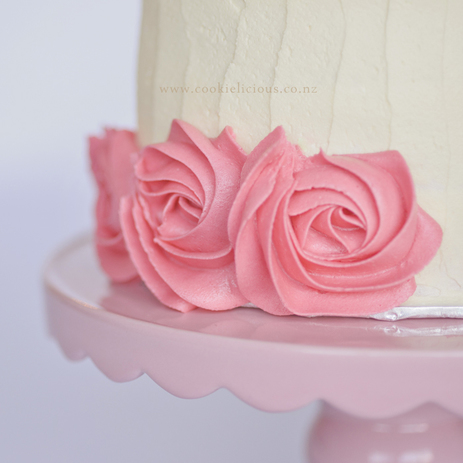 As you get more confident on making the rosette you can continue along the bottom of the cake until it covers the whole bottom circle.  Continue to do the middle and top layer of rosette with a lighter pink colour icing. 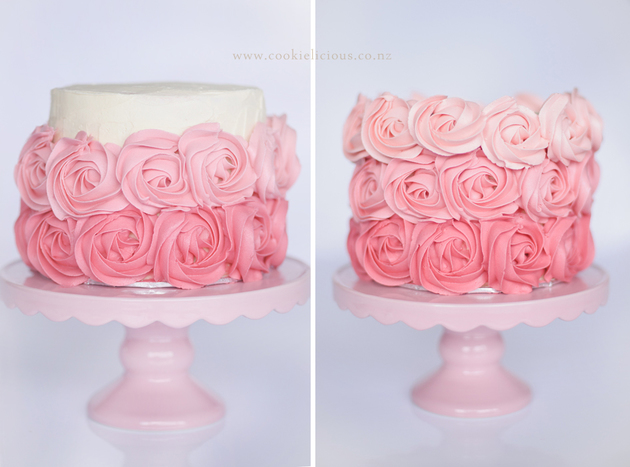 When you have finished piping the rosette all around sides then start covering the top of the cake with the lightest pink colour. 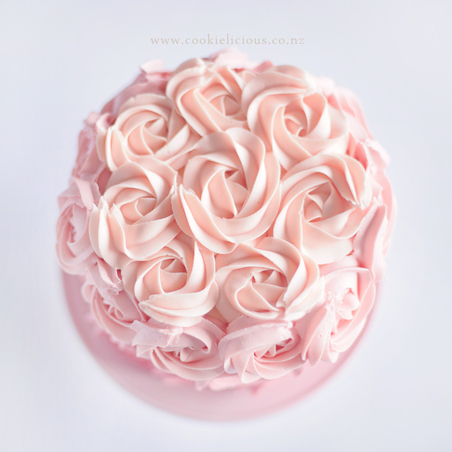 And that's it, you're done! Taaadaaa! :) 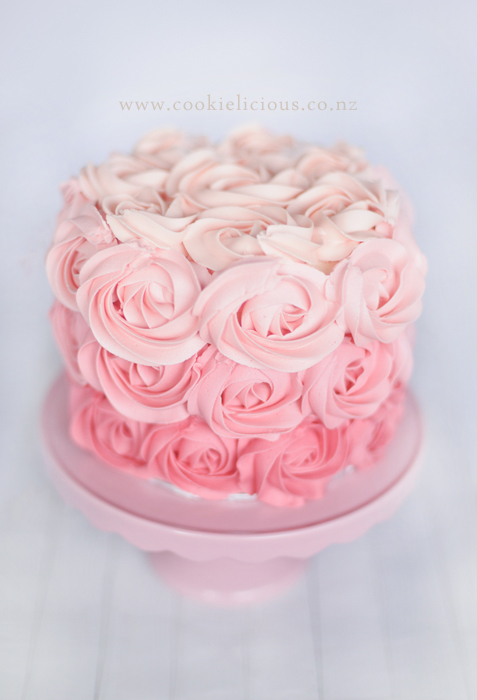 Here is the picture of the cake being cut by two very happy recipients, my mother & father in laws :) 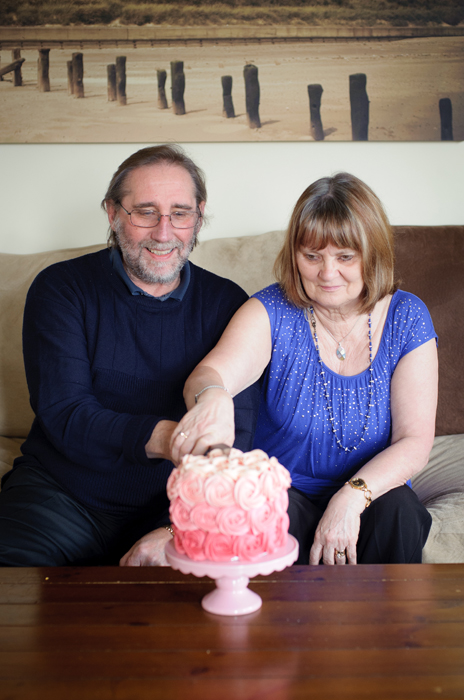 And this is what the inside of the cake looks like after being cut :) 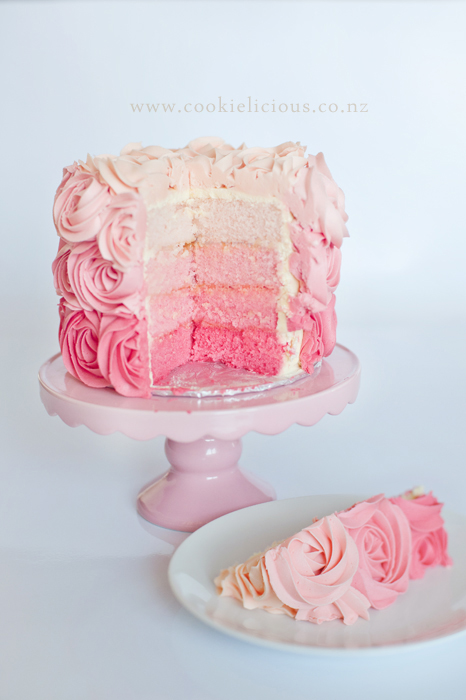 Hope everyone is having a restful weekend, specially those who had been unwell like our family :)  |
Archives
December 2016
Categories |
 RSS Feed