
|
A special request from my dear cousin as she told me that my lovely niece loves mermaids :) So we set out to create a special 'under the sea mermaid' set for her. This is what we came up with... 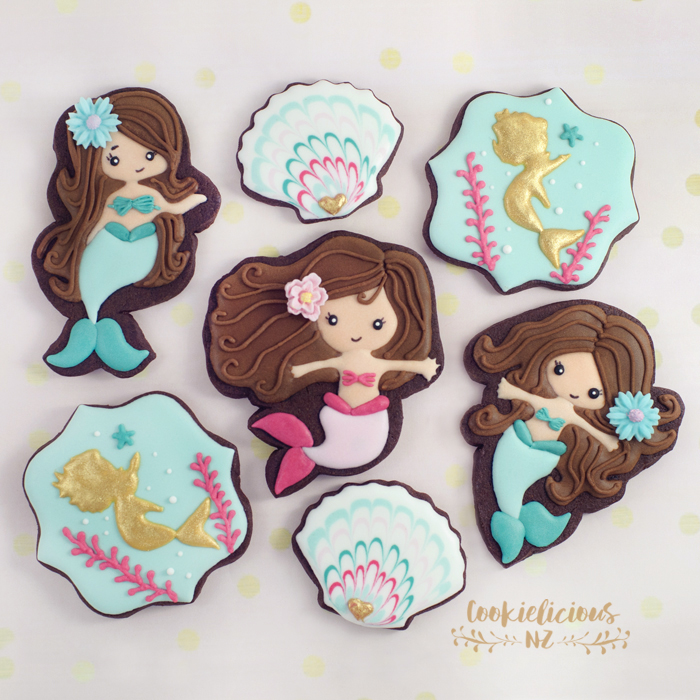 Here are the step by step tutorial on how to create a couple of these mermaids, lets start with the pink mermaid. Step 1: outline the cookie with edible marker and start with the face and body area. Flood with skin colour icing in medium consistency (we use 20 seconds icing for this). Step 2: Fill the hair area with brown medium consistency icing and let it dry. Step 3: Fill the mermaid tail with a light pink icing also in medium consistency and let it dry. 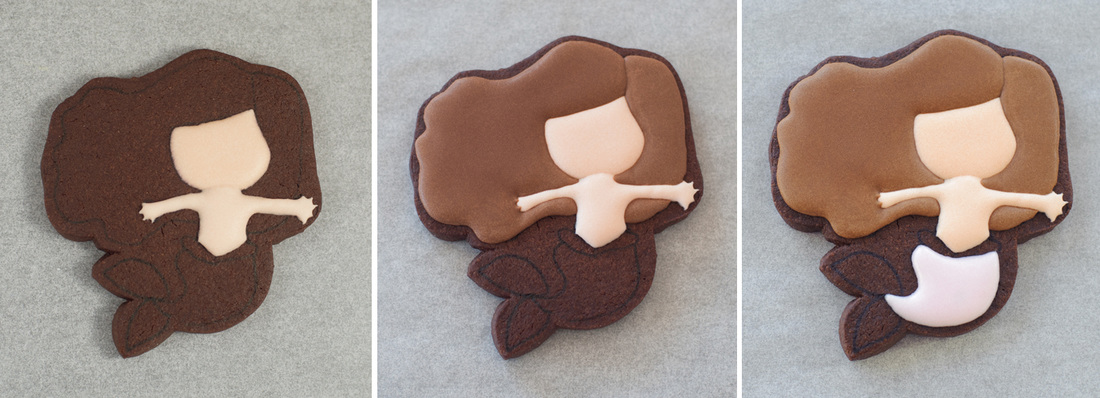 Then we continue with adding the details. Step 4: Add the waist area, the chest and the bottom of the tail with a darker pink icing also in medium consistency - see picture below with the detail. Step 5: mark the face area so you know where to put the eyes & mouth. Step 6: add the eyes with black icing and use a small nonpareils sugar to add the white dot in the middle of the eyes just to give it some dimension. Use black edible marker to add the mouth. Step 7: lastly add the strands of hair with outline/stiff consistency icing and as a last touch you can add a tiny fondant flower in the hair - see picture below 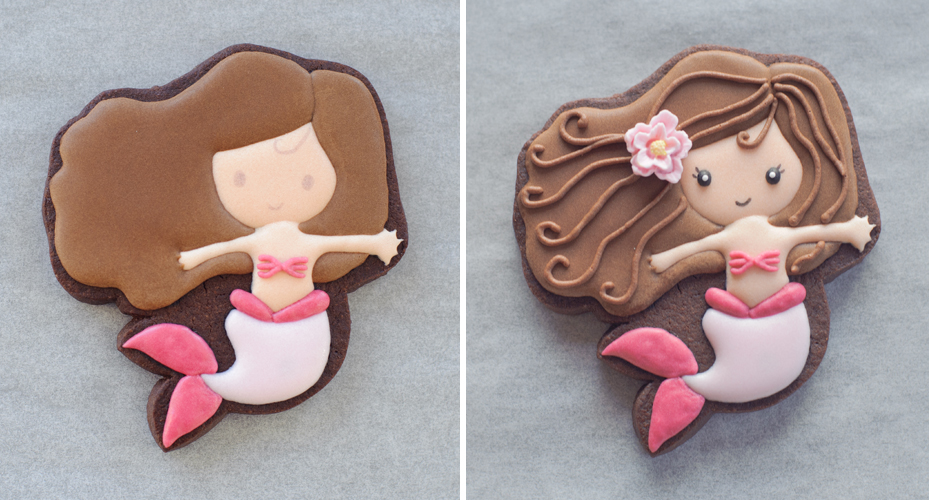 Similar steps can be followed for the sea-green mermaids. Step 1: outline the cookie with edible marker and start with the face and body area. Flood with skin colour icing in medium consistency (we use 20 seconds icing for this). Step 2: Fill the hair area with brown medium consistency icing and let it dry. Step 3: Fill the mermaid tail with a light sea green icing also in medium consistency and let it dry. 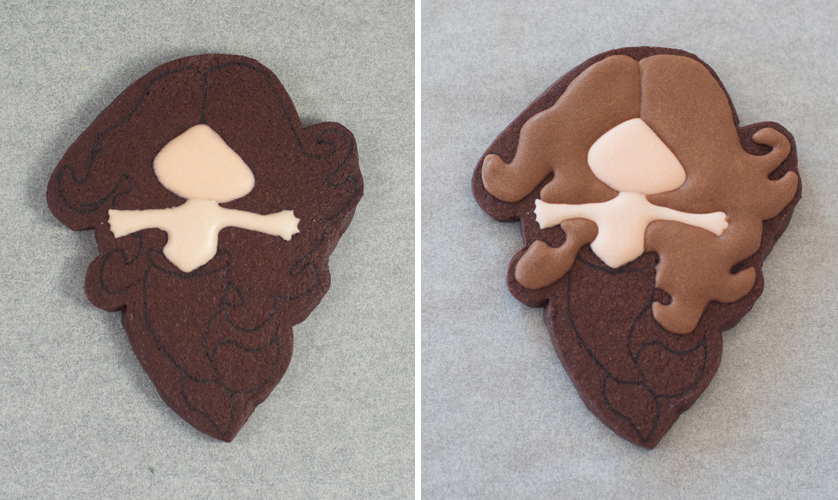 Step 4: add the waist area, the chest and the bottom of the tail with a darker pink icing also in medium consistency - see picture below with the detail. Step 5: mark the face area so you know where to put the eyes & mouth. Step 6: add the eyes with black icing and use a small nonpareils sugar to add the white dot in the middle of the eyes just to give it some dimension. Use black edible marker to add the mouth. Step 7: lastly add the strands of hair with outline/stiff consistency icing and as a last touch you can add a tiny fondant flower in the hair - see picture below 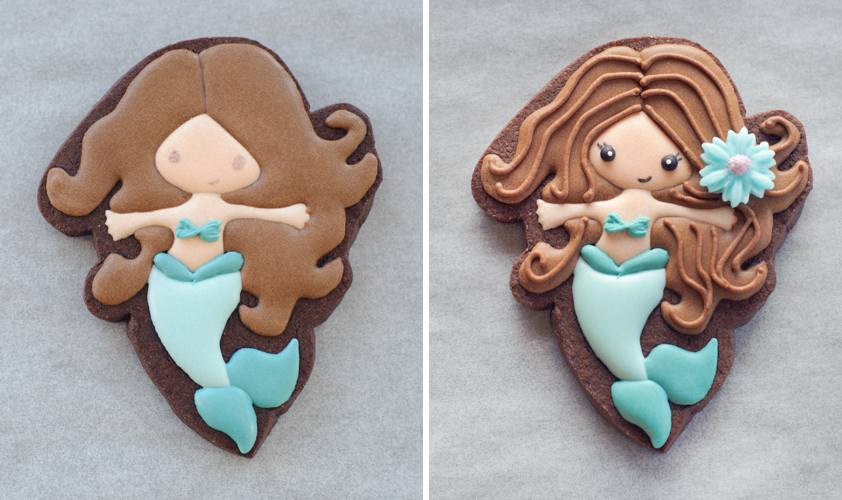 You can also create other complimentary 'under the sea' theme like shells, starfish and mermaid silhouette like we did in this platter :) 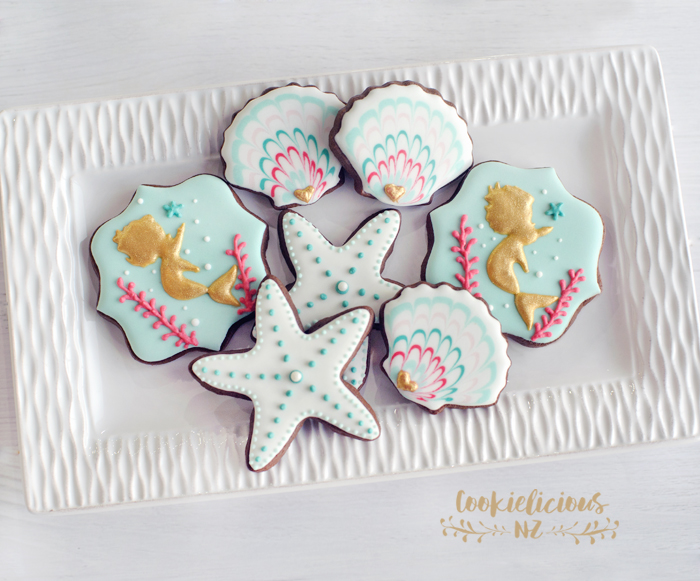 I have it on good authority that my lovely niece loves these set of cookies so i think we can safely say its mission accomplished ;-) Have a great week everyone! 
1 Comment
Its been a while since I've updated this blog. I'm so sorry I have been a tad busy and have been slacking a bit at updating this blog. I will try my best to do it more regularly :) I haven't had a chance to post these cookies here yet, but I have posted a video tutorial of how to make both the watermelon & pineapple cookies in my Instagram account. Here are the finishedcookies :) 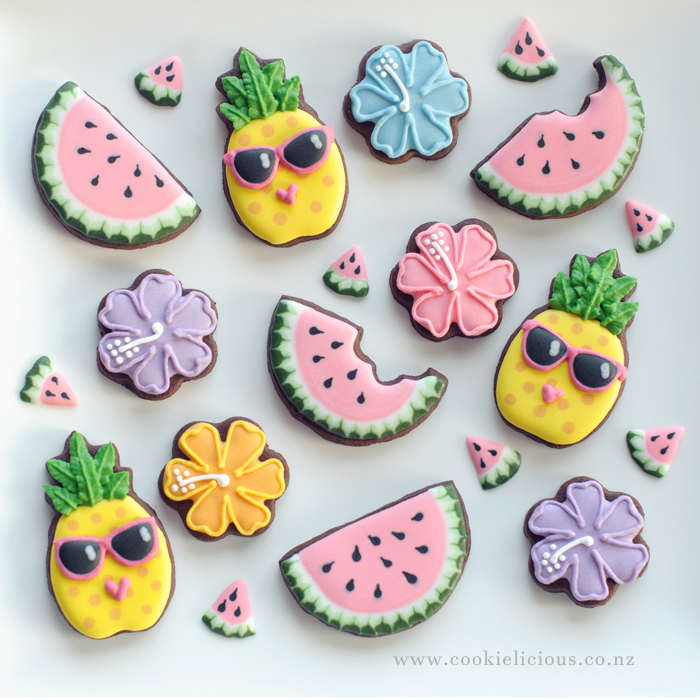 We didn't get a chance to take photo tutorial of the watermelon cookies as we made a video tutorial instead. I have put a you tube video link below, this is the first time we are trying to link up one of our videos in this blog...really hope this works! *fingers crossed!* :) This is what the watermelon cookies looks like when we finished decorating them :) 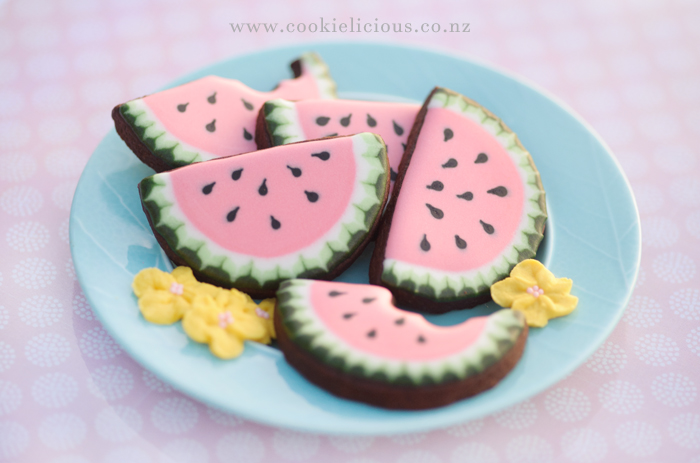 Now, for the pineapple cookies, what can be cooler than a pineapple with pink sunglasses right? :P The good news is we did managed to take photo tutorial, so here we go: Started with a wet on wet technique, flood the base part of the pineapple with yellow flood consistency icing and while the icing is still wet add orange/golden flood consistency icing in polkadot patterns and let it dry. 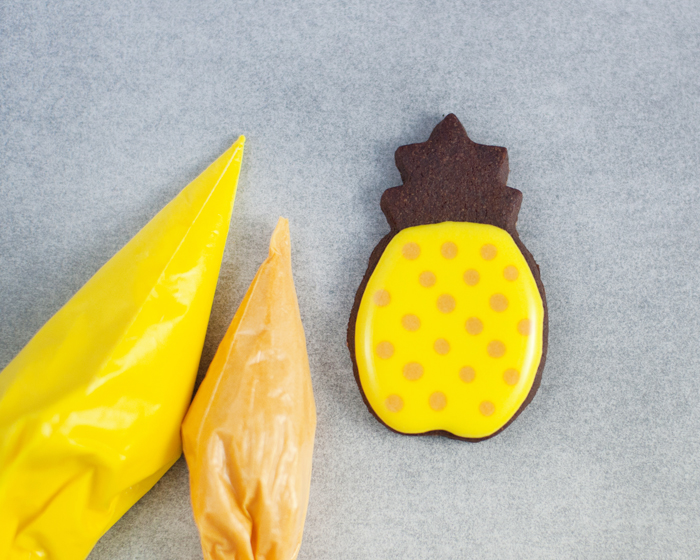 Next we add the groovy pink sunglasses and the leaves on top: 1. With an outline consistency pink icing, pipe the sunglasses. 2. Add black flood icing in the middle of the sunglasses and while the icing is still wet add a little white line on the side for the reflective side, then add the heart shape lips. 3. Lastly, with a leaf tip piped the top part as shown below. 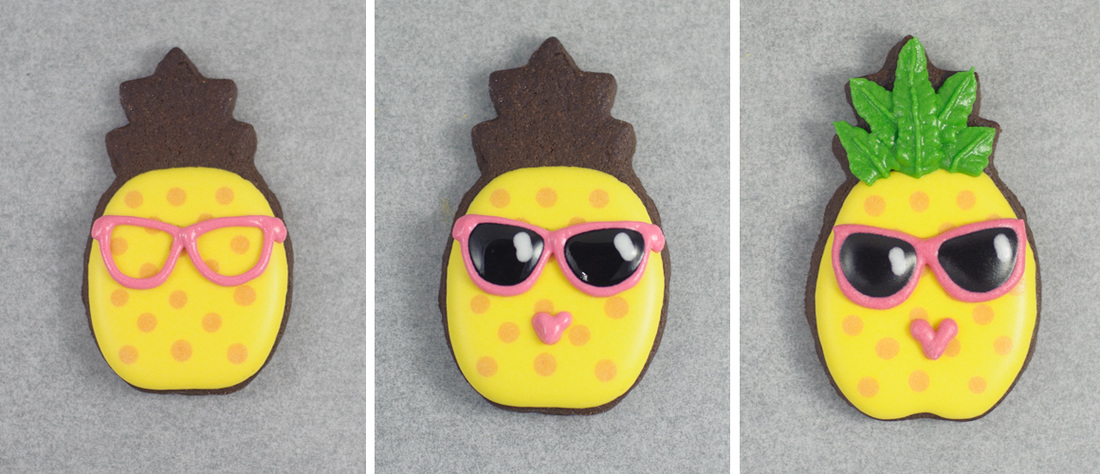 Here they are together after we complete the decorating steps. 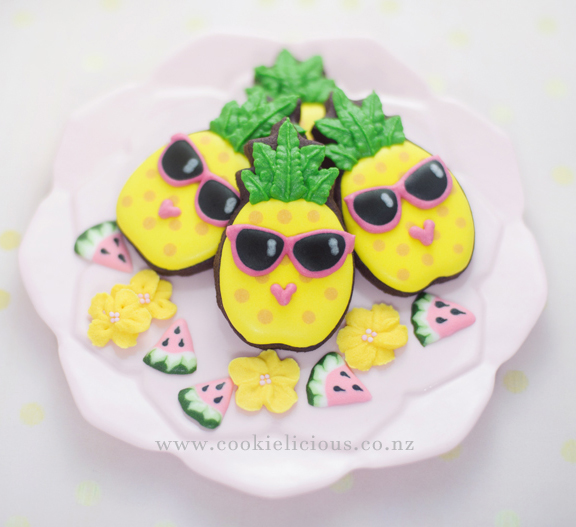 So there you go, they are pretty simple to make. Hope that will encourage you to give it a go and try making these cute cookies. Hope you had a great weekend ;-)  |
About MeCookie Artist & Content Creator, who loves spreading the cookie love. 

Archives
February 2020
Categories
All
|
 RSS Feed