
|
We are aware that this blog have been sadly neglected for the past few months. So we are making the effort to give you the latest update :) These are the latest cookies we made for Claudia's birthday and she has specifically requested a 'Boho theme' cookies, so we had so much fund creating these for her :)  We didn't get a chance to take photo tutorial for all the cookie designs but we choose a select few to show you here. If you would rather see a video tutorial for the majority of these boho cookies design please check out our Instagram account HERE. Okay the first photo tutorial is for the dream catcher. We didn't have a specific dream catcher cookie cutter so in this case we used a sandal/flip-flop cutter. Step 1: Flood the base of the cookie with white flood icing. Step 2: Draw a circle on the top area with an edible marker and mark off the areas for the inside of the circle as well as for the feathers. Step 3: With an outline consistency brown icing and a small piping tip ( we used PME tip 1 for this) pipe the inside of the circle first - see the first picture below. Step 4: Use the same brown icing to pipe the squiggly outer section of the dream catcher. Step 5: Using the same brown icing pipe the bottom park where the feathers are going to be filled. Step 6: Use an outline consistency icing with different pastel colours add the feathers in small lines resembling an arrow and also use a green outline consistency icing to make the green leaf on each side of the dream catcher - see picture below. Step 7: Add a royal icing roses into the middle of the leaf and with gold edible dust (we used Rolkem Super gold for this) dust the yellow part to make the gold accent - see picture below. If you would rather like to see video tutorial so can clearly see the step by step details on how to make this dream catcher, you can view it HERE. 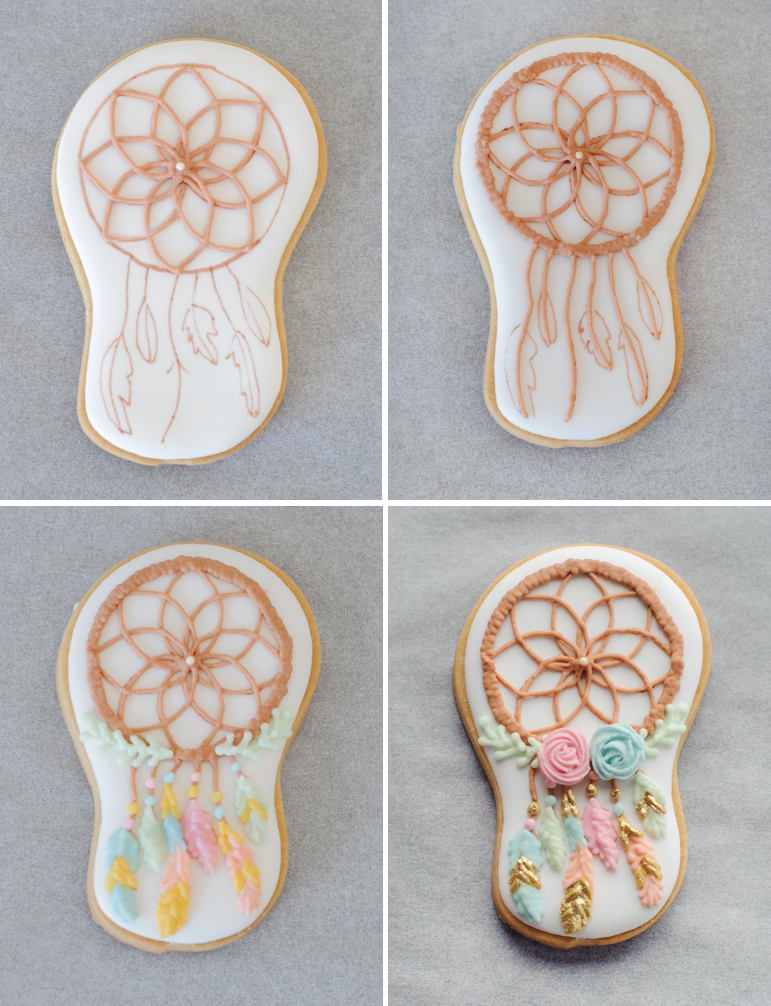 Here is what they all look like when we finished decorating with matching arrow cookies :) 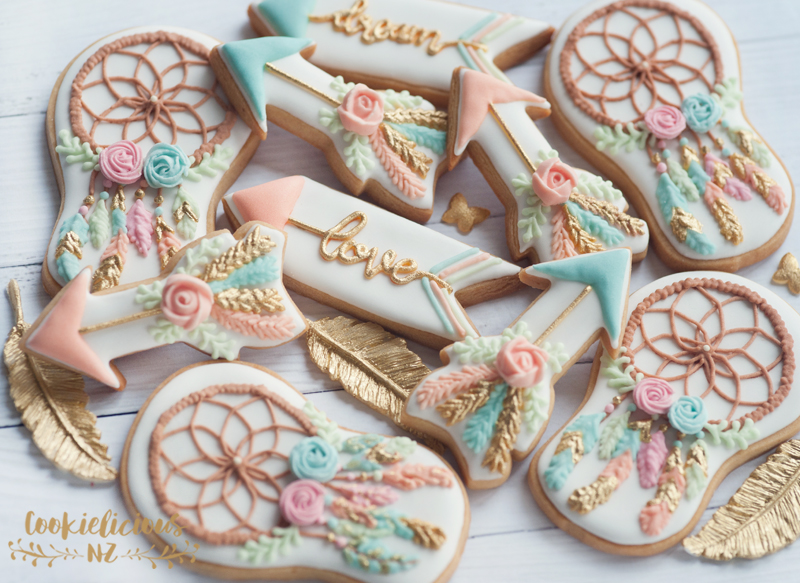 Next one is the flower teepee cookies. We love this design so much as they turned out so pretty :) Here is a simple photo tutorial on how to make them: Step 1: With medium consistency peach colour icing fill the triangle area and fill the entrance of the tepee with a cream colour icing - see the first picture below. Step 2: Use an edible marker to make off the area for the teepee outline - see the middle picture below. Step 3: Use an outline consistency brown icing to pipe the outline of the teepee (see last picture below) and use an outline consistency cream icing to create the cream dotted area and hearts at the bottom of the teepee. Step 4: add royal transfer rose and a couple of fondant flowers on top and then add the green leaves by piping then on the sides of the flowers using PME tip 1.5 If you would like to see a video tutorial on how to make this step by step, you can view it HERE. If you like our pretty flower teepee design, you can now purchase the cookie cutters at Say it with sweetness online shop - link to Kate's shop HERE. 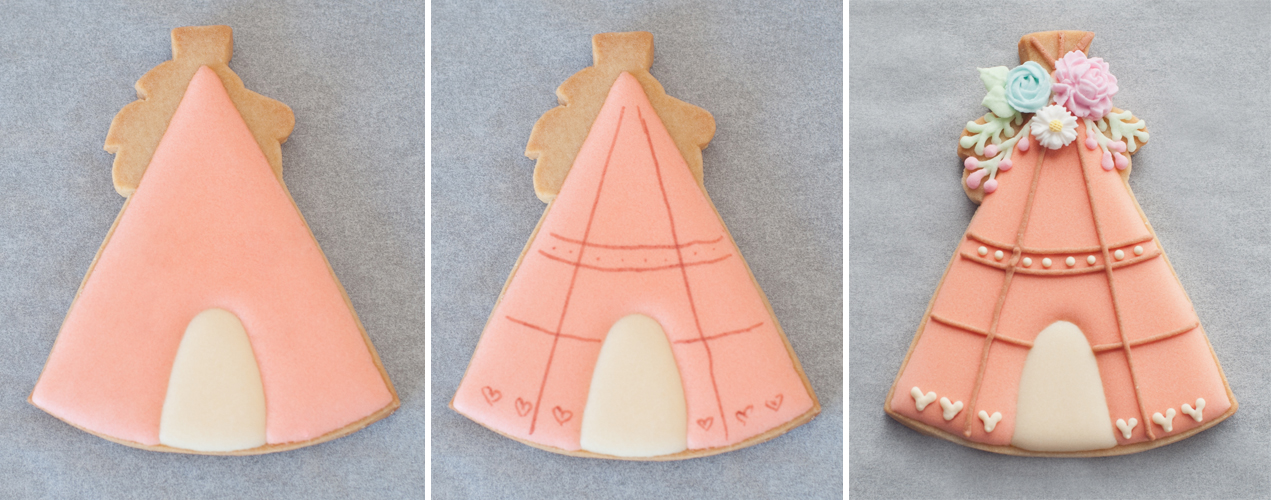 The next one is a quick ohoto tutorial on our lace teepee. Step 1: Start off the same way as our flower teepee, with medium consistency blue colour icing fill the triangle area and fill the entrance of the tepee with a cream colour icing - see the first picture below. Step 2: Use an edible marker to make off the area for the teepee outline - see the middle picture below. Step 3: Use an outline consistency blue icing to pipe the outline of the teepee (see last picture below) and then attach the sugar lace on top of the teepee using either an edible glue or in our case we used a clear corn syrup. Step 4: add the royal icing roses at the bottom of the teepee as well as the three tiny fondant flowers on top of the teepee - see last picture below. If you would like to see a step by step video tutorial on how to make this, you can view it HERE. If you like our pretty lace teepee design, you can now purchase the cookie cutters at Say it with sweetness online shop - link to Kate's shop HERE. 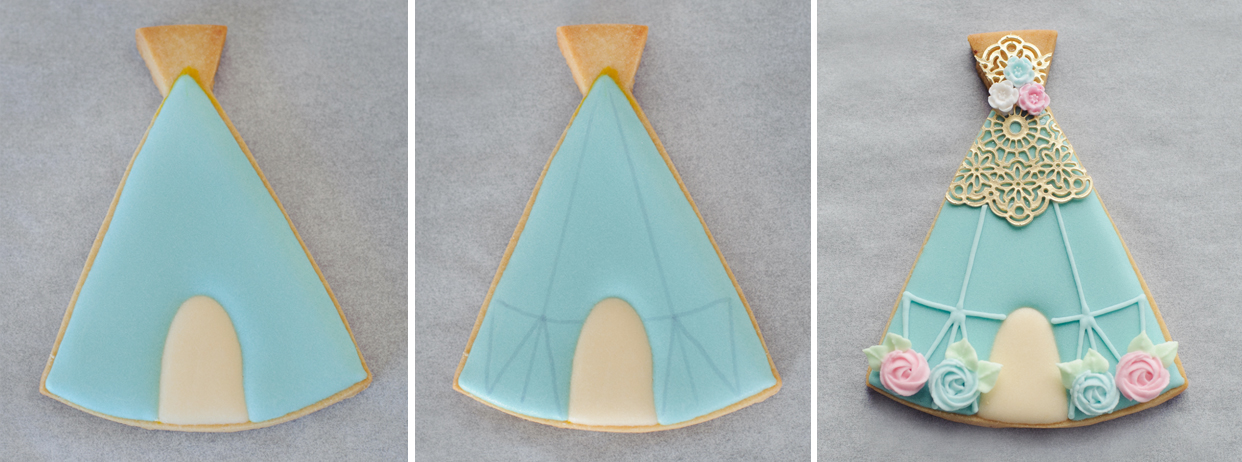 Here is what they both looked like after we finished decorating them :) 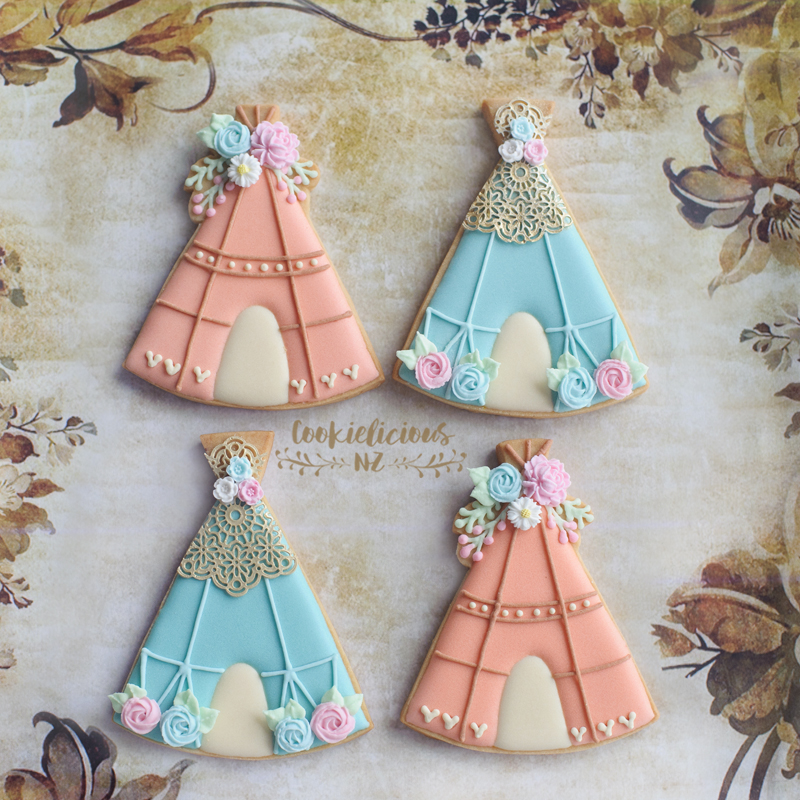 We didn't get a chance to take any photo tutorial for the cookie with the writing but we'll show you a closer look at them, as we really love all the gold accent and writing in this set :) 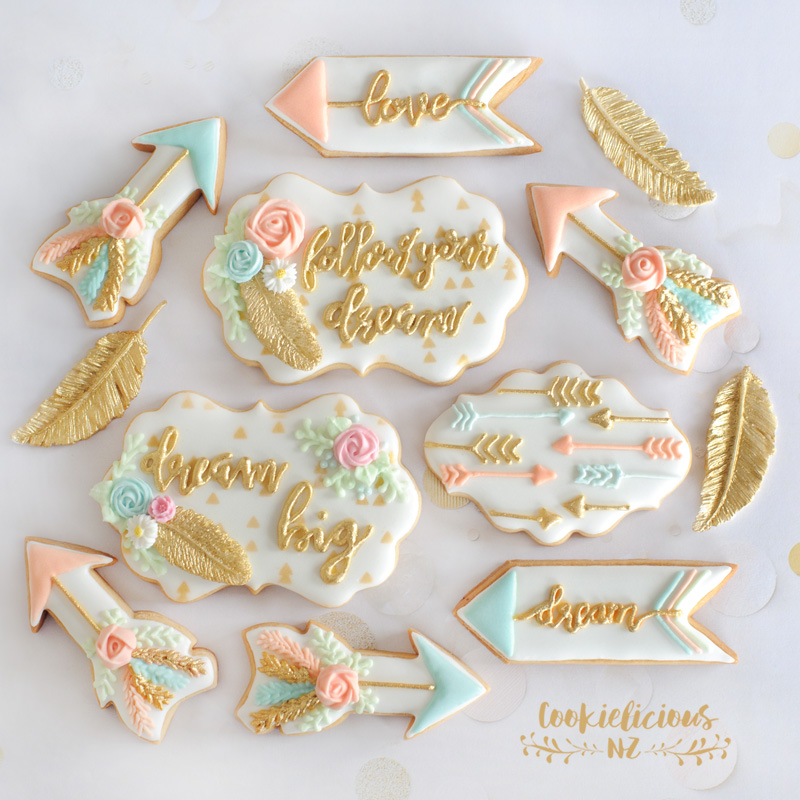 Okay so there you go,hope you enjoyed seeing all this tutorial. If you would like to see a wider range of video tutorials on these cookies please make sure to visit our Instagram account - Cookielicious NZ. Have a great week everyone! ;-) 
4 Comments
|
About MeCookie Artist & Content Creator, who loves spreading the cookie love. 

Archives
February 2020
Categories
All
|
 RSS Feed