|
Well technically its white & blue Christmas but mainly its white so lets stick with that lol :) We wanted to do a Christmas set with a non traditional Christmas colours, and we also wanted to make the cookies with some bling on them so this is what we came up with :) 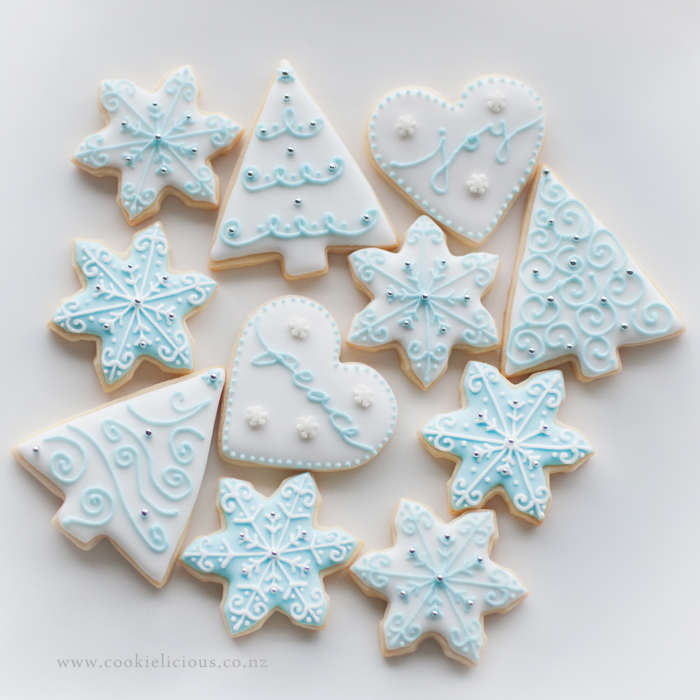 The Christmas tree was just an experiment with different kind of swirly things and metallic sugar pearls, so i didn't take any tutorial photos of them, but i did take some step by step photos of the snowflakes to share here. Start of with a base colour (either white or blue or any colour preference you want), fill the cookie with white or blue flood icing. Let it dry for a few hours. Then the first step is pipe a line from one end of the snowflake tips to the other end using a stiff consistency icing - see picture below. 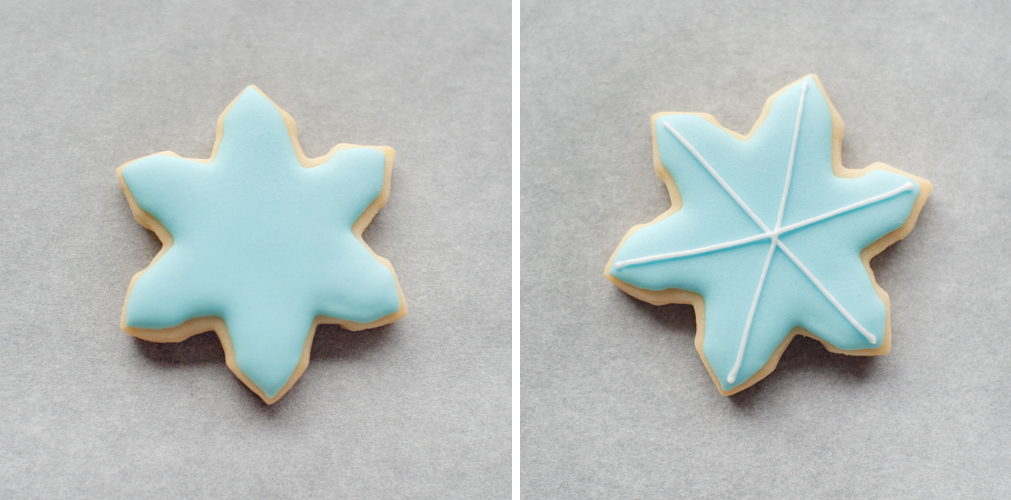 For these snowflakes we decided to start from the middle. Pipe a small line in between the connecting lines and put a small metallic sugar pearl on each end - see picture below for a clearer visual. Then continue to do the swirls on each snowflake tips and put a tiny dot on each side - as pictured below 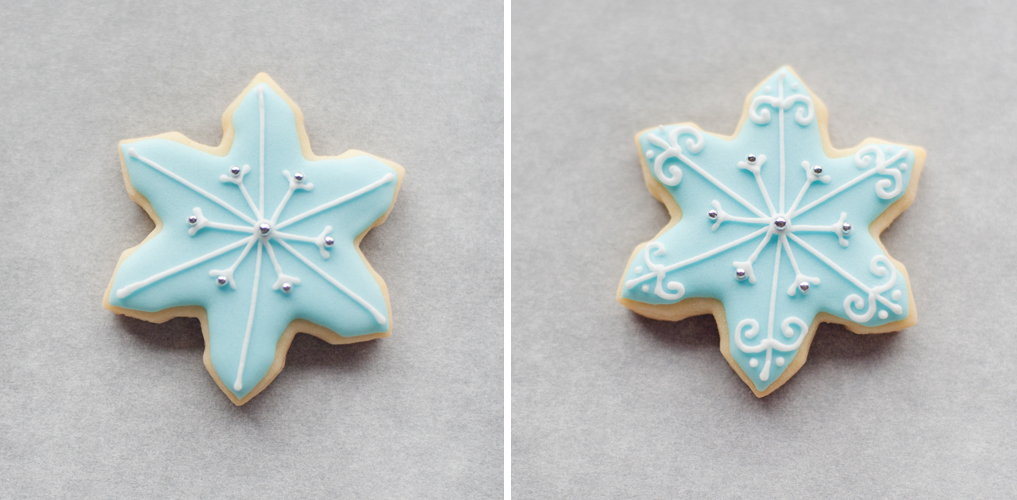 The lastly, you can either leave the snowflake as it is or you can add some more details on, like some dots in between each lines or you can leave the snowflake as it is for a simpler design. Here are the different variations we have made with both blue on white and white on blue :)  Here are the three different trees and 'Peace & Joy' cookies :) 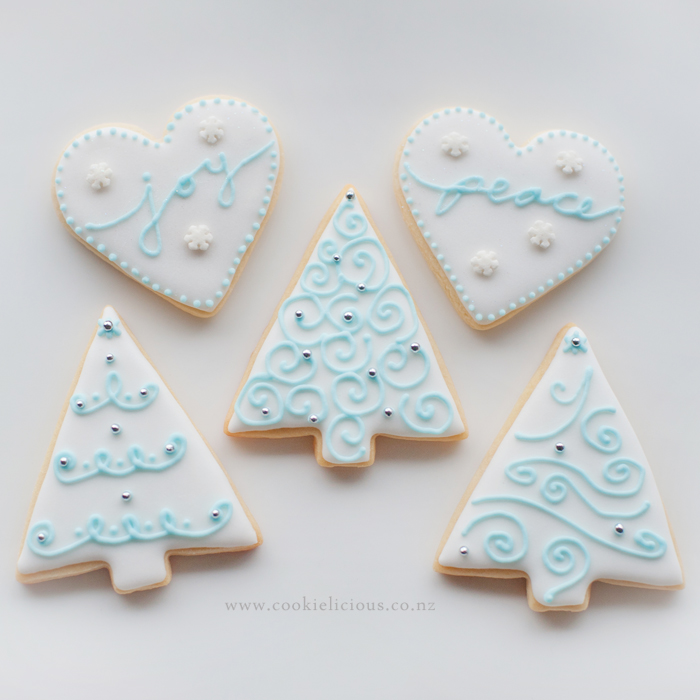 Close up of the 'peace' cookie because we dusted it with a light pearl dust and a sprinkle of sparkly dust :) It doesn't show well in photos but it sure looks pretty when you see it up close ;-) 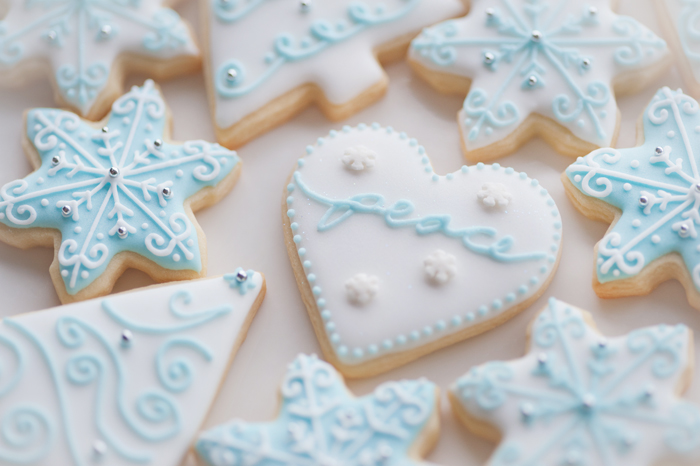 Only a couple more sleeps til Santa, hope everyone is winding down and getting ready to celebrate and be merry! :) 
1 Comment
This is our Christmas cookie platter, my mother in law specifically requested for us to bring a platter of cookies for Christmas day at her house. So we decided to go for simple Christmas cookies for our platter, Christmas trees and Snowmen :) 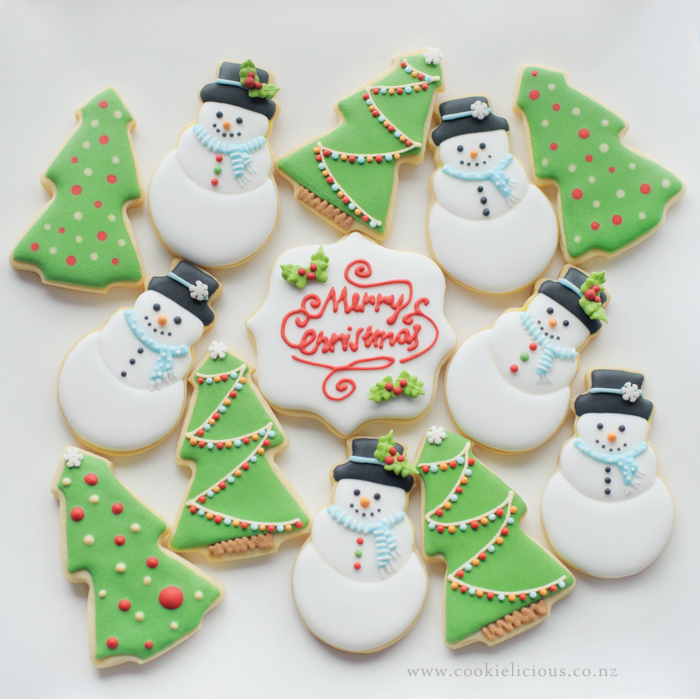 These set are very easy to make. Lets start with a step by step of the snowman :) We start by using the black icing as the hat, let it dry. You can either mark off the area of the snowman's belly and body area with an edible marker, or if you are good at free-hand you can just piped the icing straight on the cookies :) Use a white flood icing to fill the belly area and the face, let it dry. 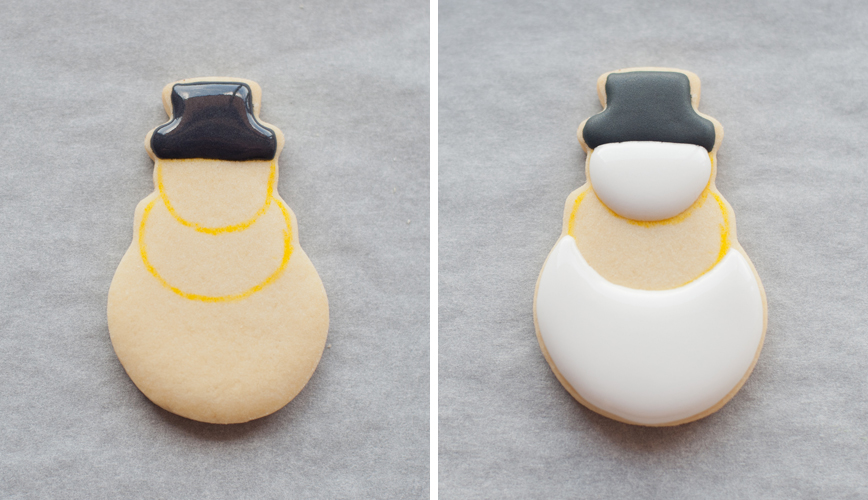 Then add the middle body area and let it dry. While we are waiting for the white icing to dry we can start decorating the hat. We did 2 different hat designs here, the first one is a simple snowflake hat. Pipe a blue stiff icing in the middle of the hat and add the little snowflake on the side of the hat. Then add the snowman's face details. Pipe 2 black dots for his eyes and an orange squiggle for his nose and lastly a few smaller black dots for his mouth. 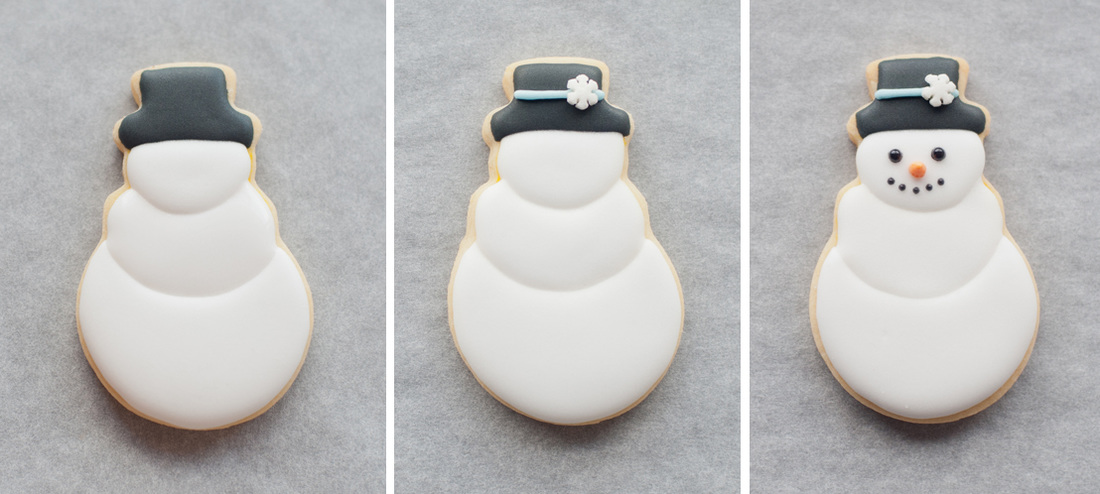 The last part of decorating is to put the 3 little buttons on his body and add a blue scarf around his neck. 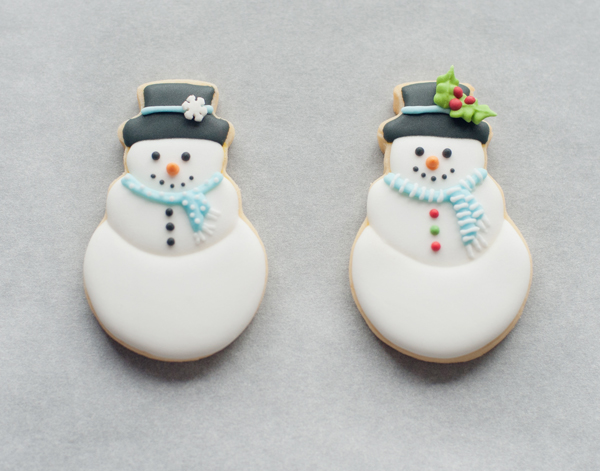 For the Christmas tree we did 2 simple designs. The first one is a plain green tree with Christmas lights and a snowflake on top. We fill the tree with green icing and let it dry. The use brown icing to make the tree stump and a light colour icing to make the zig-zag strings across the tree - see photo below. 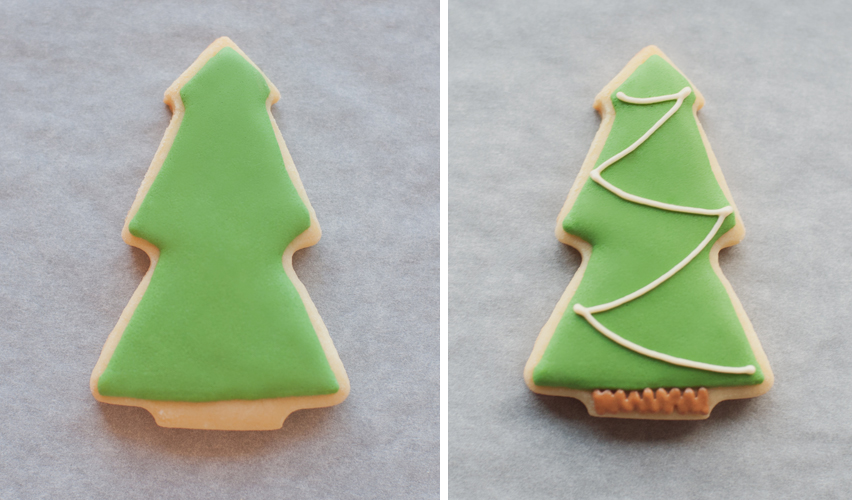 Then the next thing to do is to add the Christmas lights just underneath the strings. Just use any Christmas colour icing and put a dot underneath the strings in alternate colours - see photo below :) We also made a very simple polkadot Christmas Tree, all you need to do is put the red and cream polkadot icing on the green icing while its still wet. We use random sizes for the polkadots - see below. These are the two different Christmas trees we made :) 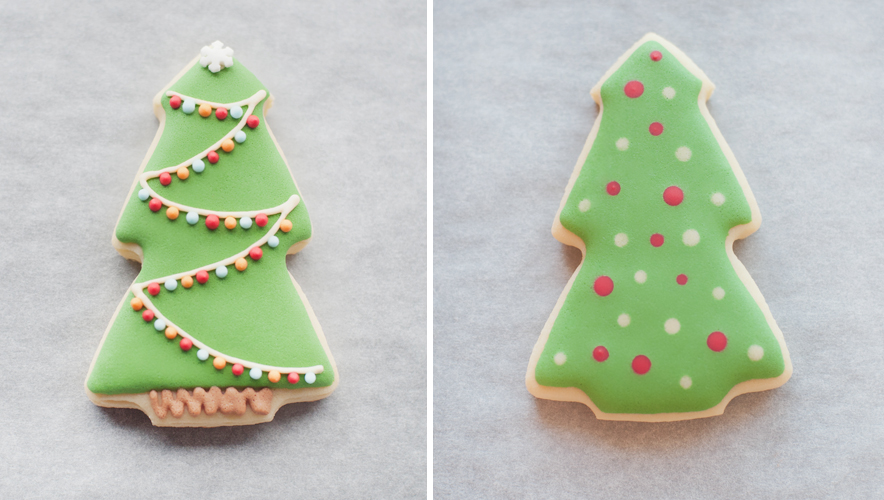 Okay so that is our very last Christmas cookies for this year. We are bringing this platter to my in law's place later this afternoon. Hope everyone is having a wonderful Christmas day with family and friends ;-) Merry Christmas everyone!  I've decided to make little mini cookies to share with friends and workmates this Christmas :) These are a set of traditional Christmas cookies, we have included Santa, Rudolph, Santa's Elf and some Christmas trees :) 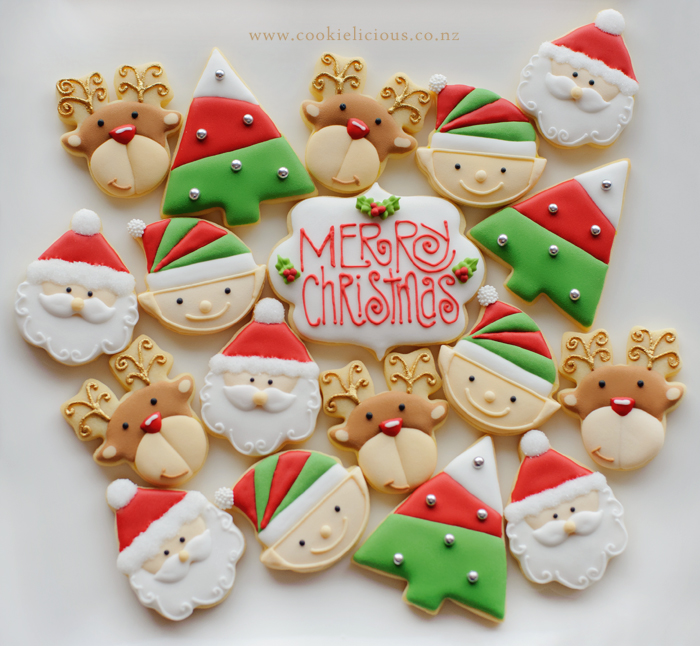 I got a chance to take step by step photos on how to make Santa, so will share how to him below :) Note to self: make the elf ears more pointy when we make these little dudes again in the future :P Start with Santa face, we mark the area with an edible marker and fill with skin colour icing. Wait for a bit until its dry and add Santa's beard with white icing. Let it dry. 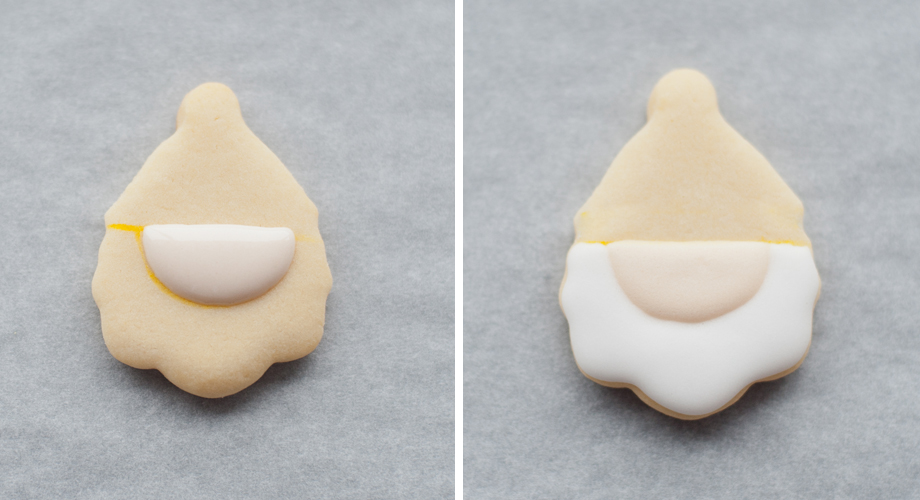 The next step we add the rim of Santa's hat, use white icing and while the icing is till wet sprinkle some white sanding sugar and let it dry. While we are waiting for it to dry add Santa's mustache with white icing in the middle of Santa's face (see picture below for a visual). After the white rim of Santa's hat is dry add the hat with red icing and let it dry. Then pipe 2 black dots in Santa's face to create the eyes.  After the red icing is dry, we add the white pom-poms on top of Santa's hat and just like the rim of Santa's hat, sprinkle with white sanding sugar. Let it dry. Lastly, add Santa's nose and with an outline consistency icing add the swirls in Santa's beard 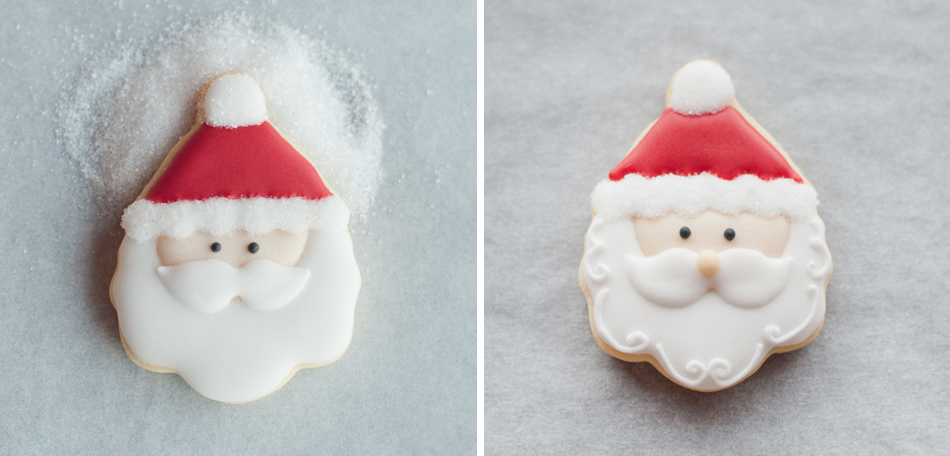 That's all you do to make Santa cookies. Here are a few of the Santa cookies together :) 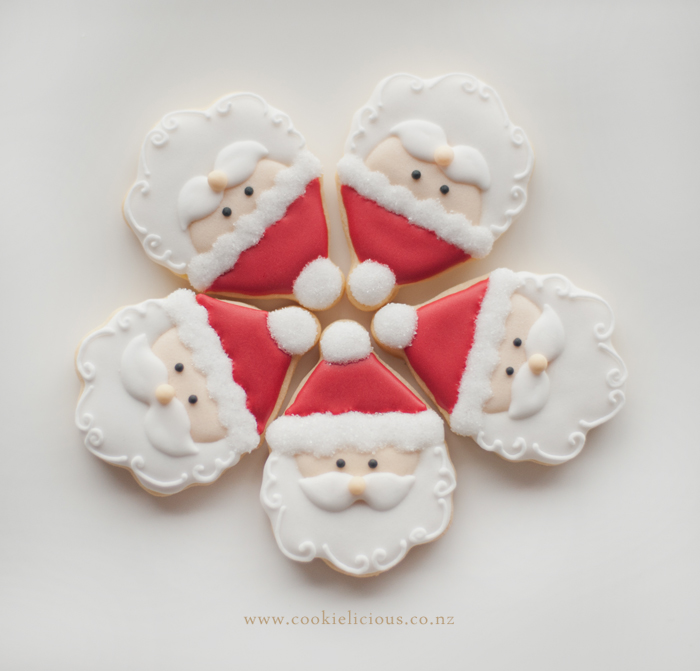 Here are the three characters together, Santa, Rudolph & Santa's Elf :) 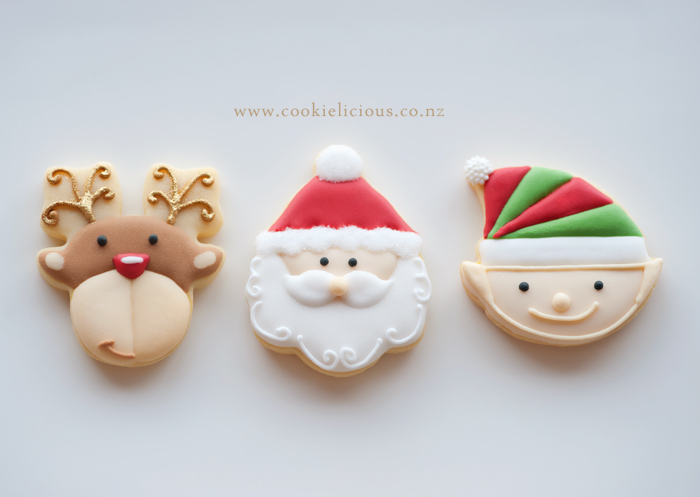 Here is a closer look at the trees and the Merry Christmas plaque :) 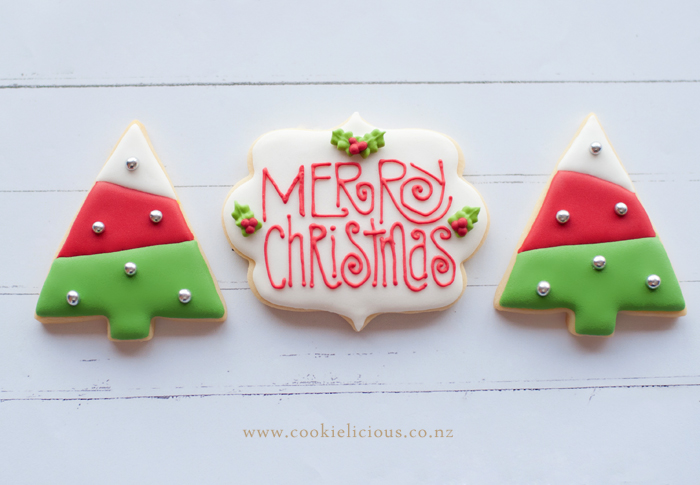 There you go, hope that helps you and encourages you to try making a few Christmas cookies. Its not long to go now....only four more sleeps to Santa!! :)  My daughter's school Principal is leaving her school, and both my kids are so sad because they really like their Principal. Today is the last day of school and Claudia has specifically requested to make her a special cookie package to say thank you and to show our appreciation for what she has done for their school. We searched for some inspiration of what to make and we found a set of Teacher's Appreciation cookies at the Cookie Connection website that we really love. The set was made by Jackie and was posted on Cookie Con, thank you for the inspiration Jackie :) Its the usual set of pencils, ruler, apples, crayons and a plaque cookies in the middle. We thought the whole set looks really amazing so we set out to make the same set. This is probably as close as we can get it without having an airbrush tool or a projector to make the set.  We didn't take a tutorial photo for all of the cookies but my favorite cookie was the short stubby pencil so we took some photos on how to make it :) We didn't have a cookie cutter for it, so we cut out a paper template and use it for both the pencil and the blue crayons. Start by piping the pink eraser at the end and the top part of the pencil as pictured below. Then add the orange or yellow icing (both colour works well) to the middle of the pencil. 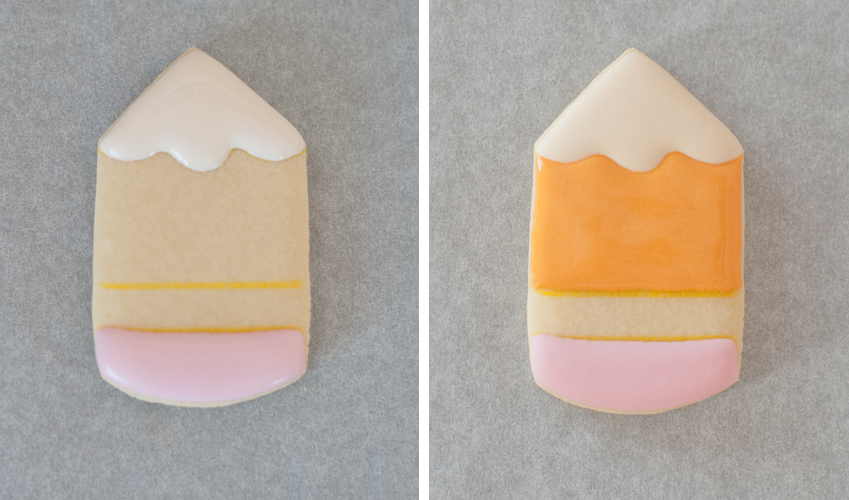 The next step is to add the grey area in between the middle of the pencil & the eraser. Wait until the the grey flood icing is dry and add the squiggly lines to create the look of the eraser holder. Then add the lines in the middle of the pencils to create the pencil groove and colour the tip of the pencil with a black edible marker. See picture below. 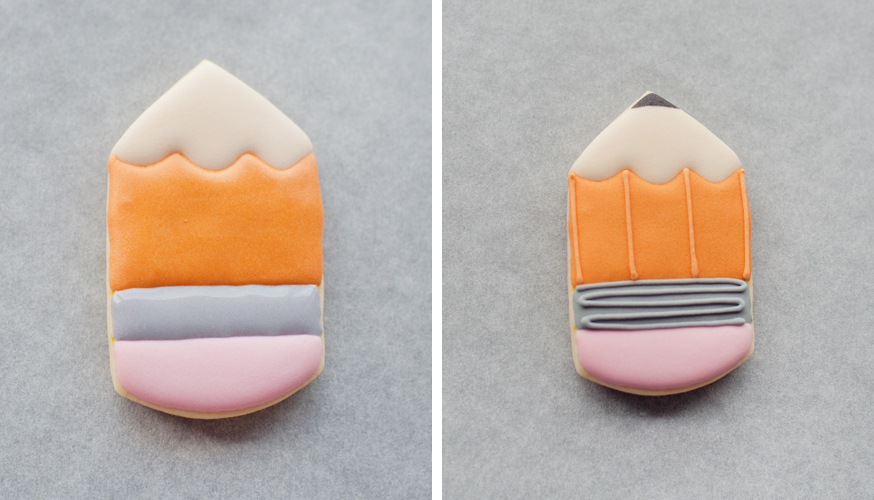 Creating the plaque was quite tricky without a projector, so we trace the letters into a baking paper and using a needle tool or scribe tool mark the letters on top of the cookie to create the outline of the letters. Its really hard to describe and unfortunately i didn't get a chance to take a photo of the process, but i will do it the next time we have do this again :)  We packaged it up inside a gift box we have prepared for her. Here they are ready to be given to the School Principal. I hope she likes them and enjoys them :)  Have a great week everyone! Its only 10 more sleeps until Christmas, i hope you have done all your Christmas shopping so you can just sit back and trelax next week ;-)  I almost forgot to post these cuties :) We made them for a friend's birthday as a gift. Because of time constraint we wanted to make something quick and simple, but still cute so we these were our choice :) 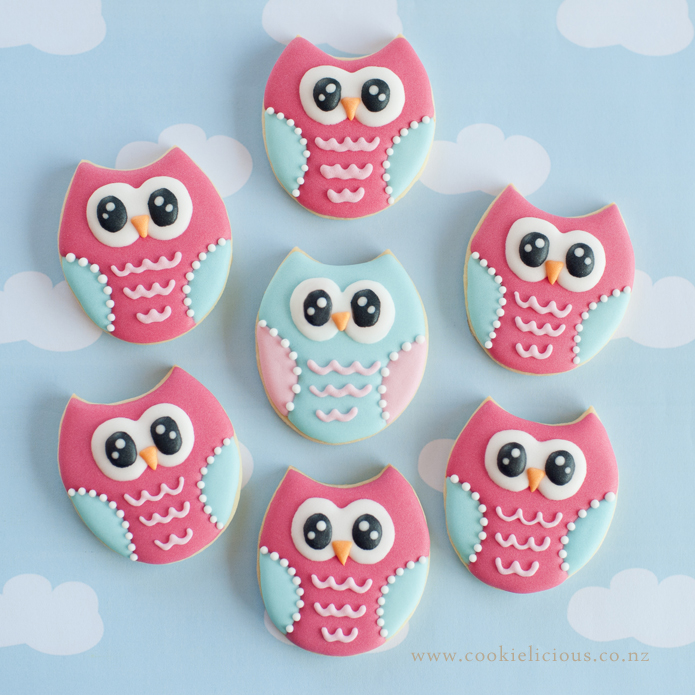 These were made from a simple egg cutter. I think there is already a tutorial by Sugar Belle. However we made it even simpler with the eyes and I'll go over a few quick steps here. With an egg cutter you just snip off the top part with the egg cutter to create the pointy ears. Then mark off the area for the wings with an edible marker.  Then fill the body area with 20 second icing, you can choose any colour you like....we decided to go with pink here, let it dry. Then fill the wings area with blue 20 second icing, let it dry again. 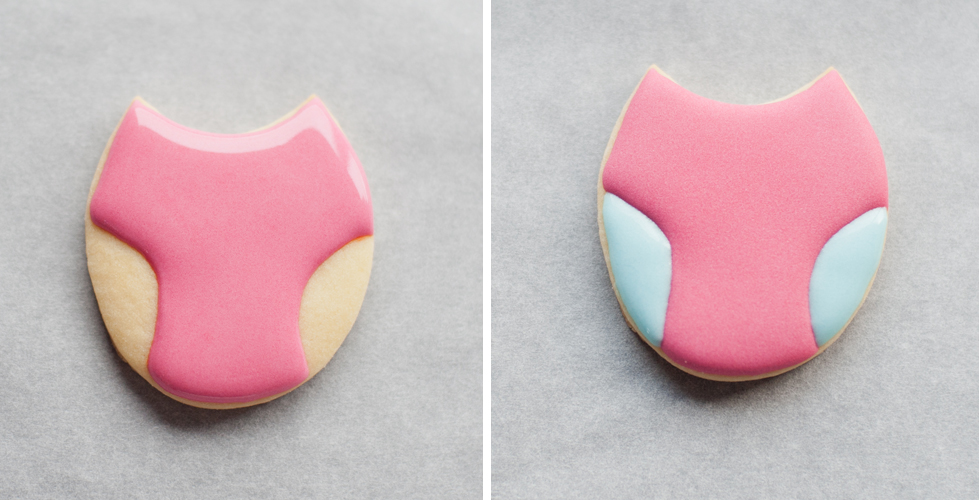 Once the pink icing is dry, piped a white flooding icing to make the bottom of their eye shape & let it dry - see picture below for a clearer visual. Then piped a black flood icing on each eye area, while the black icing is still wet, add 2 white dots to give a definition for the eyes. Let it dry. 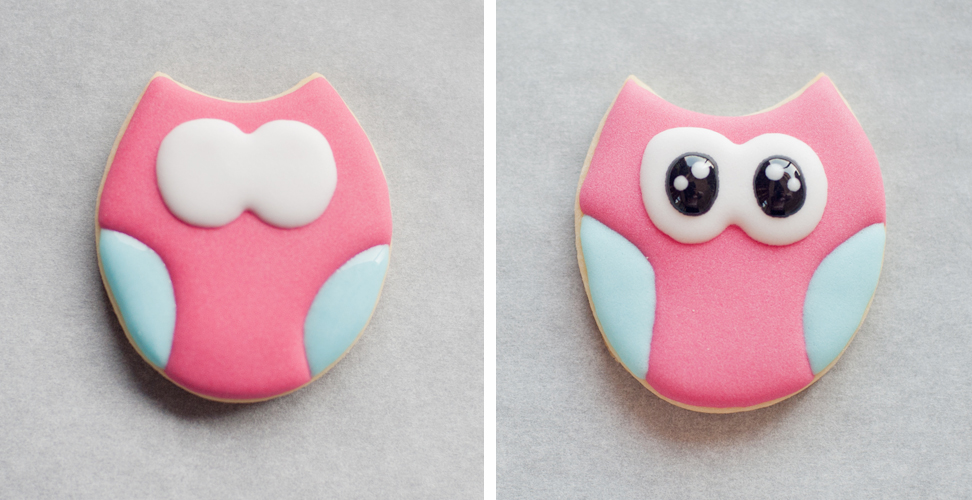 Once the eyes are dry, then we can start piping all the little details. We added the beak with orange icing, white dots around the wings with a piping consistency icing, then lastly the squiggly lines in the middle of their body to add the fur. We used light pink 20 second icing for the squiggly lines in the middle. 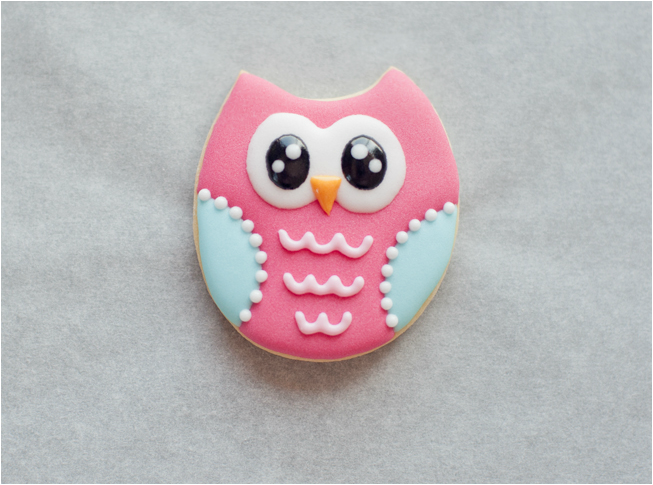 So there you go, simple & easy :) Hope this encourages you to try making these cuties ;-) 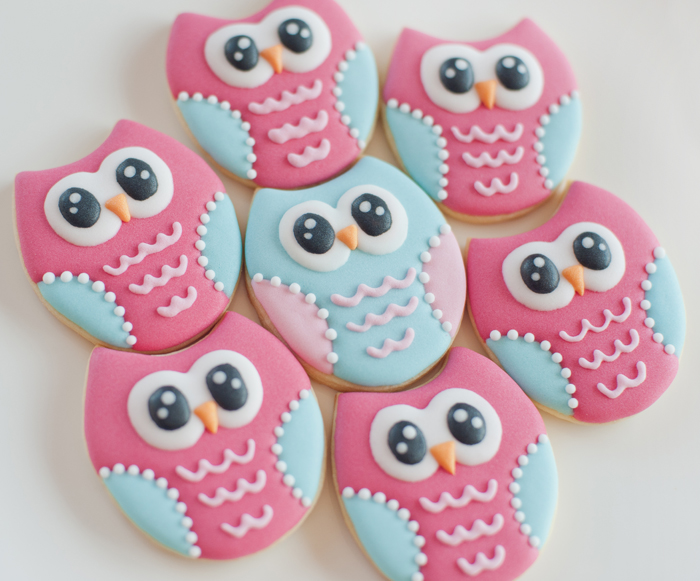 Hope everyone is having a great start to the week ;-)  I'm fortunate to be a member of a group in Facebook with all the other Cookier in Australia & NZ. So one of the ladies in the group organized a "Kris Kringle Secret Santa" between all of us cookie decorators. It was pretty intimidating to create Christmas cookies for someone who has been at this a lot longer than i have, but it was also exciting at the same time coz i will be receiving cookies from one of them too, yay! So looking forward to receive mine :) My secret Santa recipient has received hers yesterday, I've got the talented Laura from Cookie B Mine, so that means i can post my cookies here :) This is part of the set I made for her. I decided to make mocha flavoured cookies instead of the usual sugar cookies, i really hope she likes them! *fingers crossed* 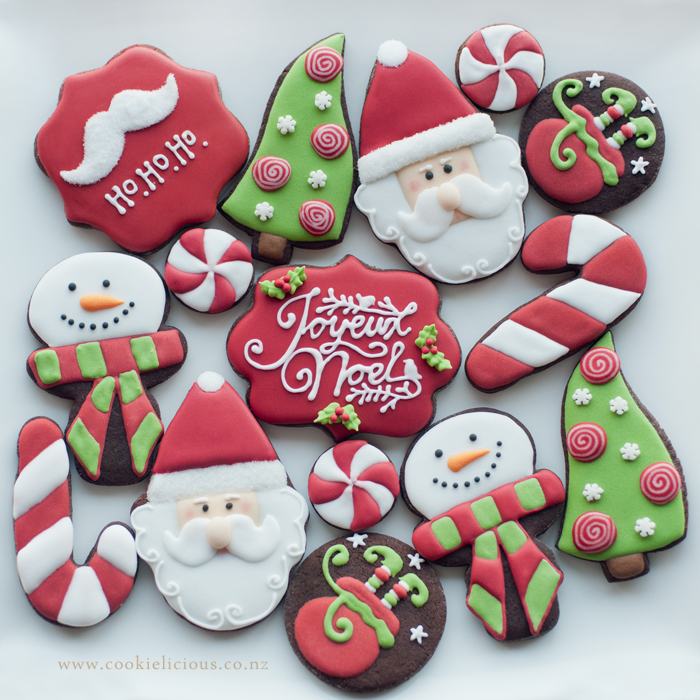 I didn't have an actual Santa cookie cutter so i searched online for an alternative and found a tutorial in Haniela's site to use an ice cream cone cutter to make a Santa. So that's what i did here :) 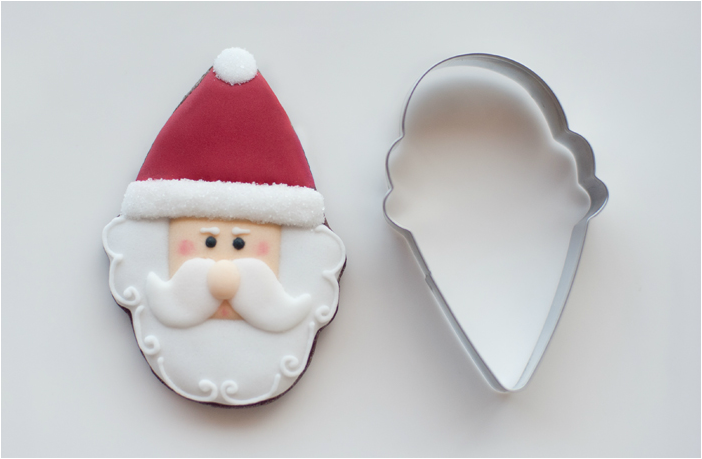 We also use a full body snowman cutter to make a snowman head with a Christmas scarf. This was a tutorial from Sugar Belle :) 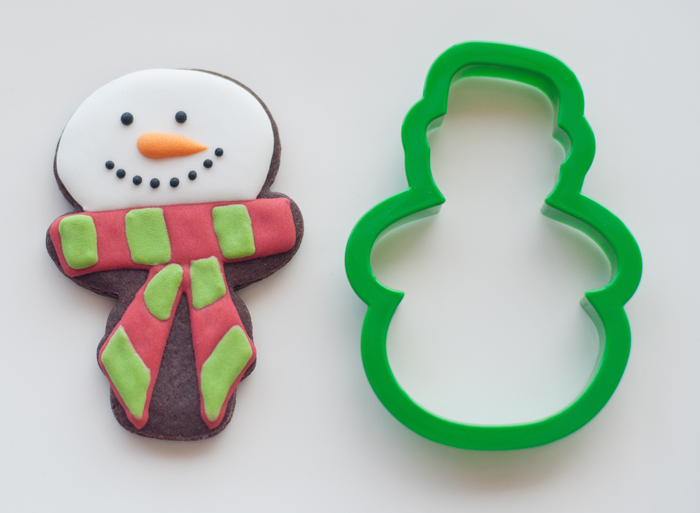 Because all the tutorials have been done by others, we didn't take any tutorial photos for any of these cookies. My absolute favorite was actually the red plaque in the middle with the writing "Joyeux Noel". I didn't own a projector so i had to use baking paper to trace the writing on to the cookies :) 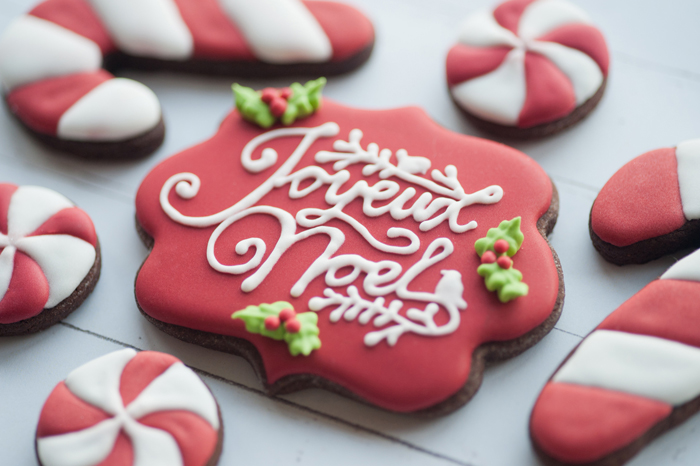 Here are a closer look at some of the Santa & Snowman cookies :) 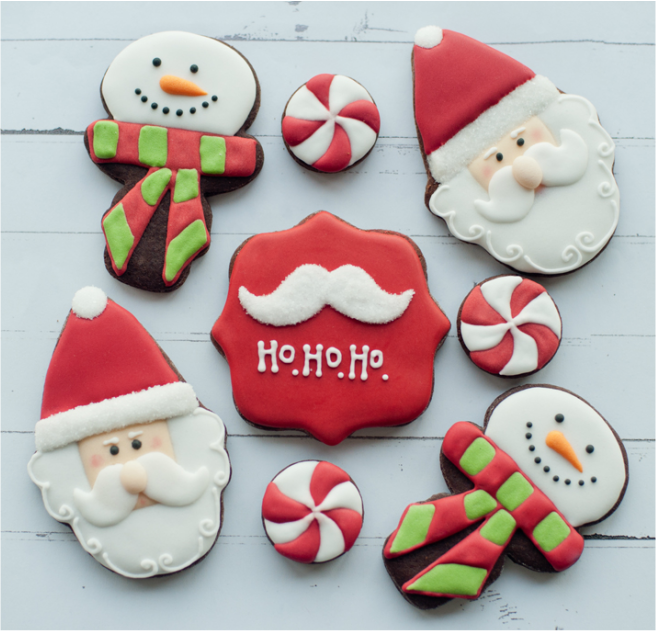 Christmas Trees and elf in a sack :) 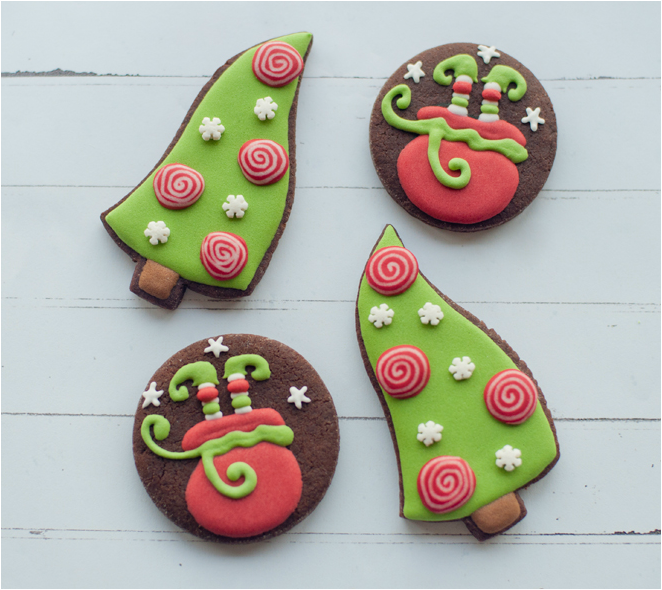 I really hope Laura likes them and also like the mocha flavour of these cookies ;-) Merry Christmas to Laura & her family!  I have been wanting to try making these cookies for a while. When i saw some gorgeous dresses cookies in pinterest, I can't quite remember who the original poster was, however they just inspired me so much that i want to try making some too :) The problem is that i dont own the cookie cutter so i had to hand-cut the dough, you might see some are a bit wonky as i had to hand-cut them without the proper cutter. They are quite simple designs but so much fun to decorate :) I want to do more different designs on these dresses so I finally decided to buy the cutter for this dress shape, just to make it easier to do more in the future :)  I was having so much fun decorating these cookies that i totally forgot to take any photos of the decorating progress. They are pretty simple designs anyway so im sure its pretty easy to see :) Instead I'm just gonna show you the close up photos of each dresses, just for funsies ;-) These three dresses are my favorite :) 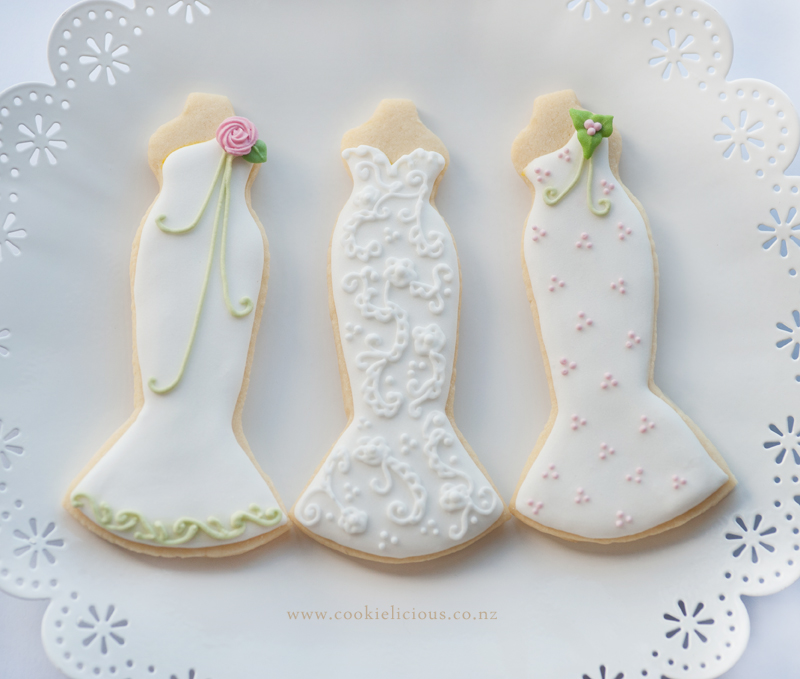 I tried some texture on the bodice of this dress and i also dusted some pearl dust on it but unfortunately it doesnt show up really well in photos. 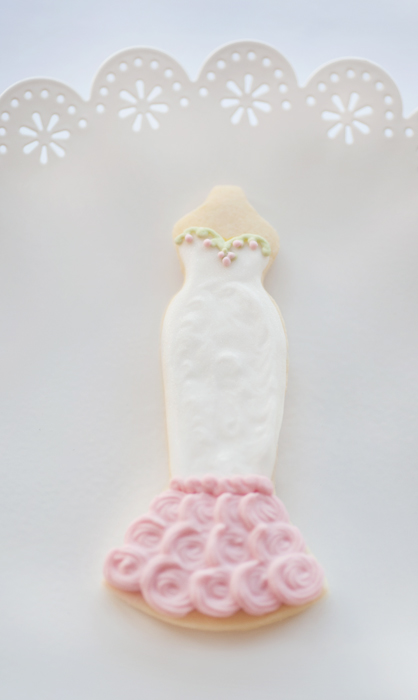 This dress is actually my least fave dress, i think its because i messed up the polkadot a bit and it wasn't quite perfect, but i still like the colours and the simple style :) 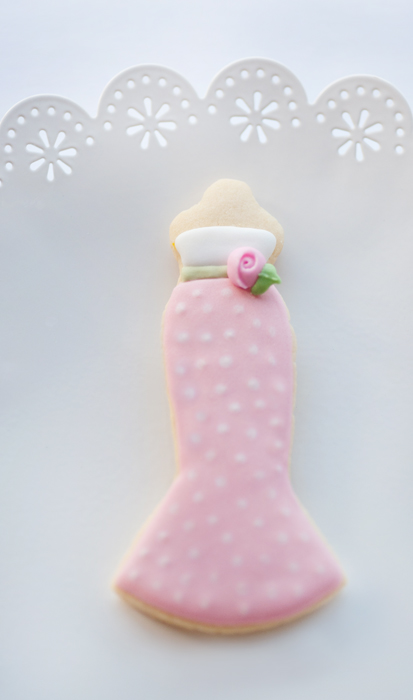 So that's all i've got to share this week. Happy to say that the sun is out and its lovely out there. Lets hope it stays until the weekend! Have a great week everyone! :)  These fan were made for a lovely lady whom I just recently connected with from Instagram & Facebook. She is so talented in her work, she creates cookies as edible art and im so blessed to have her as a friend. She has a wealth of knowledge and experiences that she shares with me and they are really invaluable to me. If you have some time, i would highly recommend checking out her work, Ibicci NZ So we have made these fan before when i first started getting into cookie decorating. I posted some photos here. So glad to see that my piping skills have improved since then :) 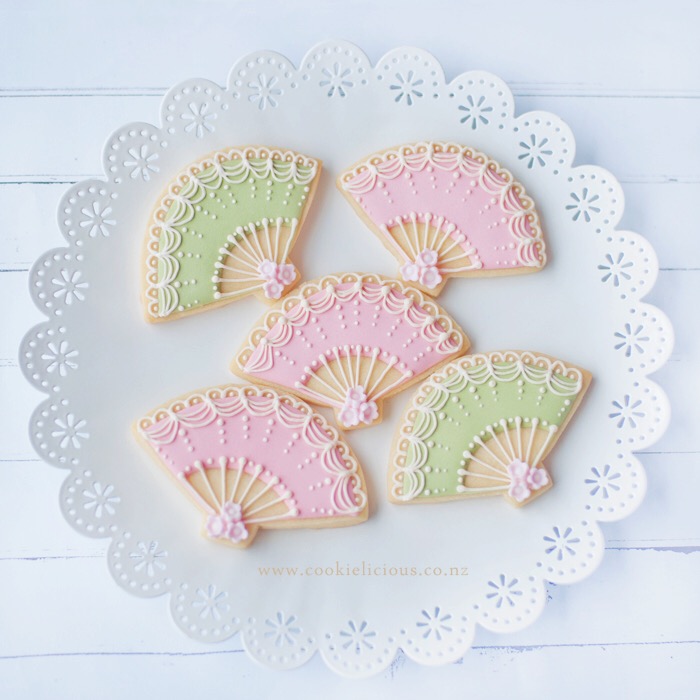 The original design was inspired by Sweetopia, they are not incredibly hard to do but you will need to have quite a small piping tip and the right consistency icing :) Start with the base of the fan, fill the cookie with a flood consistency icing as shown in the picture below. Let it dry for a few hours and then start piping in the lace details. We use tip #1 and a stiff consistency icing for the lace detail work. 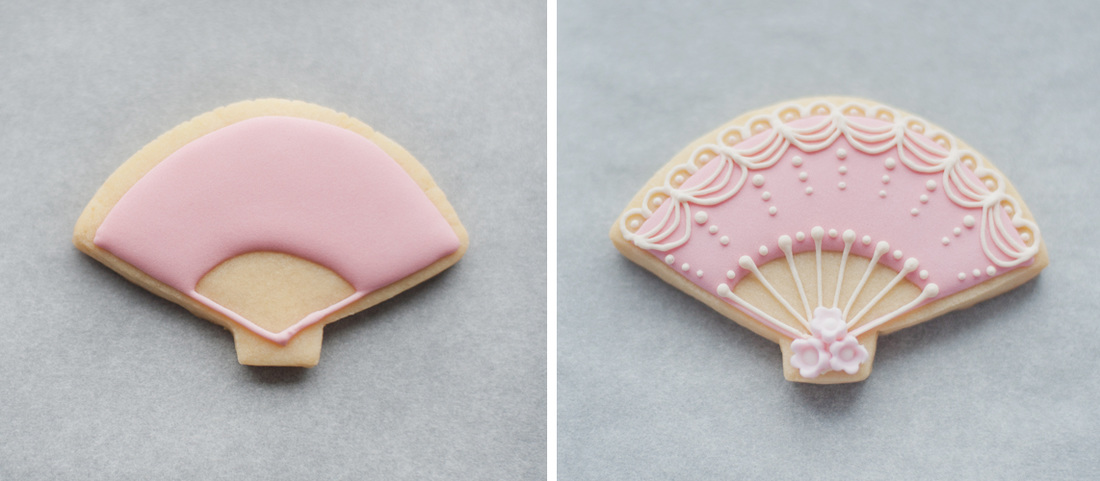 Unfortunately we dont have the right size sugar pearl to add into the lace design. The 4mm sugar pearl was too big for this small dainty fan :) Here is a closer look at the cookies... 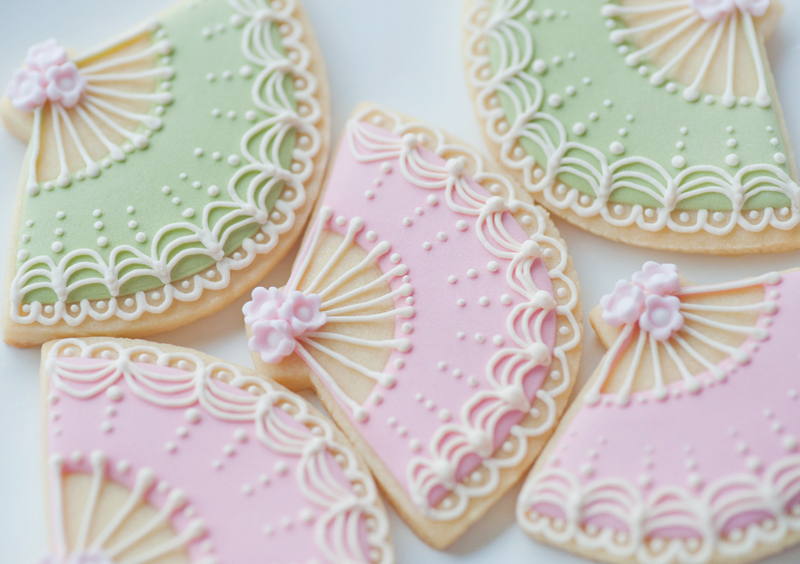 Have a great weekend everyone! :)  |
About MeCookie Artist & Content Creator, who loves spreading the cookie love. 

Archives
February 2020
Categories
All
|
 RSS Feed