
|
We are attempting to bring some fairy tales into our home this time. I have seen so many awesome versions of lil red riding hood cookies out there. One in particular really inspired me was created by a very talented cookie decorator in Instagram, unfortunately i can't put a link here to an Instagram stream but just trust me when I say she is very talented and there were many character cookies that she made which were just amazing! So this version of lil red ridinghood was totally inspired by her creations :) It was really fun making this fairy tale set, my fave part is actually decorating the mushrooms! I just love LOVE love mushrooms, i would put it in everything i eat if i can, my hubby will tell you this is real life fact....and no doubt he will also scrunch his nose and tell you that he is not a big fan of 'fungus' (that's what he called them lol). Well regardless what he thinks, personally I love them & I think they are so cute! So here is our very first fairy tale set - Lil red riding hood :) 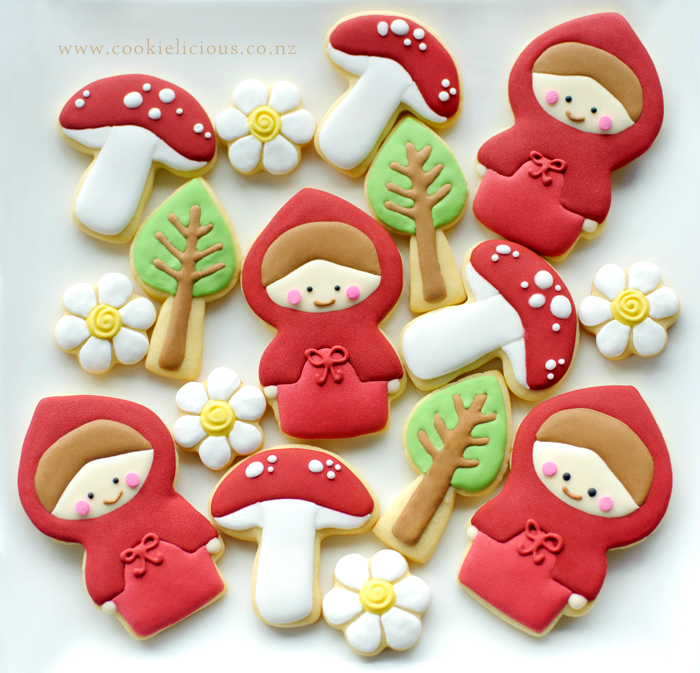 This set is pretty simple to make, but because we don't have a cookie cutter to make Red Ridinghood we had to manually cut the cookie dough with a knife with a simple paper template. I didnt get a chance to take a photo of how to do this but Haniela has posted instructions in her blog on how to do this, if you want to check it out, click HERE. So after we cut out the dough with a paper template the firtst thing we do is mark out the area to decorate with an edible marker. 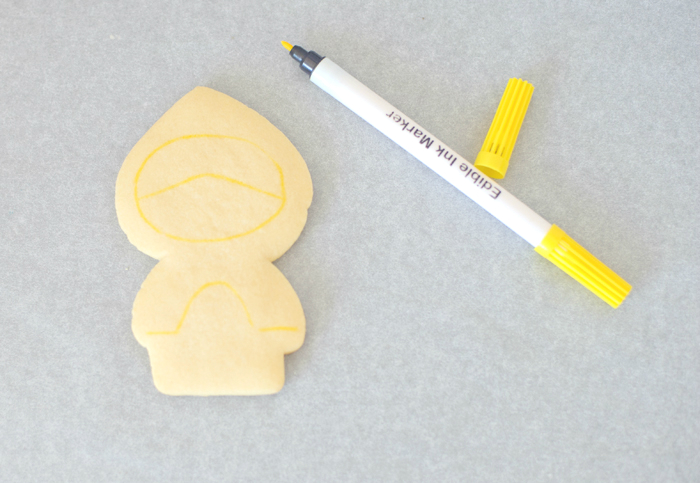 We start with the hair area, fill the area we have marked with a brown icing. We used tip #2 and 20 second icing to do this, mainly because we couldnt be bothered making 2 different consistency icing so 20 second icing works well for things like this. Then we fill the face area also with a 20 seconds cream colour icing. Let it dry for a few hours. We let it dry overnight to avoid bleeding issues. 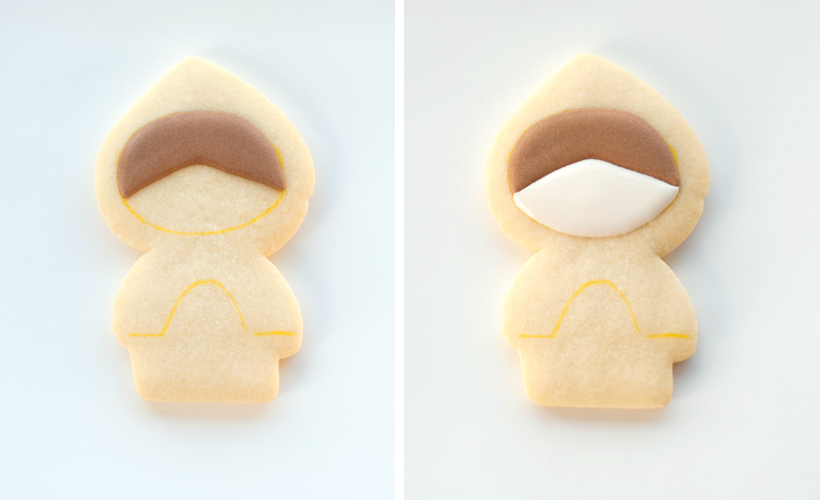 Next step is the hood, outline the area that we are going to fill with red piping consistency icing then fill it with red flood icing. This time we made 2 different consistencies as we want to make sure the outline will act like a dam to hold the flood icing without overflowing. Let it dry for a few hours. we prefer to let it dry overnight specially as red colouring have a tendency to cause bleeding issues. 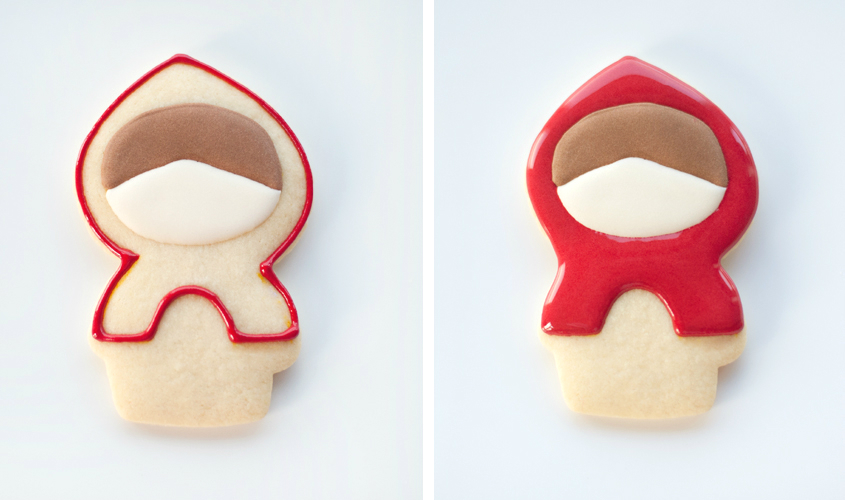 While we are waiting for her red hood to dry we decided its a good time to put her face details. Using Tip #1 we put 2 black dots for her eyes and also with tip #1 we piped a brown icing for her mouth. Then we put a couple of pink round sprinkles in her cheeks. Next step is her dress, we wanted a complimenting red colour with the hood so we made a slightly lighter red colour for her dress. Then we fill it with 20 second icing, then let it dry for a few hours. Then all we need to do is put the bow in the middle of her dress and lastly add her hands on both side of her dress using the same cream colour icing that we use for her face. 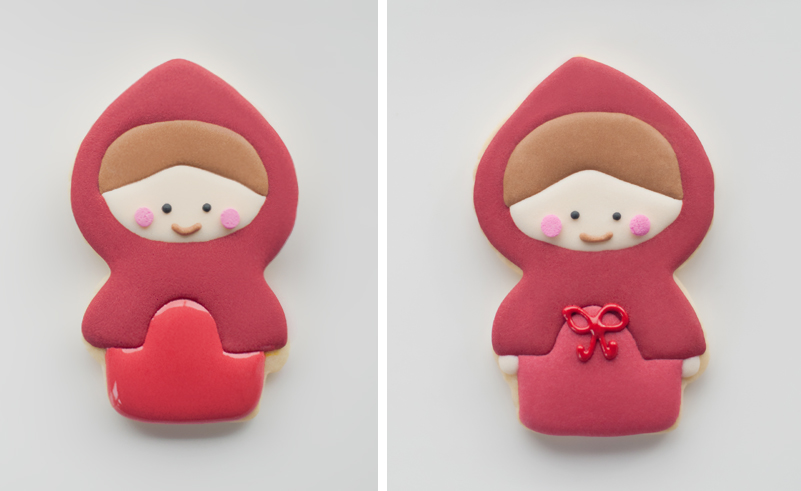 That leaves us with the other pieces for red ridinghood cookie set. Lets start with the mushrooms, just because its my favorite :P They are very simple to decorate, fill the top area of the mushroom with red icing and let it dry overnight. After the red icing dries add random white dots on top of the mushroom, then let it dry. 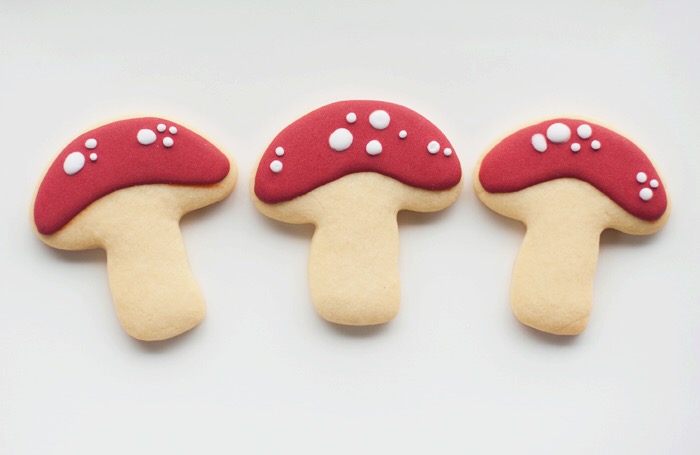 Then add the middle white stem first with 20 second icing and let it dry for a couple hours before adding the side white bits ( i really don't know what we call them). 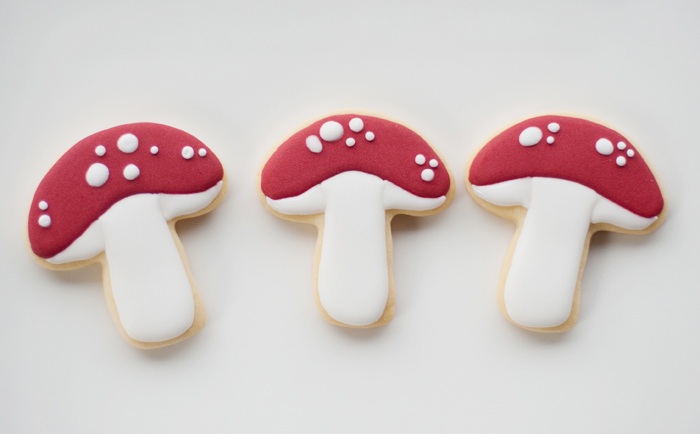 Next we do the trees. We do the branches first using a brown 20 second icing. Let it dry. 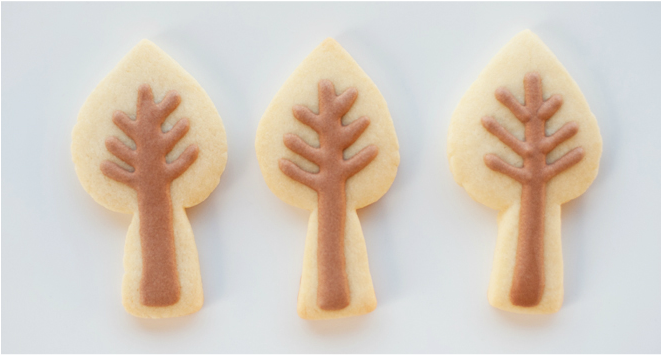 Then we fill the trees with green 20 second icing and let it dry for a few hours. 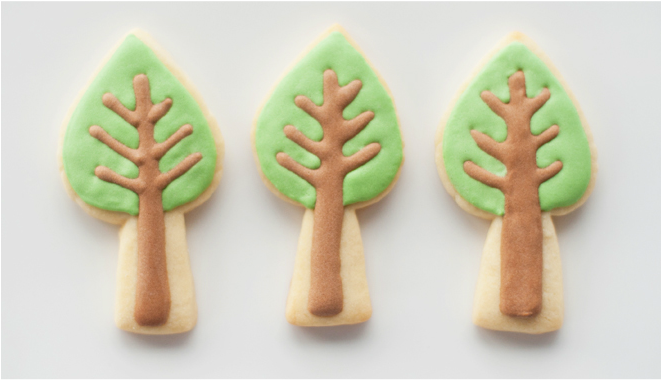 The flowers are very simple, fill the middle of the flower with yellow 20 second icing, let it dry for about an hour or so and then pipe the swirls on top of the yellow icing. Let it dry. 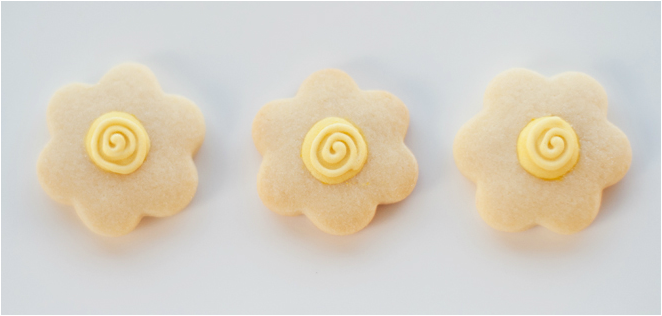 Then fill the petals with white 20 second icing, and let it dry. 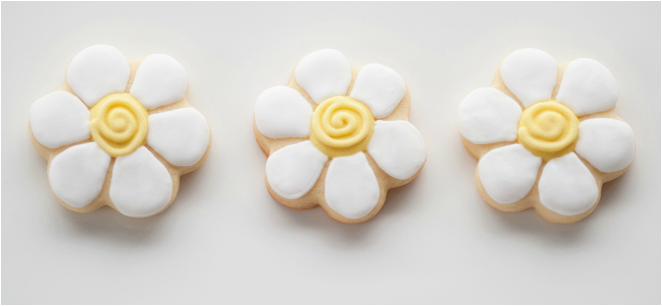 That was all, we had the cookies all ready to go :) 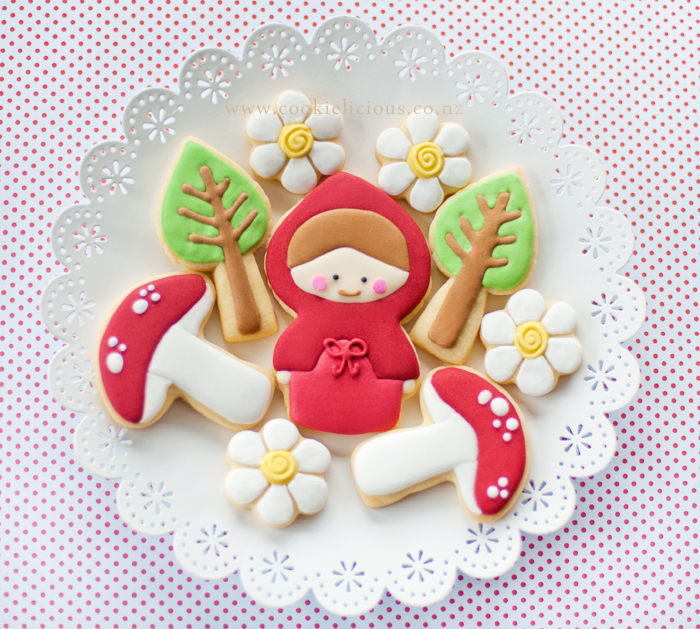 Well I hope you are having a great day, its Friday and the sun is shining...its gonna be a glorious day. Til next time, happy baking! ;-) 
2 Comments
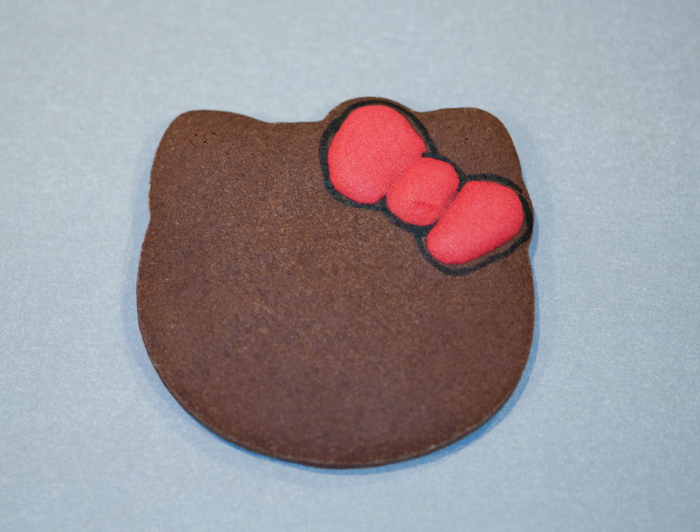
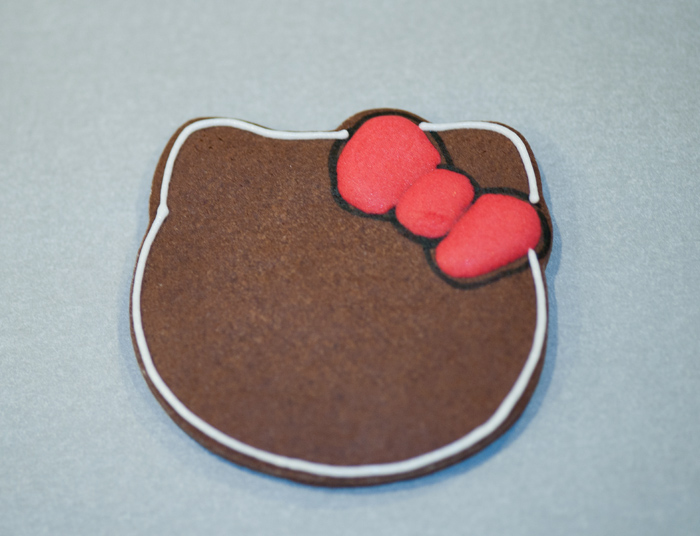
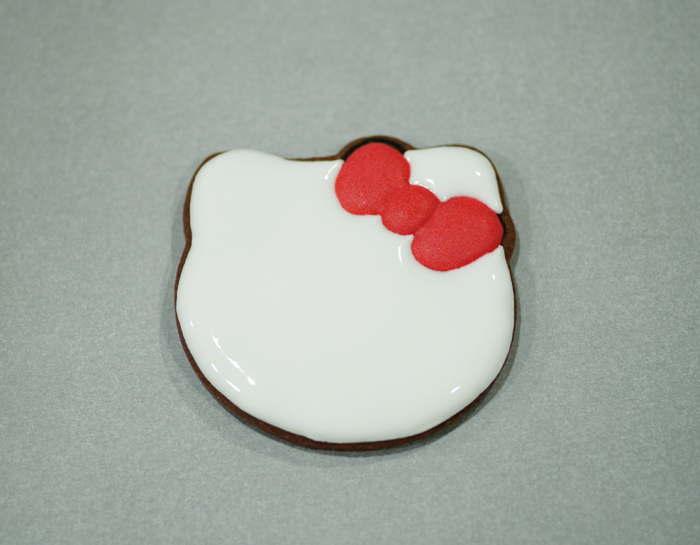
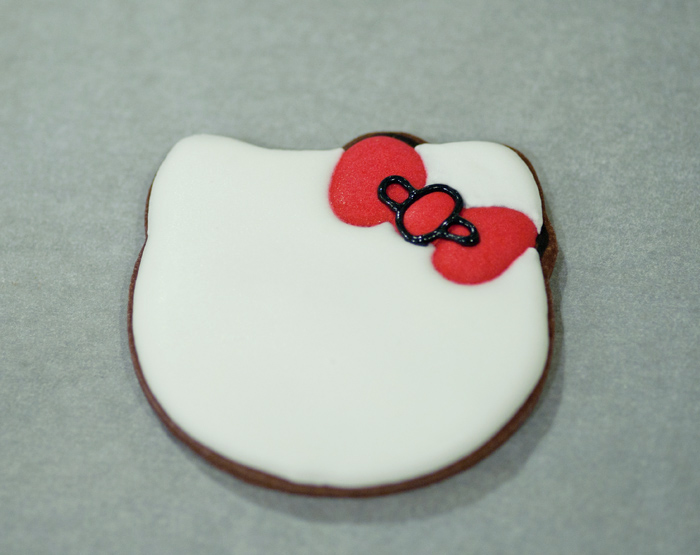
We had a special request from Victor, the owner of Apespresso to make a few ape cookies for the cafe (to match their Apespresso logo) so that people will be able to enjoy yummy cookies with their coffees. This was one of my workmate's idea to put the cookies into the cafe so more people can enjoy them :) We finished creating them over the weekend and here is what they look like  I'll go thru the step by step details on how to create these cookies, but first I had to plan ahead to make sure that i have the right cutter to make them. So i start with sketching the ape on paper to make sure they can fit into the cookie cutter that i want to use. I also use a tombstone cookie cutter to make the little coffee cups. Here is my rough sketch that i had to plan before baking, you can see Apespresso's card that Victor gave me with their logo so that i can create the cookies to match :) 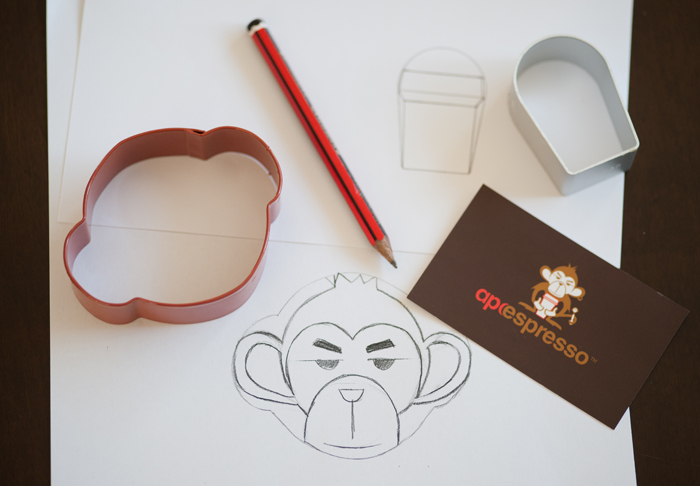 So after the planning session, baking start with a fresh batch of cookies...fresh from the oven :) 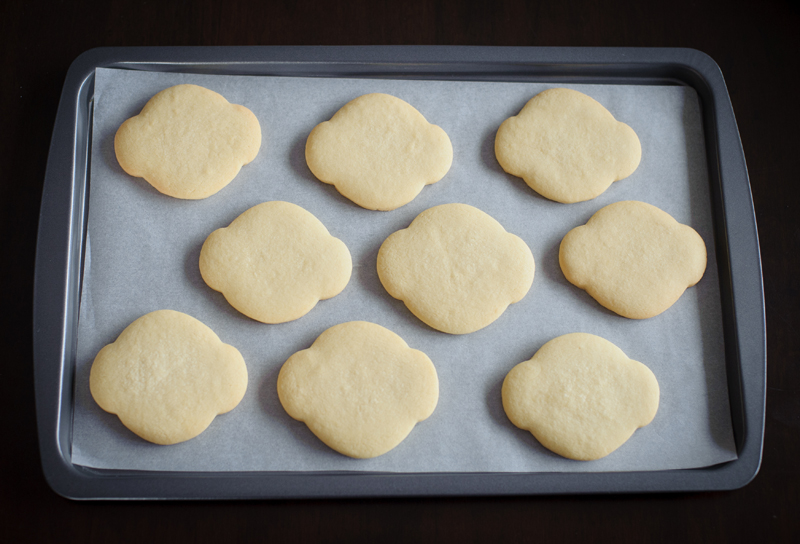 Mark the cookies with edible food markers to make it easier to fill them in with icing 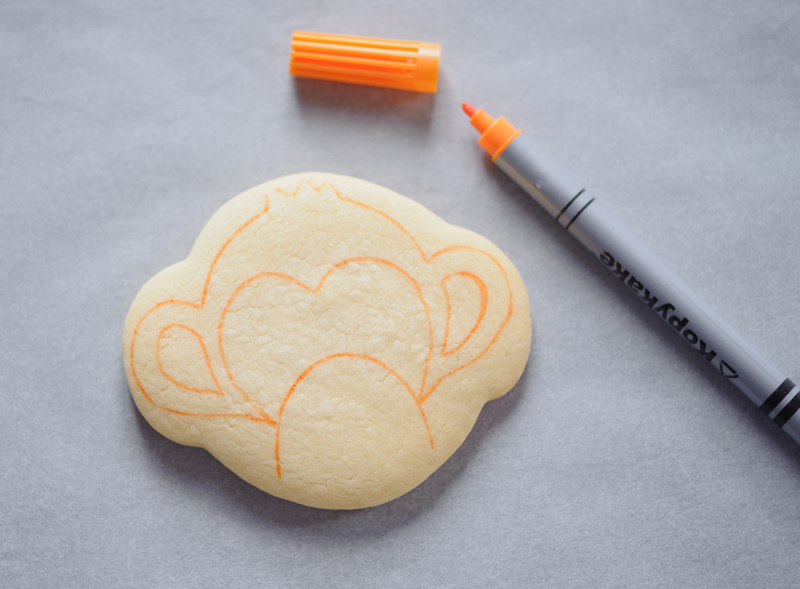 We prepared the icing with the colours we need to make the ape: beown, cream & red. 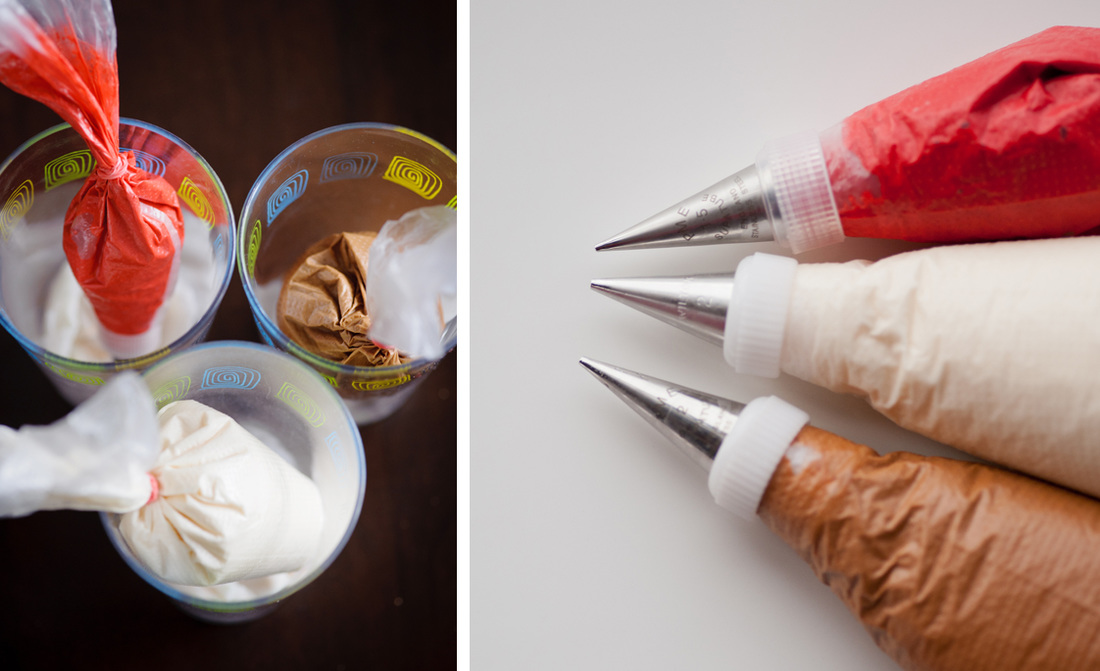 Outline the cookie with piping consistency brown icing before filling in the top part of the monkey (his forhead area) and the side of the ears with brown flooding icing (see picture below). 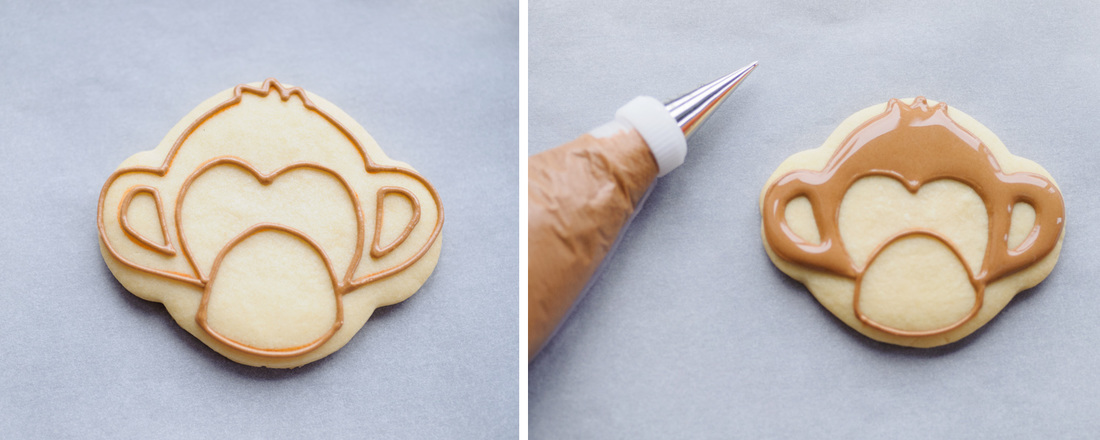 I waited about 1 hour until the brown icing sets a bit, then pipe the cream colour flooding icing into the face, ears and his nose area. Leave the cream colour icing to dry at least 4 hours (we left it overnight to dry coz we want to make sure there wont be any colour bleed). When the cream colour icing is completely dry, pipe the face details starting with the nose and mouth. 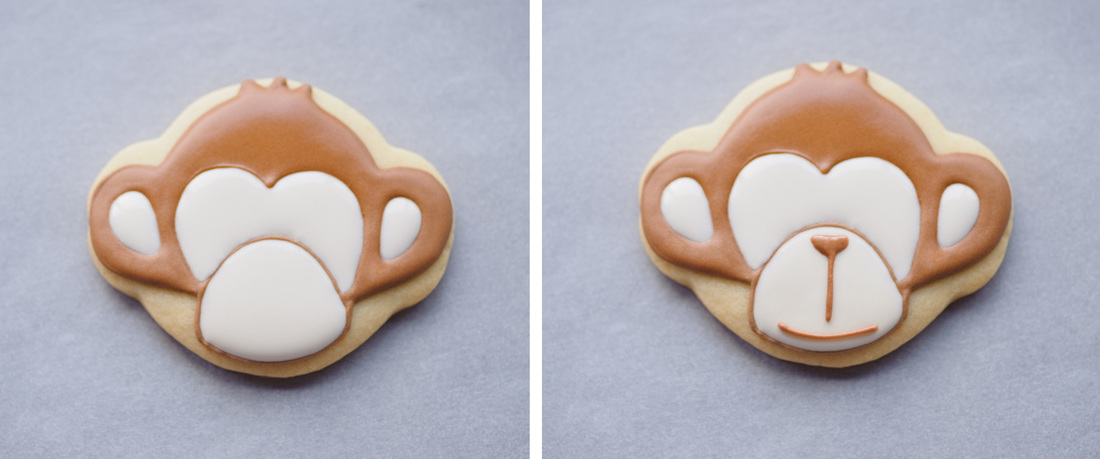 Continue to add the rest of the details on the face, add the eyes & eyebrows. 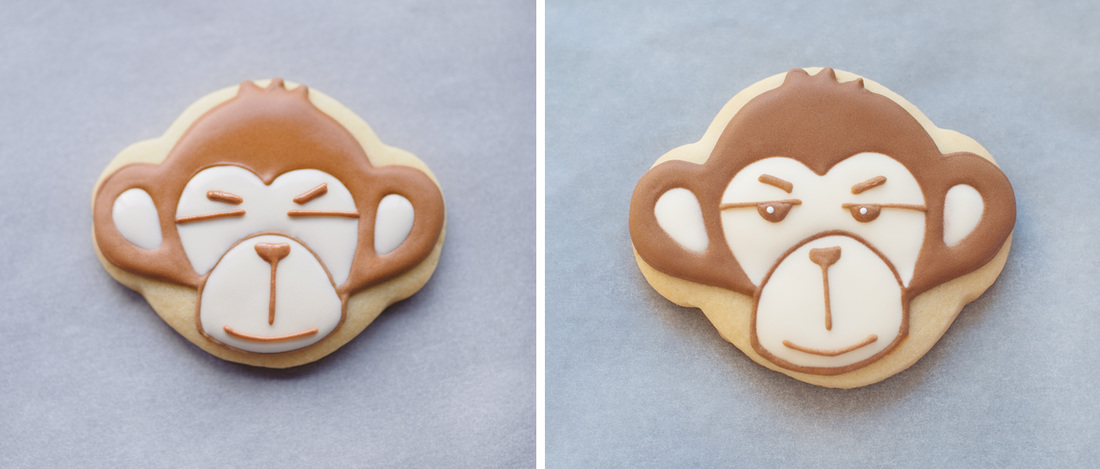 Ape cookies all done....so now we move on to decorating the little coffee cups... 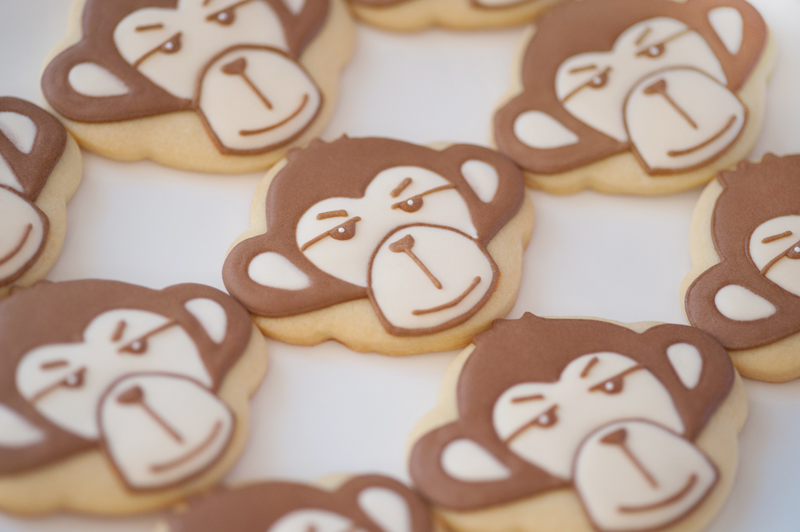 With a tombstone cutter we snip the top part to make the little coffee cups Star by outlining the coffee cups with piping consistency & then fill with flooding consistency of the same colour icing, then leave the icing to dry. 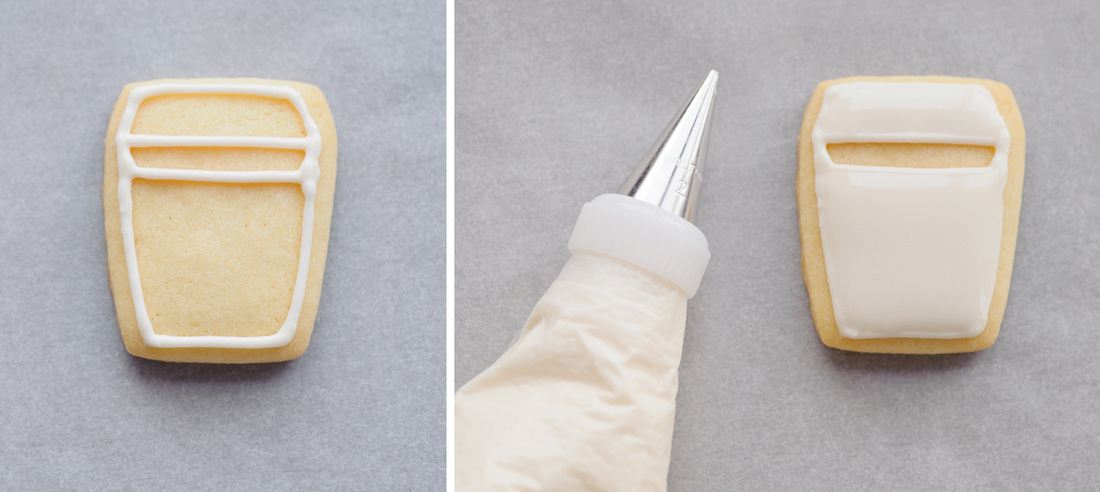 The fill the middle gap with flood icing and leave the icing to dry. Then finish it off with outlining the cookies with red piping icing. 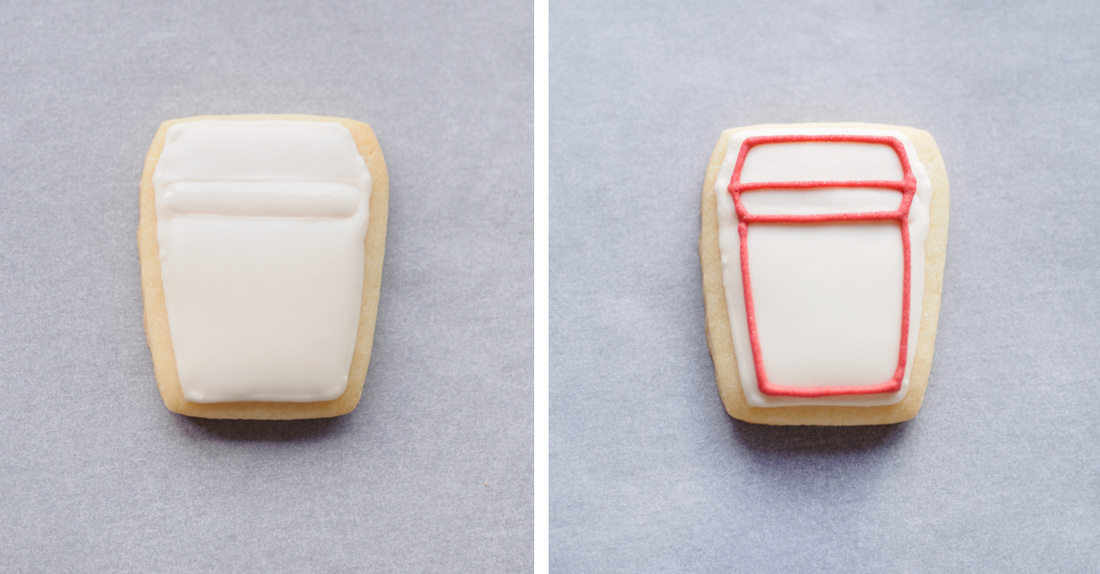 Coffee cups cookies are all done :) 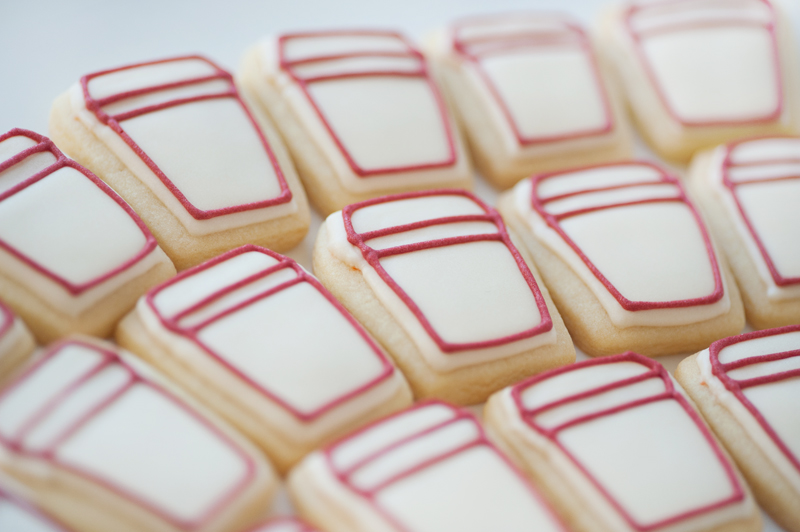 We wrapped them together in an individual cellophane bag so they will stay fresh longer. 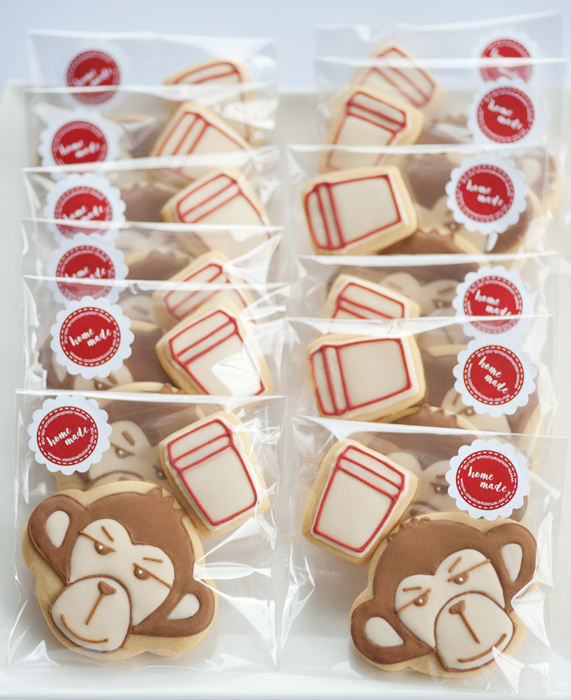 We really hope people will grab them along with their daily coffee fix :)  I have a couple of workmates who has little girls that loves Peppa Pig, so we decided to try making Peppa Pig cookies, they seems pretty simple to make :) Here are the Peppa Pig cookie platter that we created for Ruby & Maggie:) 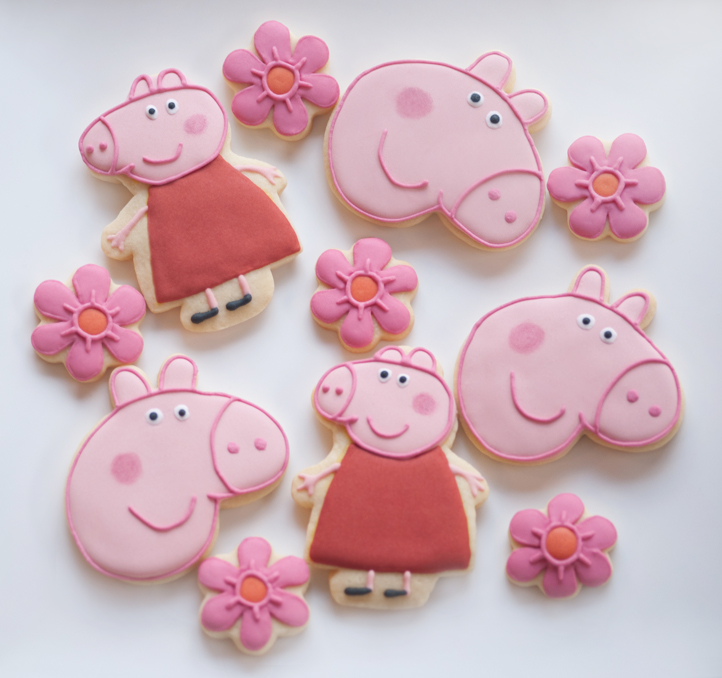 When we were planning on making these cookies, I found a Peppa Pig face cookie cutter online, but i couldn't find the cutter for Peppa Pig with the whole body, so we had to create a paper template from a picture of Peppa Pig. We traced the picture and ended up with this template 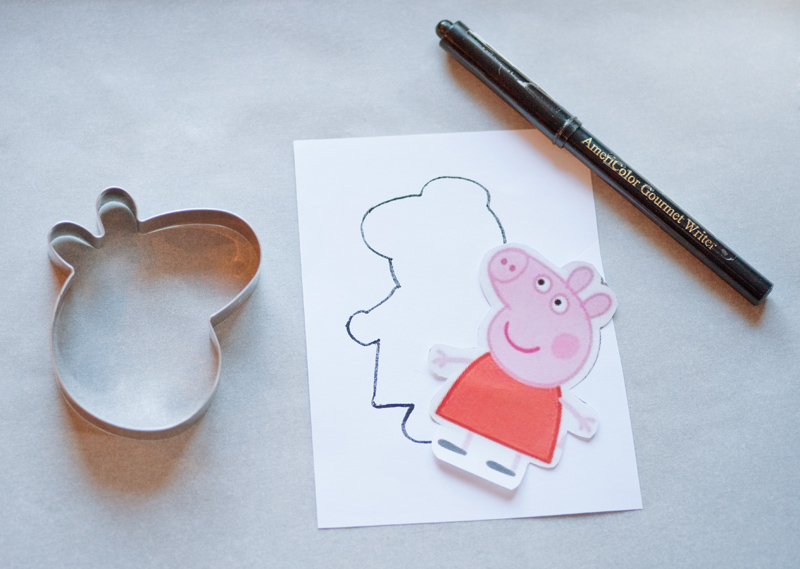 These are the cookies after they were cooled-off, and we marked the areas where for Peppa's face and dress so make it easier to decorate. 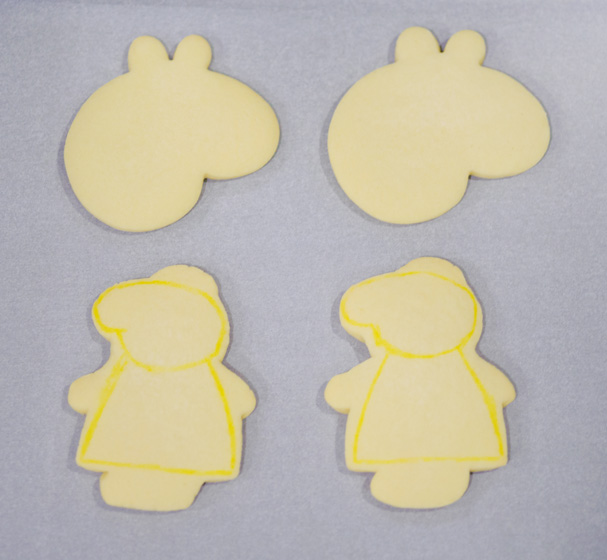 Here is the step by step visual of how to decorate Peppa Pig: Step 1: Outline and fill Peppa's face with pink icing, let the icing dry for at least 1 hour. Step 2: Outline and fill Peppa's dress with reddish orange icing, let the icing dry for a few hours.  Step 3: Add Peppa's legs and arms with pink icing, let it dry for at least an hour. Step 4: Add Peppa's shoes with black icing 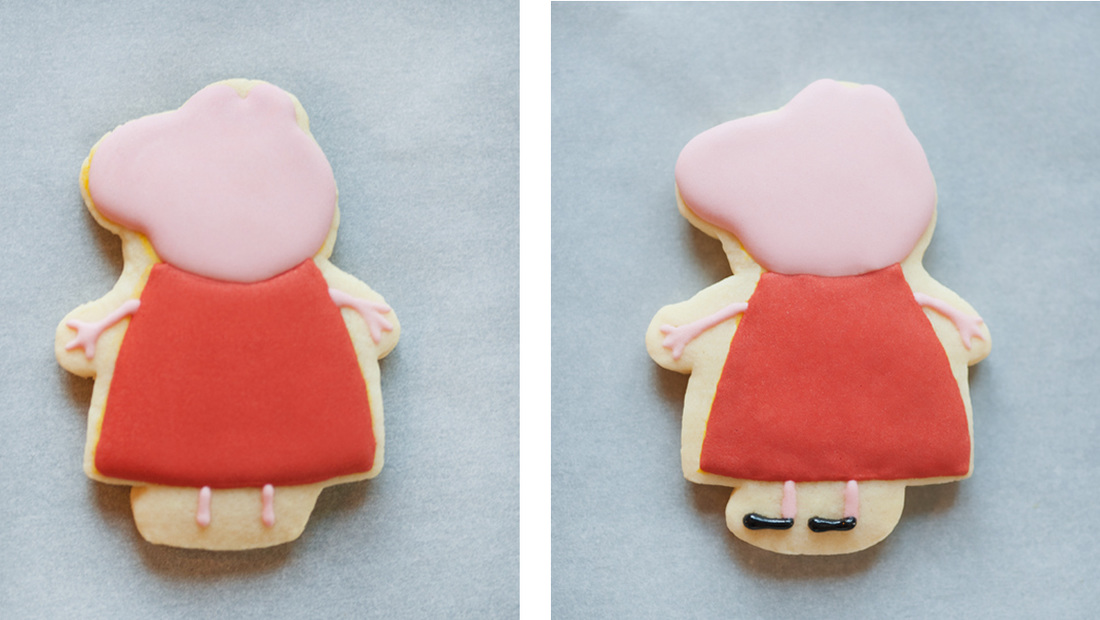 Step 5: Outline Peppa's face with dark pink icing and add her nose at the same time Step 6: Add Peppa's eyes and smiley lips 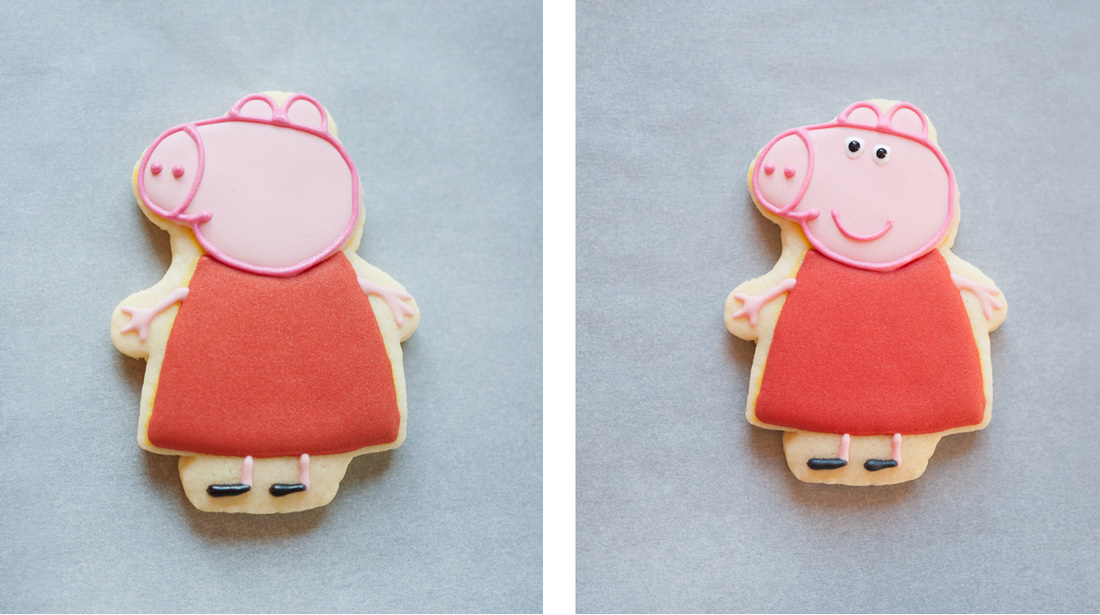 Step 7: Lastly, add a blush into Peppa's cheek with a pink lustre dust :) 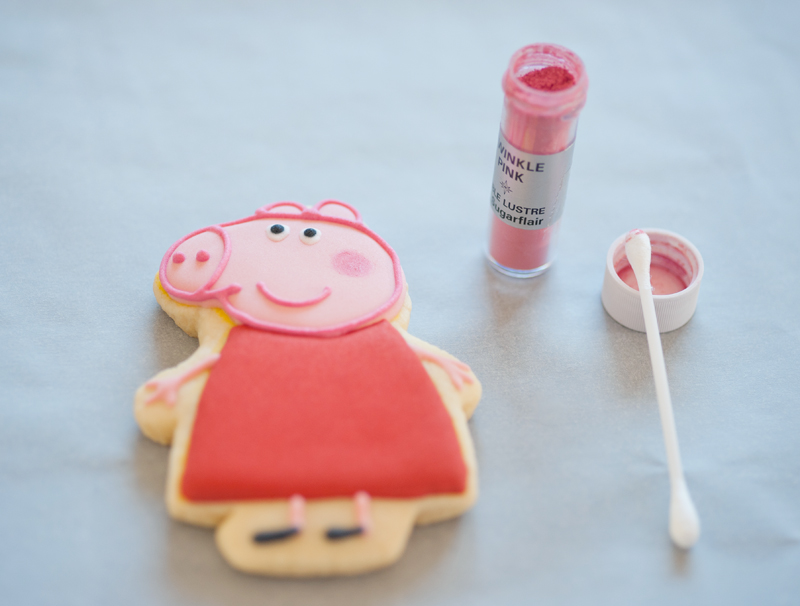 Next we decorate the cookies in Peppa's face shape only, its very simple and pretty much the same steps as above without Peppa's body. Start with outlining her face with light pink piping icing and fill with the same colour flooding icing. Let the icing dry for a few hours (preferably overnight).  Then add the outline of Peppa's face with a darker pink icing, then start adding the details of Peppa's face such as: nose, lips, and eyes. 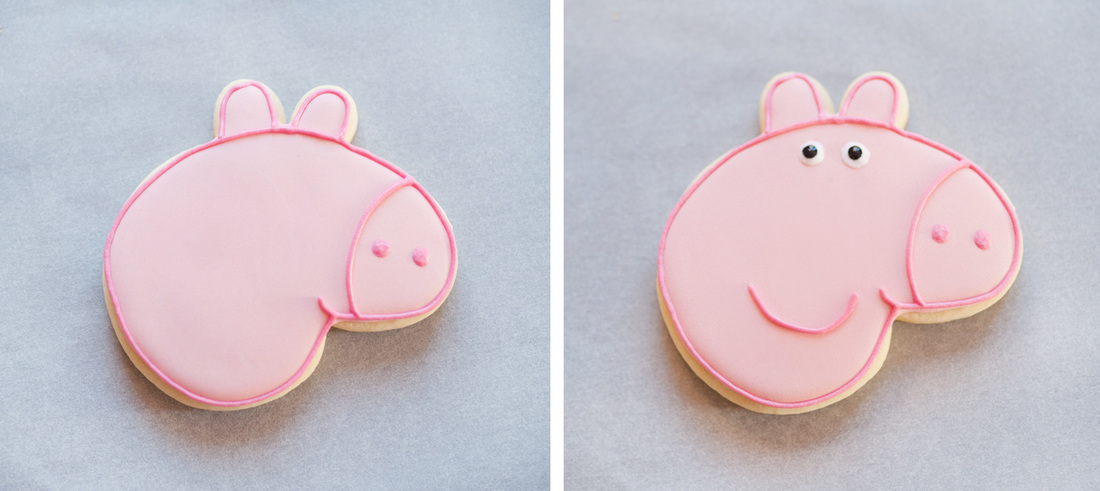 Lastly, give Peppa's cheek a blush with a pink lustre dust just like what we did with the other Peppa cookies. 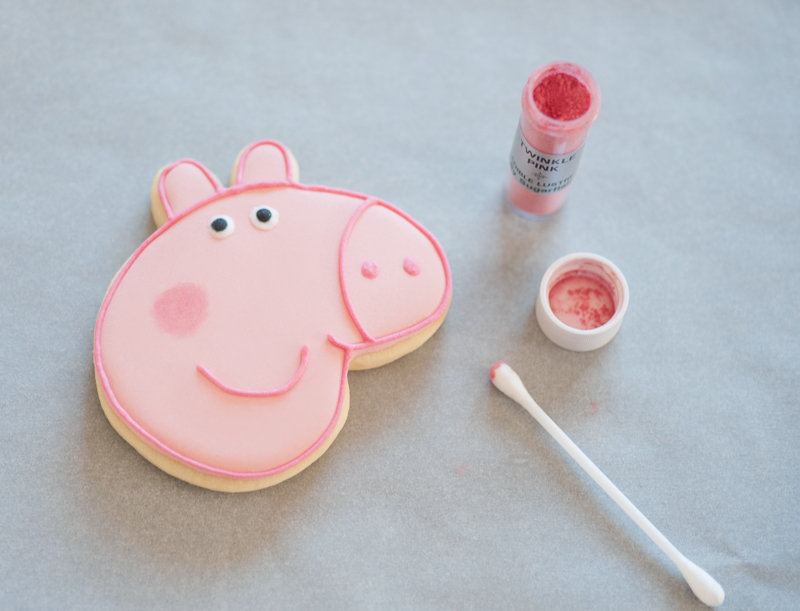 There you go, the step by step of how to make Peppa Pig Cookies :) And here is the gift box ready to go 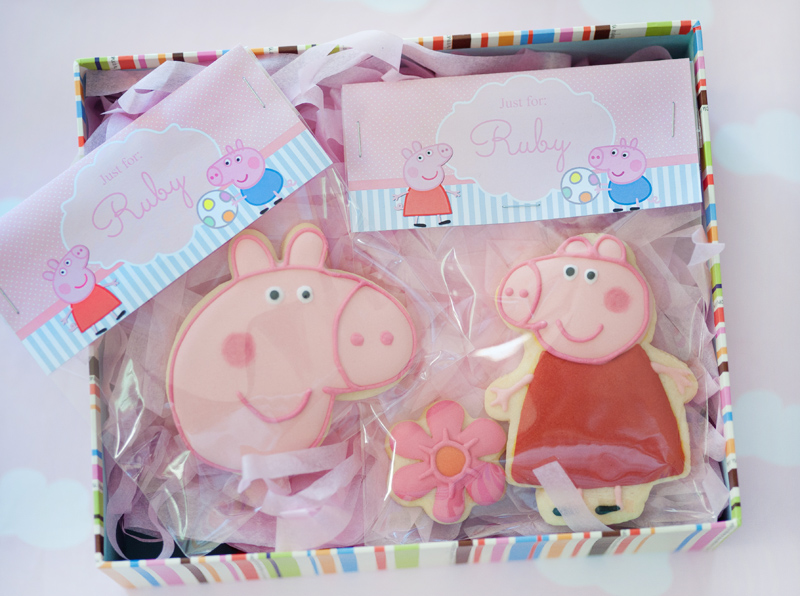 Hope everyone is having a great week ;-)  A friend of mine shared an article in Facebook about a Hello Kitty Diner opening up in Australia, and when i saw the picture of Hello Kitty i remembered that we got given a Hello Kitty cookie cutter a whole back....i figured its time to dig it out and make Hello Kitty cookies :) This time we also want to try making a chocolate cookies instead of our usual plain sugar cookies. We found a great recipe from LilaLoa that we decided to try out. Here is the result of our Hello Kitty baking session...so cute right??!! I just love Hello Kitty! ;) 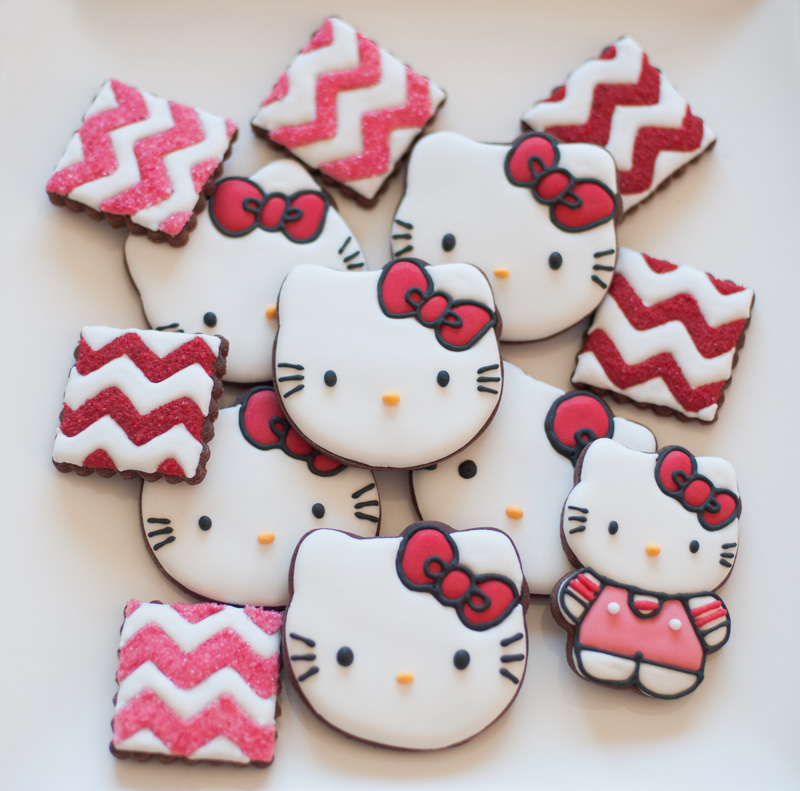 So here is the baking and decorating process...if you read LilaLoa's chocolate cookies recipe its pretty easy to follow and she also provided the step by step instructions in her website. A good friend of mine gave these cute Hello Kitty cookie cutter last year, it was a gift she brought back from her trip to the US. Glad that we can now made a full use of it :) 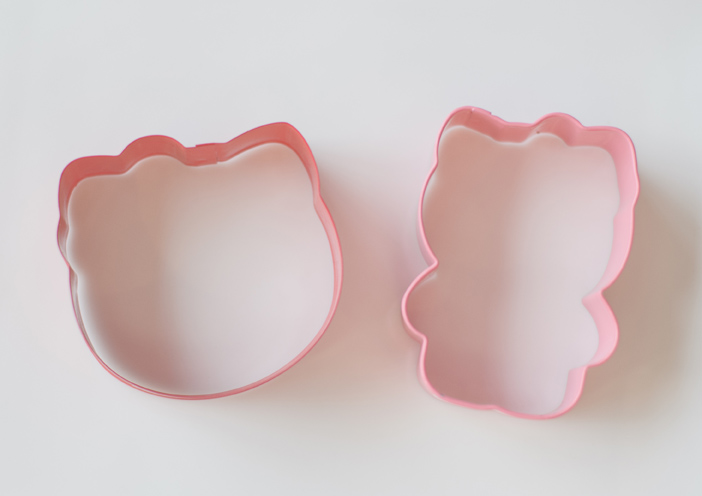 So we made the dough and we use the cookie cutter to cut into shape. These are what the cookies look like, after they came out of the oven and have been chilled. 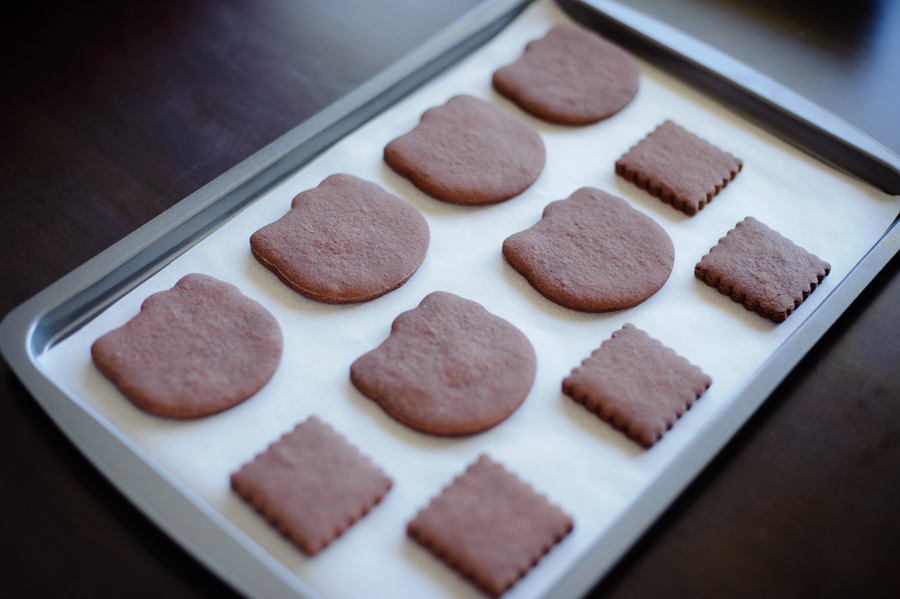 Outlined the rest of the bow with black piping icing and let it dry. 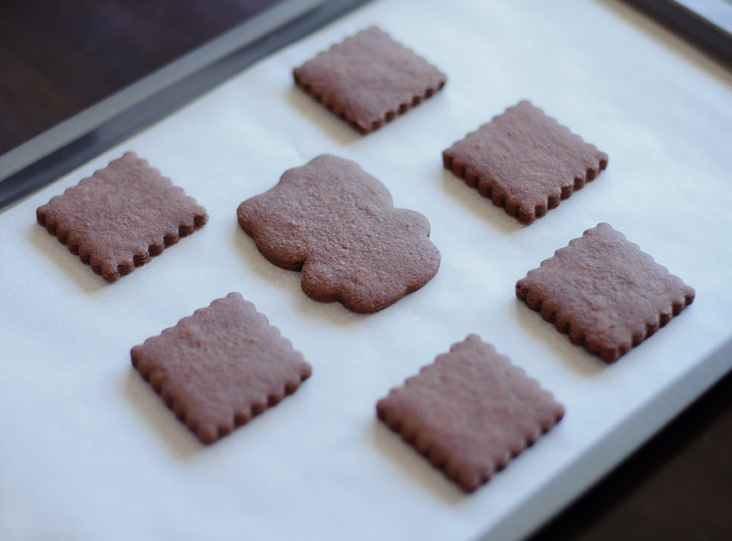 Unfortunately we only have enough dough to make one full body Hello Kitty....next time we must rationed the dough properly so we get the same amount of each shape :) This is what the full body Hello Kitty looks like.... We left it to cool down for a few hours before starting the decorating process. Firstly, we outlined the area where we want to put the bow with a food marker. Note to self: next time use a different colour food marker so that it wont show up so much. Using a red piping icing, we piped the middle part of the bow first and leave it for 30 mins ot so until its a bit dry before putting the rest of the bow to give it some dimension. We let the red bow to dry for a few hours. If you have colour bleed problem then i would leave it for longer (overnight if necessary). Then use the white piping consistency icing to outline the face. The next step is to use white flooding icing to fill the rest of the face, then let it dry for a few hours. When the white icing is completely dry, start outlining the middle of the bow with black piping icing. 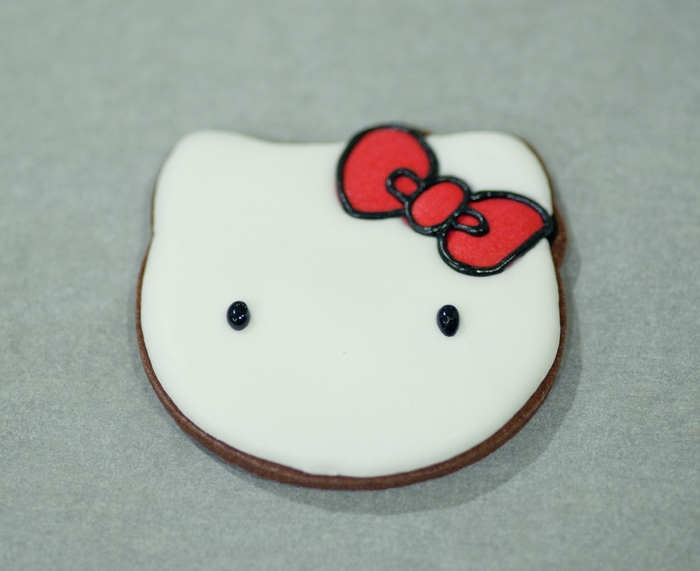 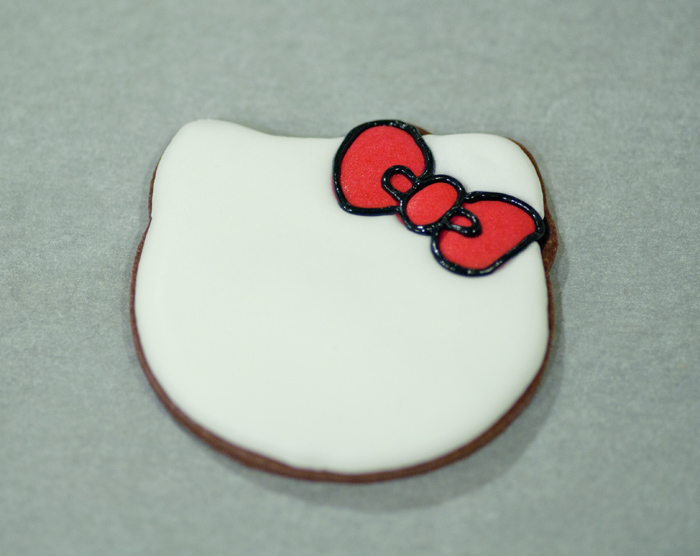 Then start adding the face features by piping a black icing to make the eyes and the whiskers and lastly finish it off by piping a yellow icing for the nose.  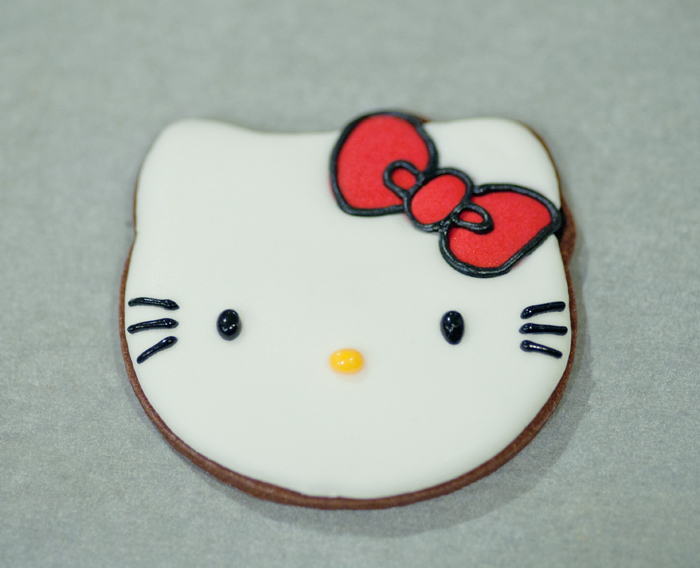 Here is a close-up of all the Hello Kitty heads when they were all done :) 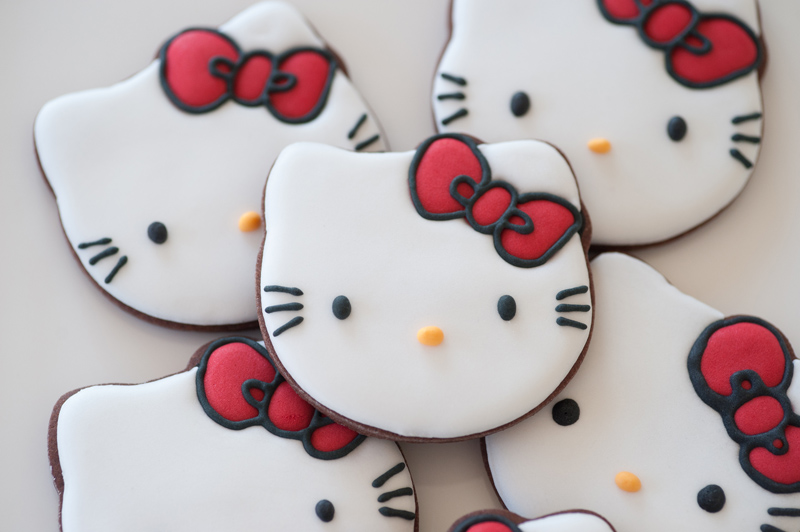 Next is the full body Hello Kitty, i forgot to take a photo of the actual step by step decorating process but its pretty much the same with the steps we did for the face above. With edible marker we mark the areas for the bow, the body, arms and legs. The just like the steps above we made the bow first and then fill the face and then some parts of the body (arms, neck and legs) with white icing. Here is what it looks like half way thru decorating... 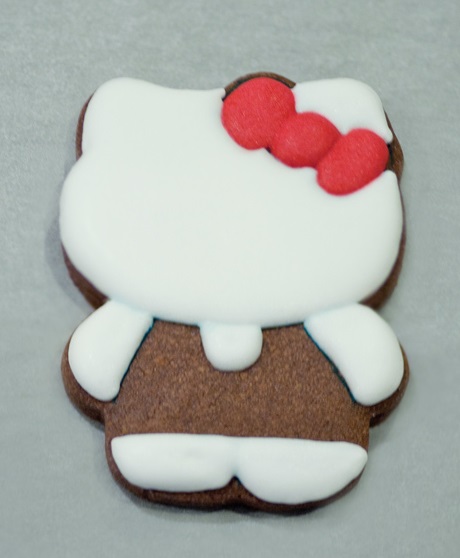 Oh i forgot to mention that we always like having some accent cookies to accompany our main cookies, so in this case we made square chevron cookies to put in the gift bag, you can also see them in the finished result of the Hello Kitty platter at the beginning of this post. Then outline the bow with black icing, add the face details and fill in the clothes with pink icing (or whatever colour you want her clothes to be). When the icing dries, outline the rest of her body with black icing and add the little details, such as the red stripes on her arms and the little white buttons on her clothes. And that was it....all done :)  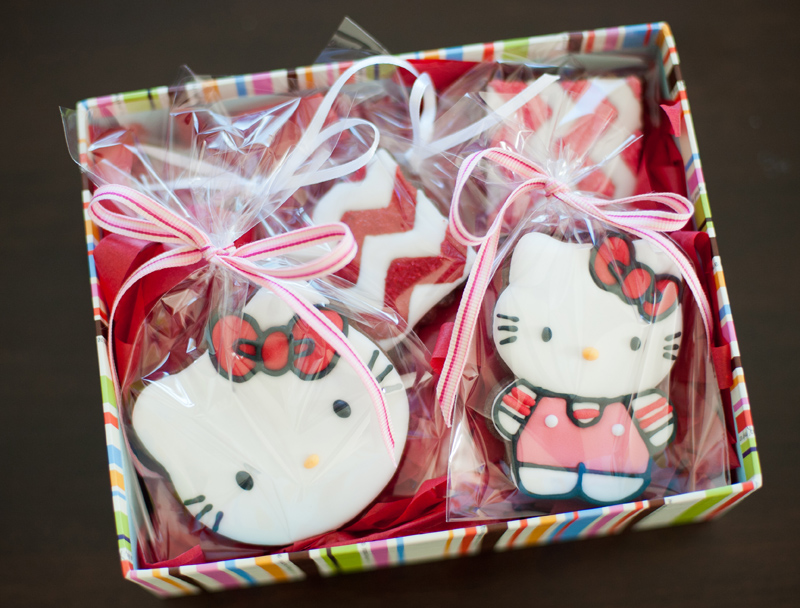 Sealed the gift box with bows and little homemade tags and they are good to go! Taadaa....!! :) 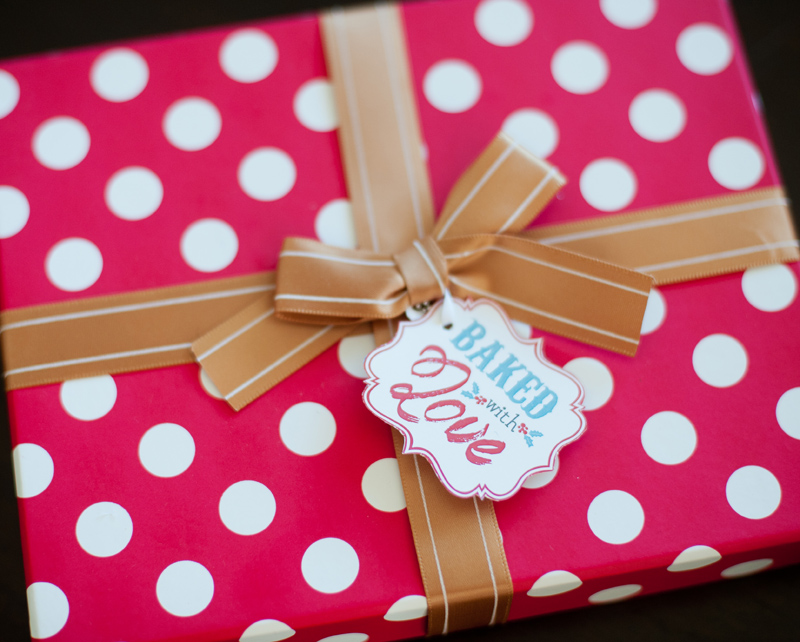 Hope you are having an enjoyable day :)  |
About MeCookie Artist & Content Creator, who loves spreading the cookie love. 

Archives
February 2020
Categories
All
|
 RSS Feed