
|
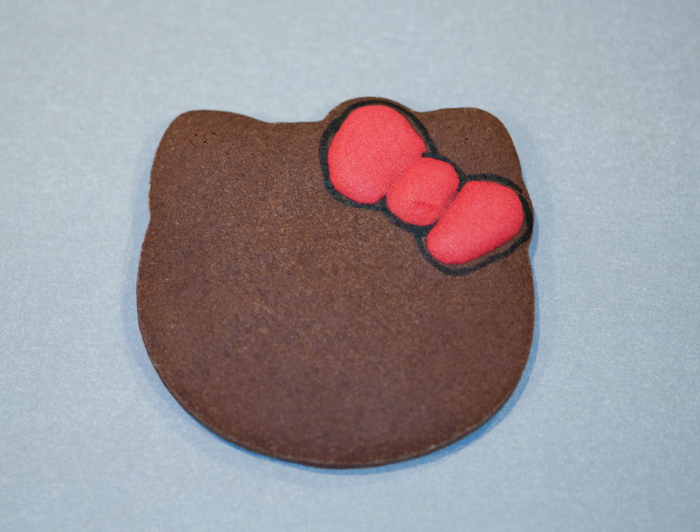
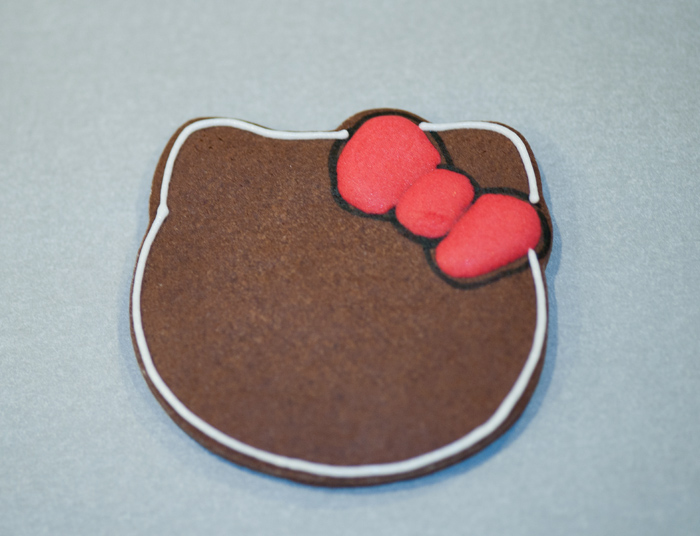
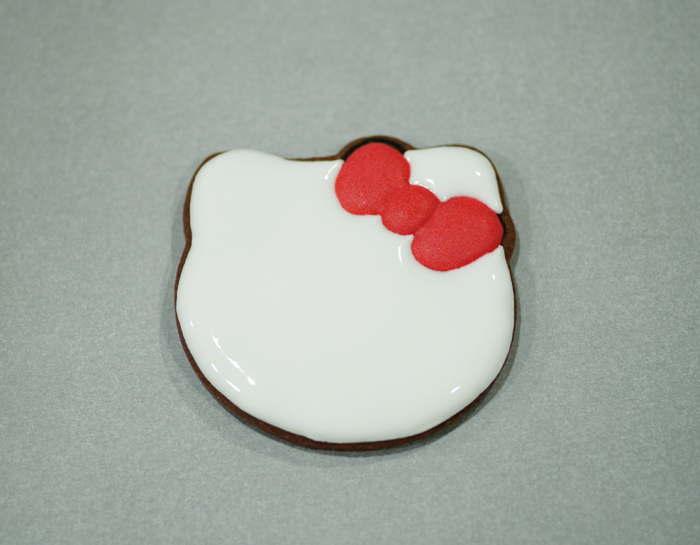
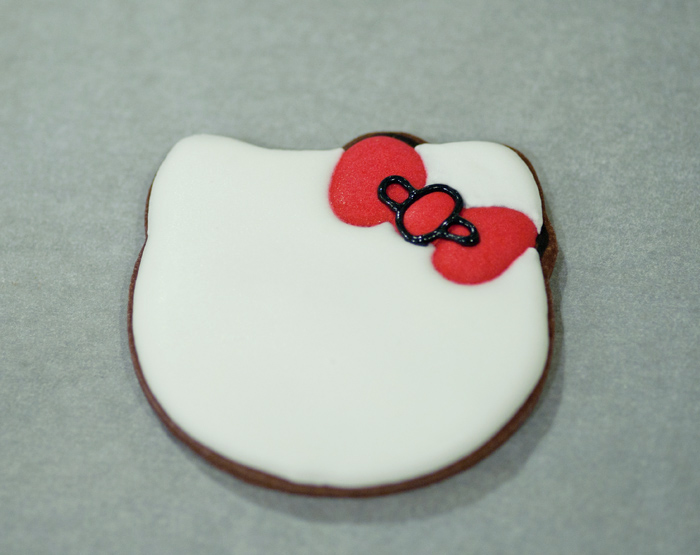
A friend of mine shared an article in Facebook about a Hello Kitty Diner opening up in Australia, and when i saw the picture of Hello Kitty i remembered that we got given a Hello Kitty cookie cutter a whole back....i figured its time to dig it out and make Hello Kitty cookies :) This time we also want to try making a chocolate cookies instead of our usual plain sugar cookies. We found a great recipe from LilaLoa that we decided to try out. Here is the result of our Hello Kitty baking session...so cute right??!! I just love Hello Kitty! ;) 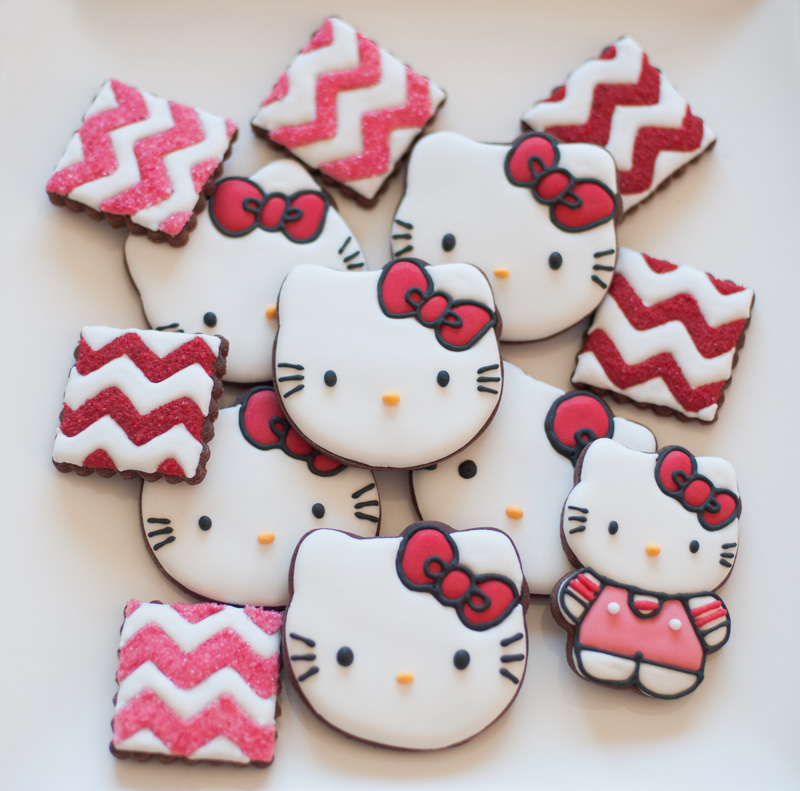 So here is the baking and decorating process...if you read LilaLoa's chocolate cookies recipe its pretty easy to follow and she also provided the step by step instructions in her website. A good friend of mine gave these cute Hello Kitty cookie cutter last year, it was a gift she brought back from her trip to the US. Glad that we can now made a full use of it :) 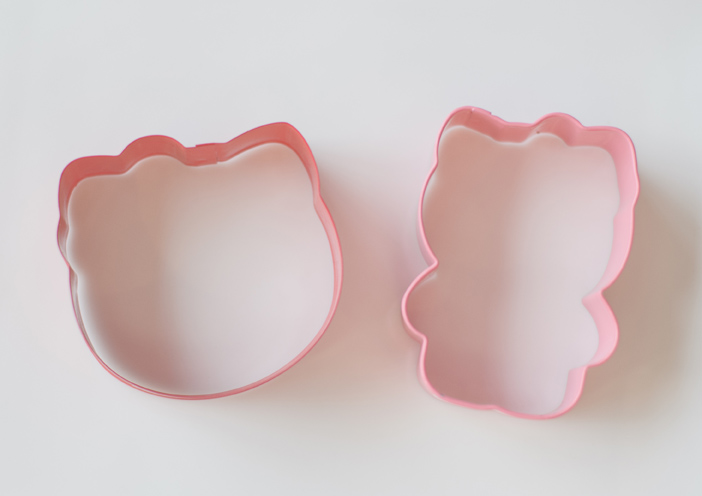 So we made the dough and we use the cookie cutter to cut into shape. These are what the cookies look like, after they came out of the oven and have been chilled. 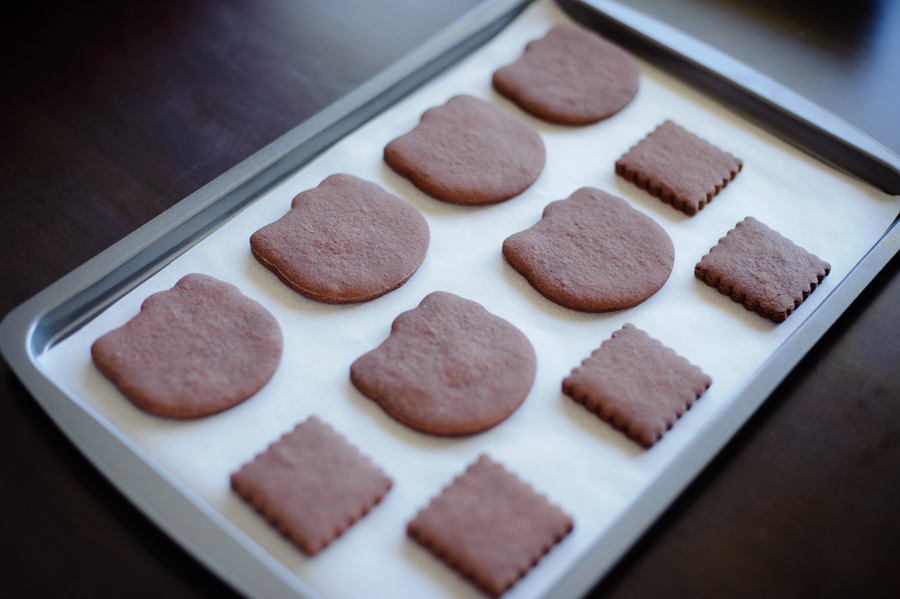 Outlined the rest of the bow with black piping icing and let it dry. 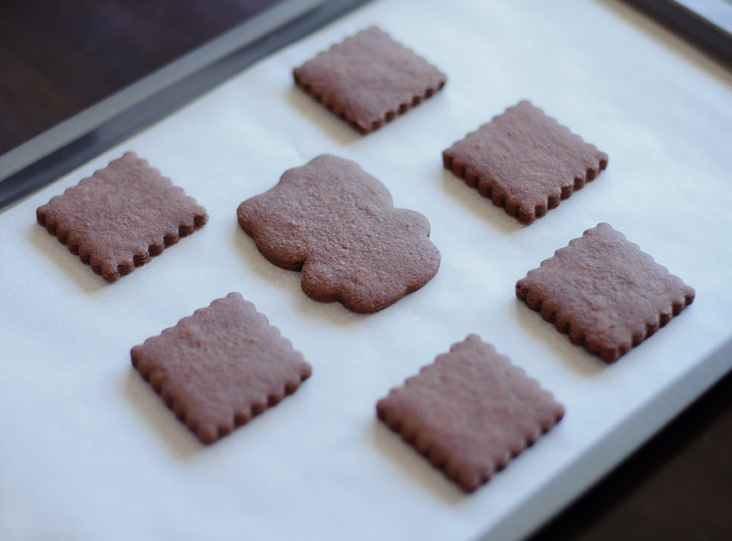 Unfortunately we only have enough dough to make one full body Hello Kitty....next time we must rationed the dough properly so we get the same amount of each shape :) This is what the full body Hello Kitty looks like.... We left it to cool down for a few hours before starting the decorating process. Firstly, we outlined the area where we want to put the bow with a food marker. Note to self: next time use a different colour food marker so that it wont show up so much. Using a red piping icing, we piped the middle part of the bow first and leave it for 30 mins ot so until its a bit dry before putting the rest of the bow to give it some dimension. We let the red bow to dry for a few hours. If you have colour bleed problem then i would leave it for longer (overnight if necessary). Then use the white piping consistency icing to outline the face. The next step is to use white flooding icing to fill the rest of the face, then let it dry for a few hours. When the white icing is completely dry, start outlining the middle of the bow with black piping icing. 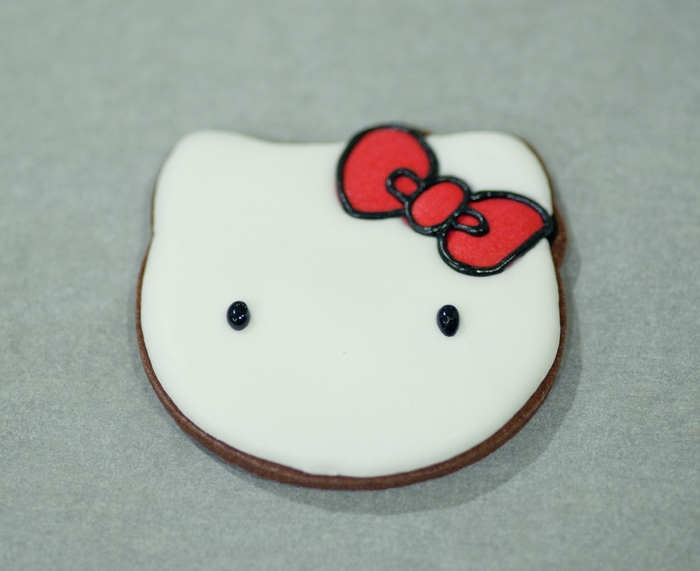 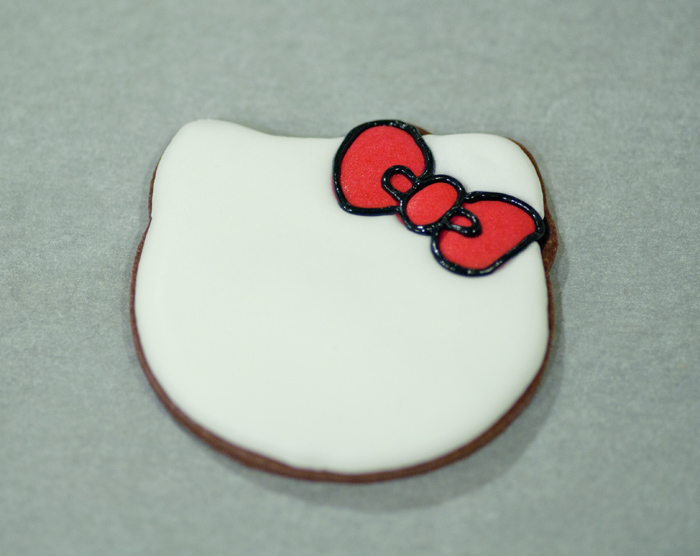 Then start adding the face features by piping a black icing to make the eyes and the whiskers and lastly finish it off by piping a yellow icing for the nose.  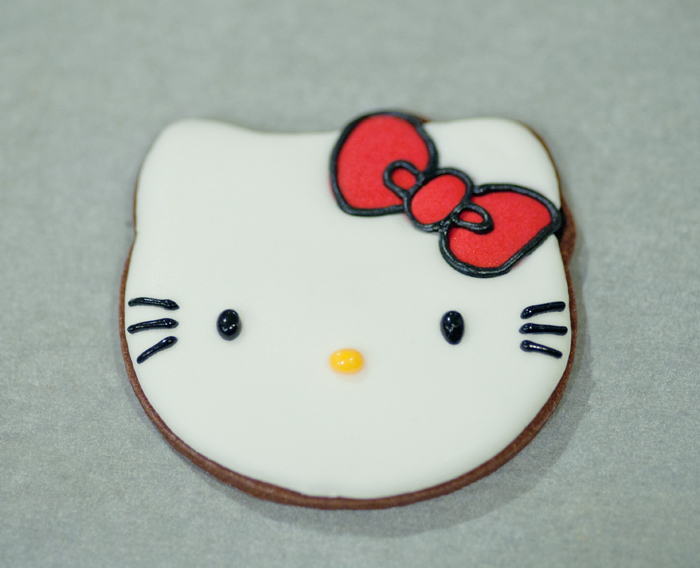 Here is a close-up of all the Hello Kitty heads when they were all done :) 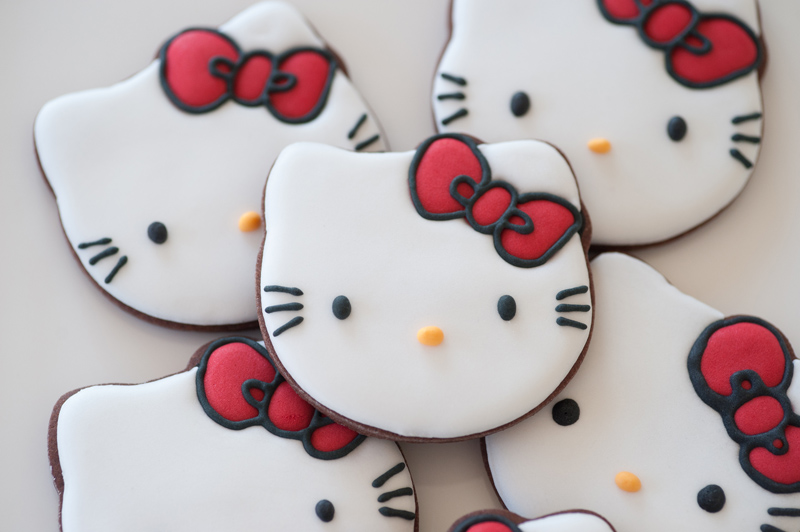 Next is the full body Hello Kitty, i forgot to take a photo of the actual step by step decorating process but its pretty much the same with the steps we did for the face above. With edible marker we mark the areas for the bow, the body, arms and legs. The just like the steps above we made the bow first and then fill the face and then some parts of the body (arms, neck and legs) with white icing. Here is what it looks like half way thru decorating... 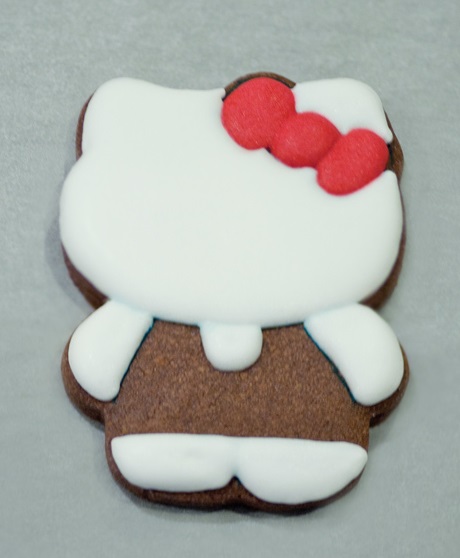 Oh i forgot to mention that we always like having some accent cookies to accompany our main cookies, so in this case we made square chevron cookies to put in the gift bag, you can also see them in the finished result of the Hello Kitty platter at the beginning of this post. Then outline the bow with black icing, add the face details and fill in the clothes with pink icing (or whatever colour you want her clothes to be). When the icing dries, outline the rest of her body with black icing and add the little details, such as the red stripes on her arms and the little white buttons on her clothes. And that was it....all done :)  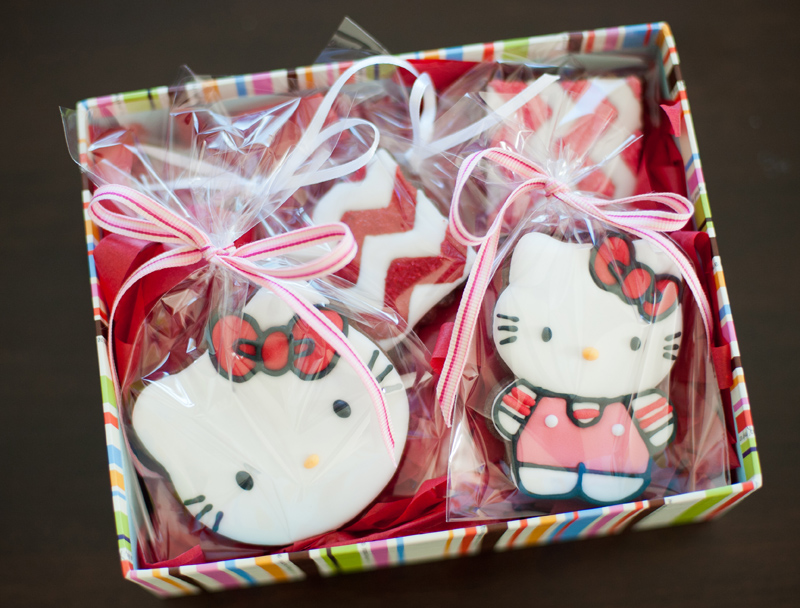 Sealed the gift box with bows and little homemade tags and they are good to go! Taadaa....!! :) 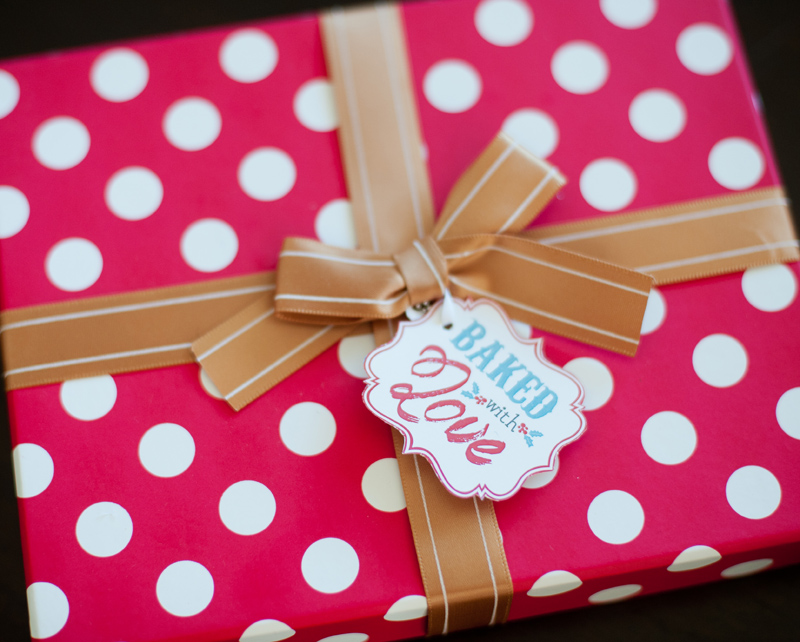 Hope you are having an enjoyable day :) 
3 Comments
i love you blog i think that cookie decorating is defiantly one of your talents. I noticed you haven't made any cookies for your talented daughter i bet she would love them. I love your blog I definitely think you put alot of time and effort on in. Make sure you always have enough cookies for your family as well though I am sure they love them.
Natalia Campbell
28/9/2015 09:20:50 pm
Hi Denise, if you are using similar royal icing recipe like the ones we use in our recipe section the icing you should be able to get a smooth icing if you make it with the right consistency (getting the right consistency is the key to decorate with royal icing). We used mainly Wilton tip#1 & 2 to iced the cookies :) Leave a Reply. |
About MeCookie Artist & Content Creator, who loves spreading the cookie love. 

Archives
February 2020
Categories
All
|
 RSS Feed