|
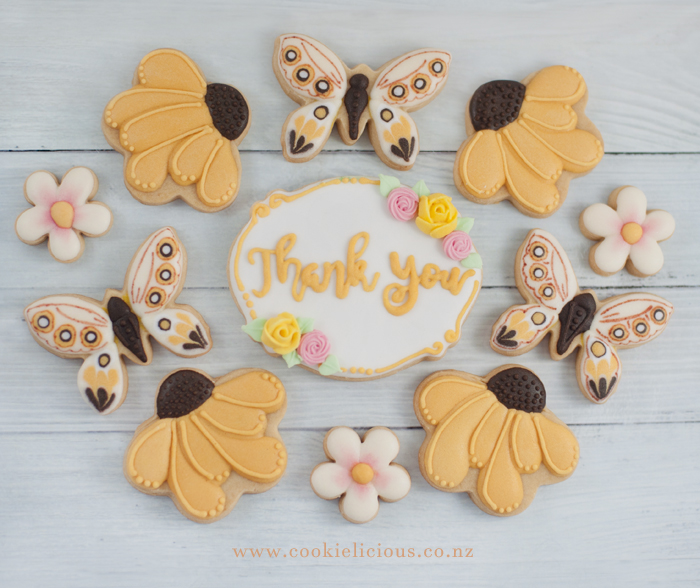
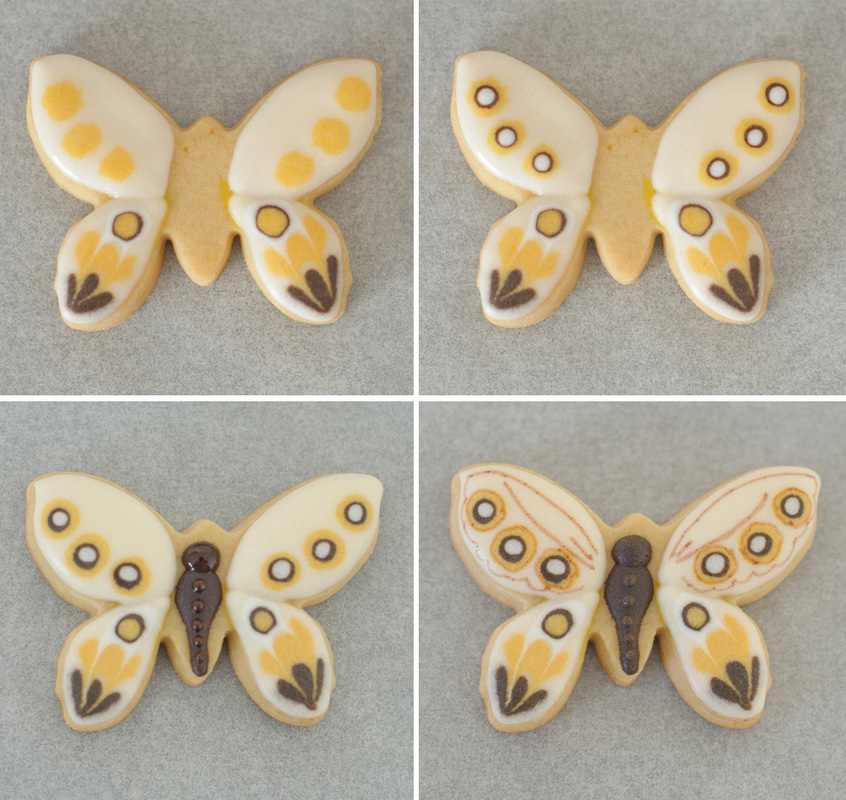
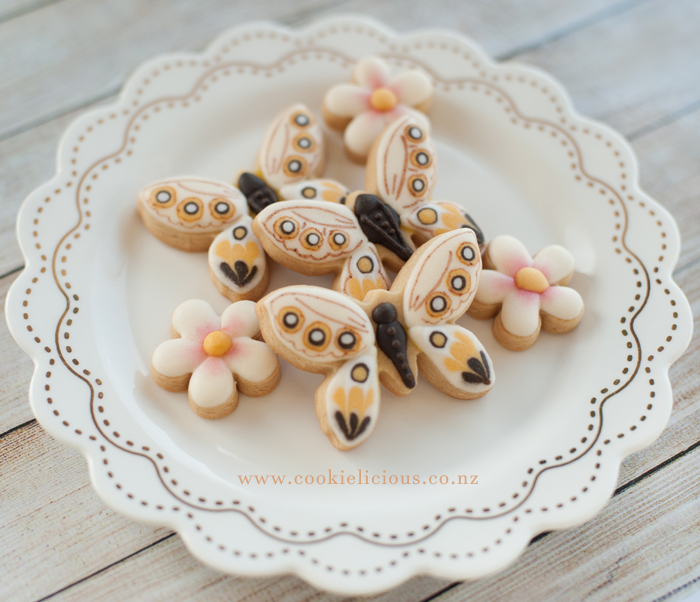
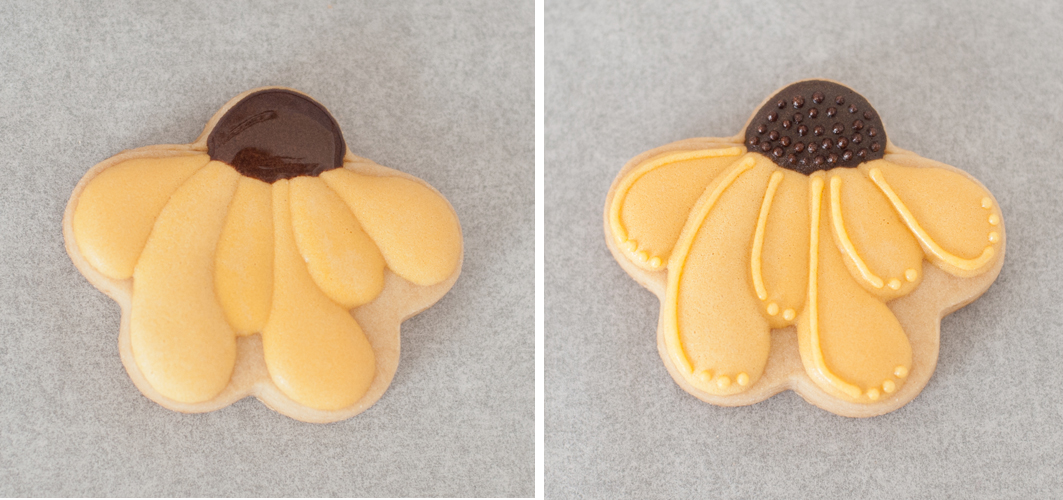
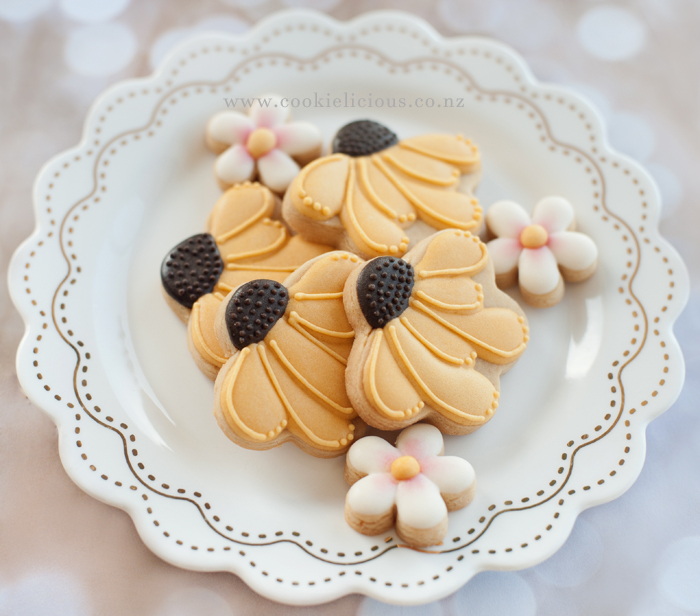
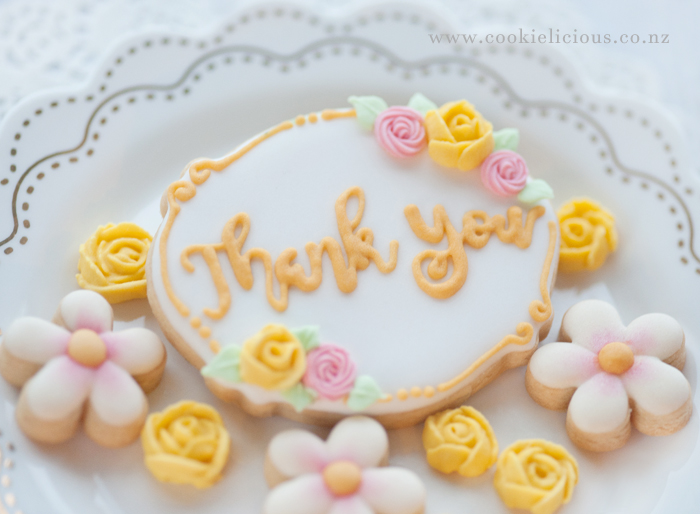
My lovely massage therapist has decided to move out of wellington and i'm so gutted! >.< She has always looked after me really well and everytime i see her (which usually means i'm either in pain or very sore) she always makes me feel better. She is such an amazing lady with a gentle soul and healing hands. So I've decided to make some cookies to show my appreciation to her and to say thank you for being so wonderful. I tried to think of something that she will love and to brighten her day...in the end we've decided these butterflies and half sunflower cookies will be the best for her ;-) Creating these butterflies for her was so much fun, we get to experiment with wet on wet technique and pretty pattern for their wings :) We started with the bottom wings, outline with cream flood icing as per the first picture on the far left. Then fill each section with different colours, we choose earth colours for these butterflies, we add brown for the bottom section, yellow for the middle and white for the top section - see the middle picture below Then take your scribe tool (or toothpicks if you dont have a scribe tool) and drag it along from the top to the bottom of the wet icing. While the icing is still wet add a dot of brown icing on the white section of the bottom wing and white the brown icing is still wet add another dot of yellow on top - see the 3rd picture. After we finished with the bottom wings then we do the upper wings, flood the upper area with cream flood icing. Then while its still wet add 3 yellow dots along the side of the wings. While the yellow icing is still wet add the dark brown and white on top - see the second picture. Let this dry completely The next step is to add the middle body of the butterfly. With medium consistency brown icing pipe along the body and the head of the butterfly - see the bottom row of pictures below. The last step is to create lines in the top wings, use brown edible pen to draw lines along the inner wings. Here are a closer look at the butterflies together :) For the sunflower, we had to do a bit of frankencookie-ing as we don't have the cookie cutter for it, so we had to cut the dough using a normal flower cutter, cut it in half and re-attach the top bulb. You can see from the photo below there is a line on the top of the cookie where we had to cut and re-attached (where we did the frankencookie) :P I totally forgot to take a photo of the cookie dough when we were cutting it so I'm showing you how to cut it with paper....its the same way as you do with cookie dough, the only difference is you cut the dough with a sharp knife instead of using scissors:) Okay so once the dough is baked, we start with the petals. I wanted multiple petals with varying length so i marked it with an edible pen and then piped the petals alternatively with medium consistency yellow icing (or 20 second icing) and let it dry - see picture below. Once that is done, add brown medium consistency consistency icing (or 20 second icing) for the flower bulb. And lastly add the details of the petals and add little dots on the bulb - see picture below. Here is a closer look at the hlaf sunflowers together :) Of course we also took a close-up picture of the thank you cookie, i love the yellow roses that we made to decorate these plaque shape cookie :) I just gave these cookies to my amazing therapist today when we said our goodbyes, i hope she will enjoy the cookies. Thank you so much for taking good care of me Prue, if you are reading this, just know that you will be missed ;-)
0 Comments
Leave a Reply. |
About MeCookie Artist & Content Creator, who loves spreading the cookie love. Archives
February 2020
Categories
All
|
Our Blog
|
Blogs i love
|
|






 RSS Feed