|
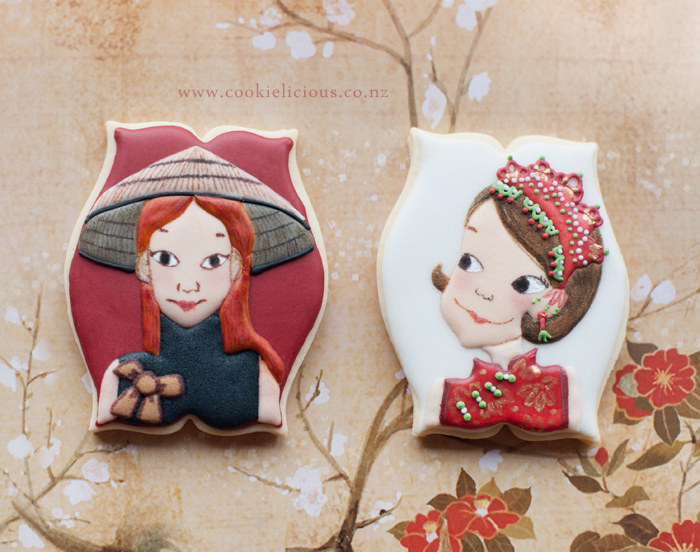
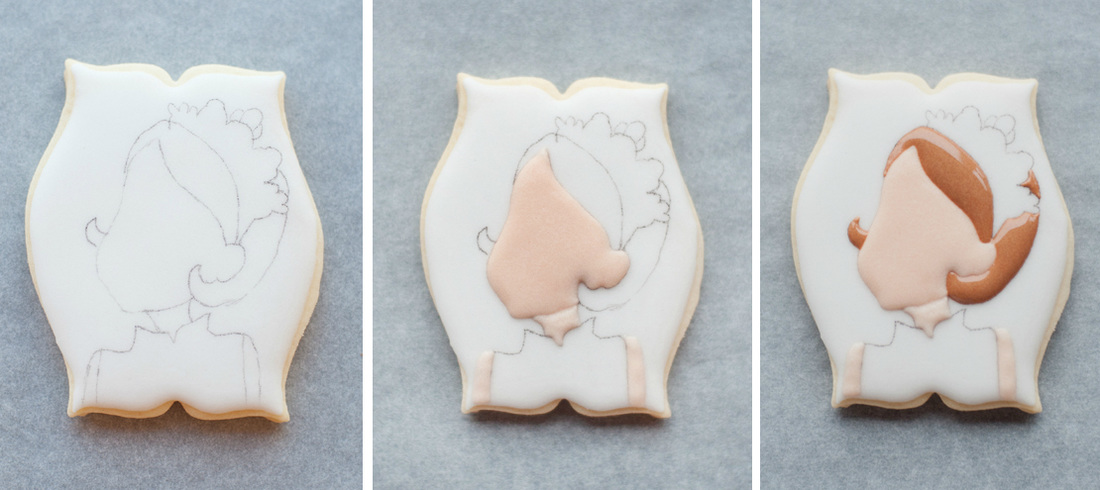
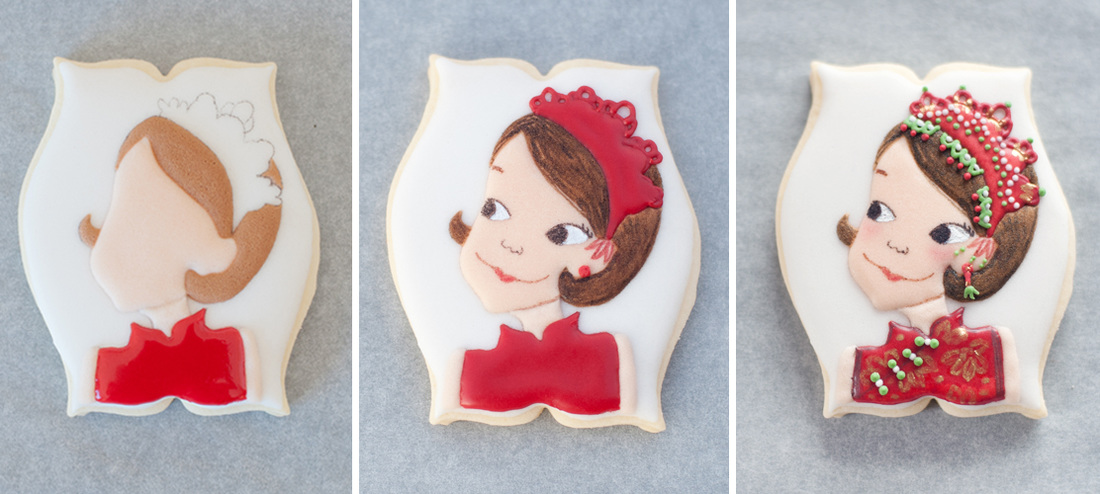
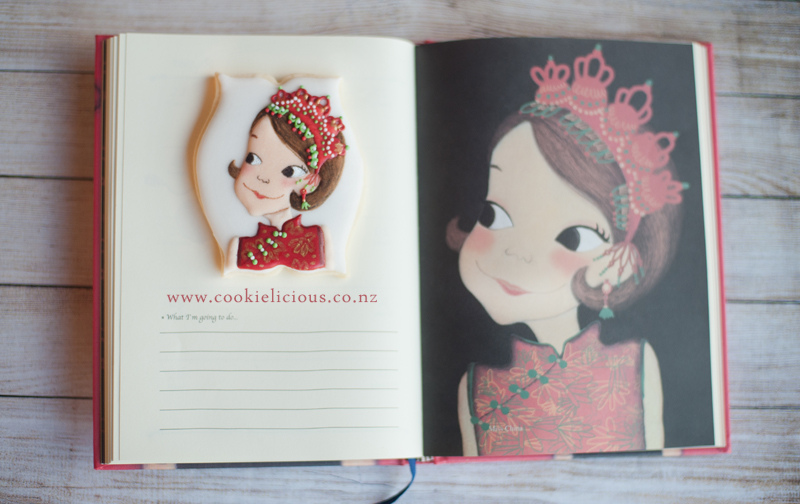
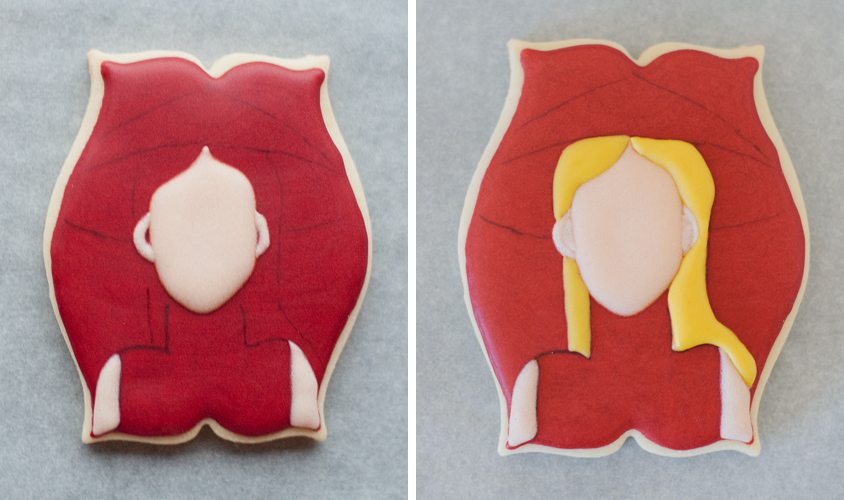
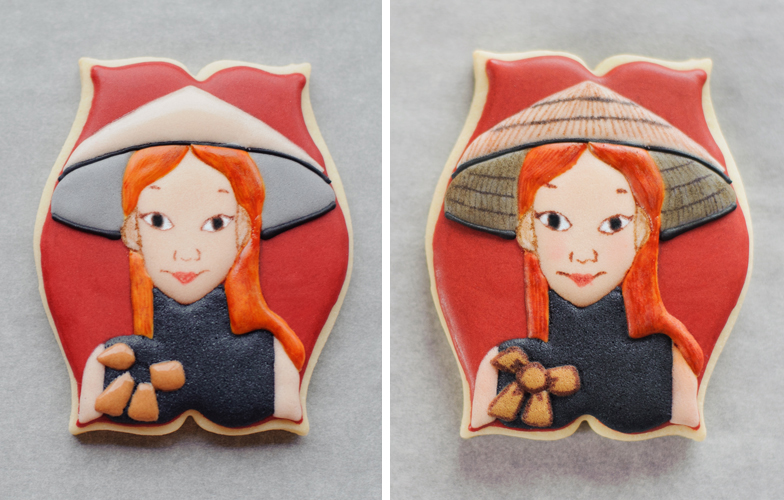
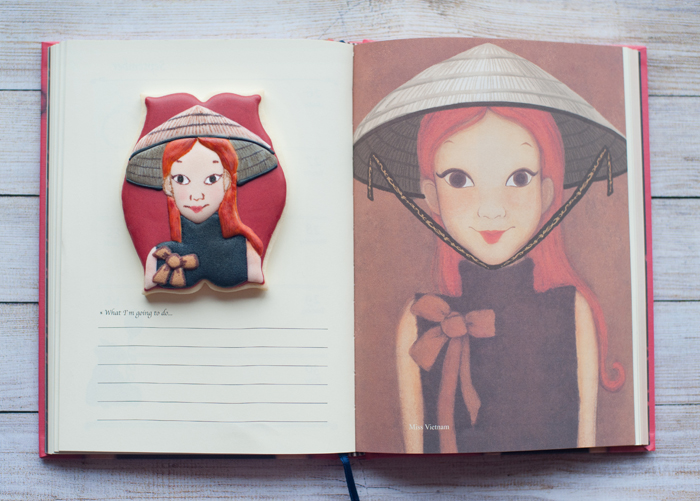
I suspect that these might be different from the Princess Diary you were thinking about...let me explain... One of my amazing friend sent a gorgeous diary for Claudia, all the way from Korea... thank you Aunty Danbee ;-) This diary has gorgeous pictures of princesses from all over the world. I was told that they are originally paintings from a known Artist in Korea. So when I saw the princesses i immediately thought "wow they are beautiful, i wonder if we can turn them into a cookie?" Okay so maybe not many of you will think that, but as a cookier my mind works differently lol :P So we have 2 cookies to play with and from the diary I personally like Miss China & Miss Vietnam, so we decided to try and make those two princesses from the book :) So lets look at Miss China first. Btw, this is the first time we are trying out hand painting a cookie, eventho its only partially hand painted it was a learning curve for us. It was fun but tricky at the same time :) Here is the progress photo of what we did to create Miss China :) Start with outlining the shape of the princess in the cookie. Then we start with her face, give it a few minutes to dry a bit and then add the neck and arms. After the skin colour icing are dry add the hair with brown icing. When her face and neck are dry start adding in the red top and her headband. Then mark off the face area with her eyes, nose, lips and with a thin brush use brown gel colouring and add some strokes into her hair to give definitions of hair strands. Lastly add all the details into her headband, add the earrings and the pattern into her red top. So this is what Miss China looks like in the diary and the finished cookie on the left :) So next is Miss Vietnam. Similar to the steps above, starts with her face and arms, then add the hair with yellow or orange icing. We don't have any orange icing so we used yellow icing as a base colour (just note down that we are going to paint it with dark orange gel colour and add strands of brown-ish colours to give definition to her hair). Next add her black top and her straw hat - see picture below for more details, and when the black icing for her black top is dry add brown bows on the left side as pictured. When the icing for her hat is dry, use a fine tip edible marker to put more details into her hat, and finish off the brown bow on her top as well. So we decided to leave out the strap from hat, coz we thought that if we make a mistake with it the princess might look like she is being strangled with a black strap LOL :P So this is what Miss Vietnam looks like in the diary and the finished cookie on the left :) So there you go, all in all hand painting a cookie is not so bad...its a lot of fun but of course a lot more work is involved and i think these kind of stuff we enjoy doing for fun and just for the challenge of making cookie as art, but definitely not something that we want to make as an order for a client :P
Anyway, it was a great fun as our first try at hand painting a cookie, I can see that this is more of a Claudia's thing as she loves painting and doing these kind of free-hand stuff. I will just leave the artistic part to my little lady and I'll just stick to decorating with icing lol ;-)
0 Comments
Leave a Reply. |
About MeCookie Artist & Content Creator, who loves spreading the cookie love. Archives
February 2020
Categories
All
|
Our Blog
|
Blogs i love
|
|



 RSS Feed